Enov8 BBOT User Guide
Platform Overview
Enov8 BBOT introduces a no-code solution for monitoring the health of environments, specifically designed to streamline IT projects. BBOT's visual interface enables non-developers to effortlessly create, manage, and expand health monitoring across their IT and test environments and platforms.
Key Features:
-
"Top Down" it Evaluates health from the standpoint of users - *IT projects, developers, and the testers.
-
No-code, visual approach suitable for non-developers.
-
Requires minimal build or maintenance for agile teams.
-
Agnostic to Target Platforms Architecture or Languages.
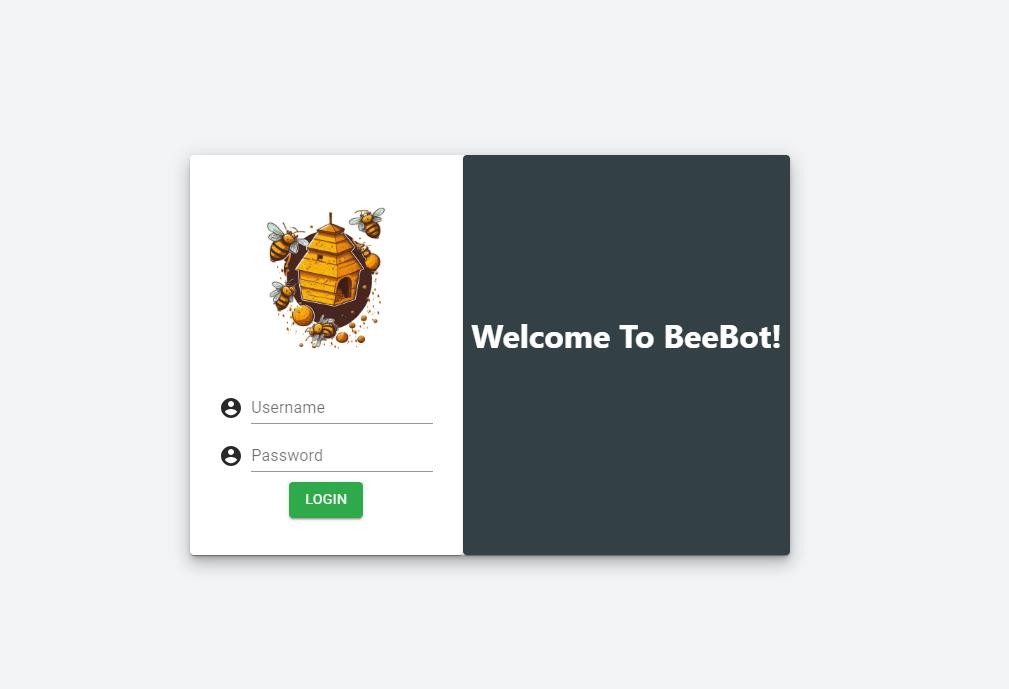
Login
Each user will be provided with a username and password to log into the solution.
Contact the System Administrator in your organisation for access or contact support@enov8.com if
you're unsure of who your System Administrator is.
Menu
A logged in user will be directed to the dashboard, where the user can see the menu at the left-hand side of their screen.
Navigation includes:
-
Bees - view, add, or delete bees.
-
Global Logs - view logs regarding the operations within the BBOT tool.
-
Options - allows the ability to change global setting to suit User's automation test.
-
Logout - allows user to log out of their session**.**
Menu remains in opened state unless users choose to close the menu to enlarge the main content.
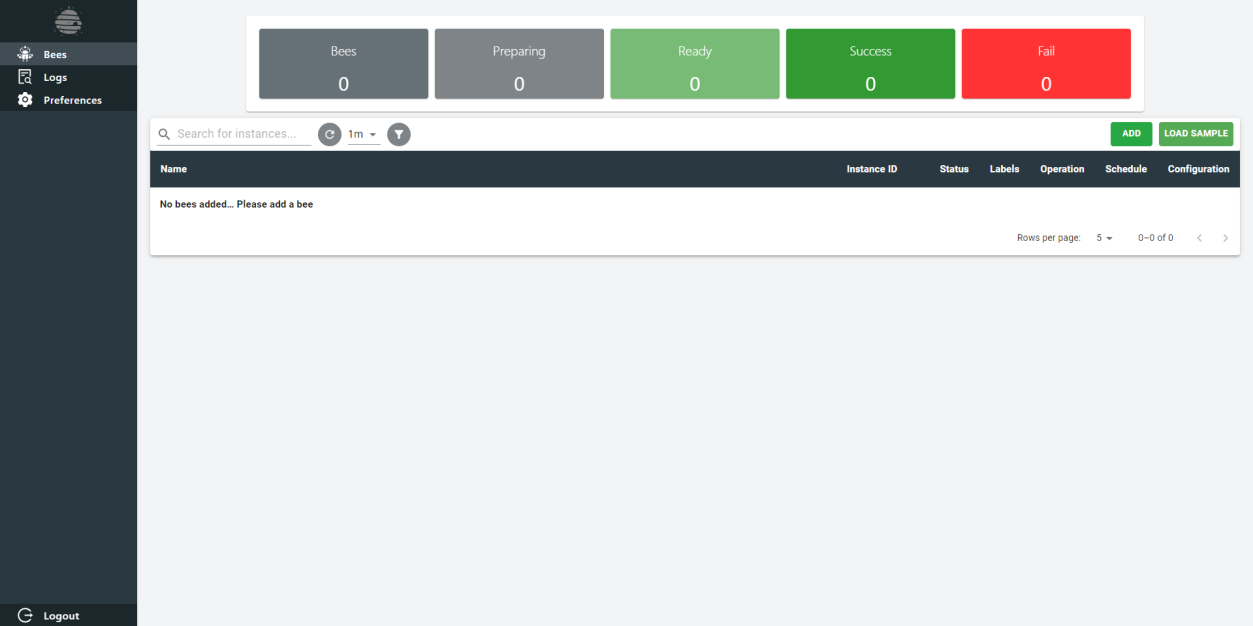
Dashboard
On login, users are redirected to dashboard where they can see the menu and main frame which holds the bees.
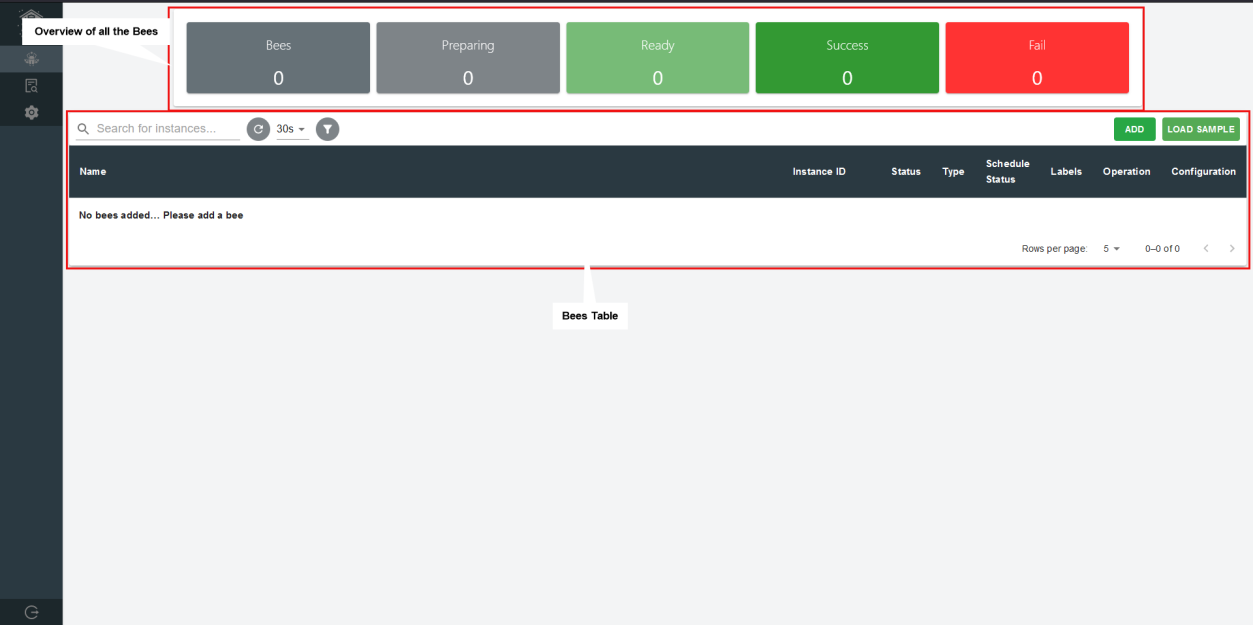
Bees
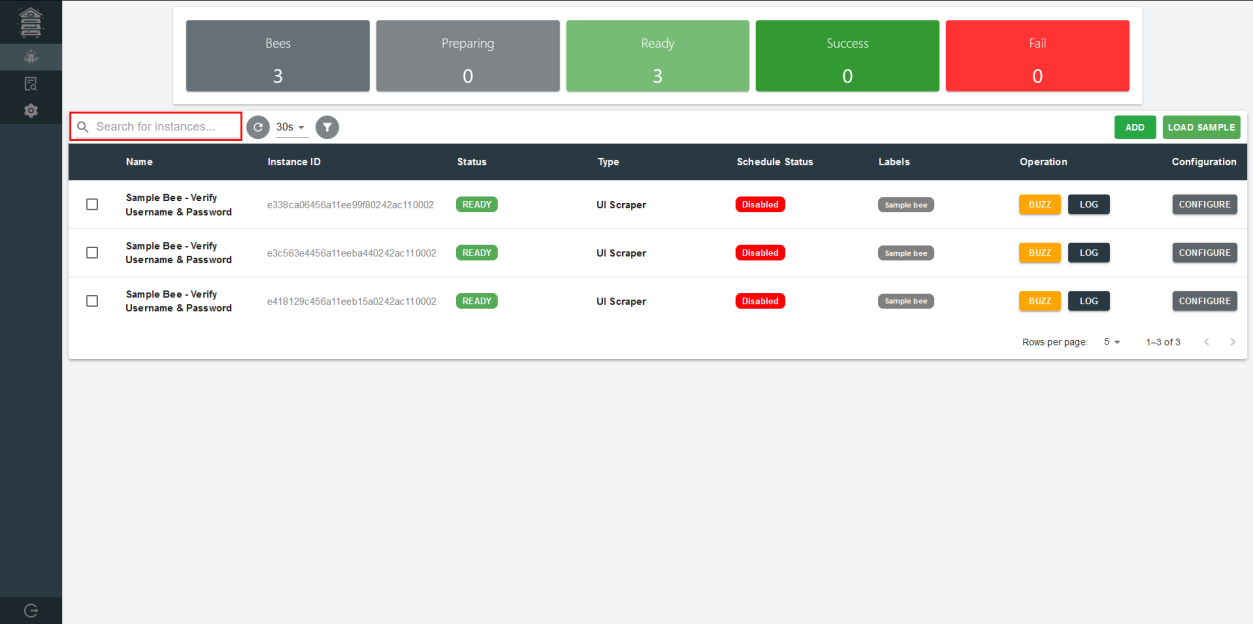
Gain instant visibility and control over your bees. Our intuitive interface displays a concise overview, showcasing the total number of bees and their specific statuses at the top of the frame. Stay informed and effortlessly manage your bee instances.
Effortlessly manage your bee instances with our intuitive header functionalities. Seamlessly search, select, add, and filter within the instances table, all within a single, user-friendly interface.
Streamline your workflow and maximize efficiency in managing your bees.
- Add Bot Form
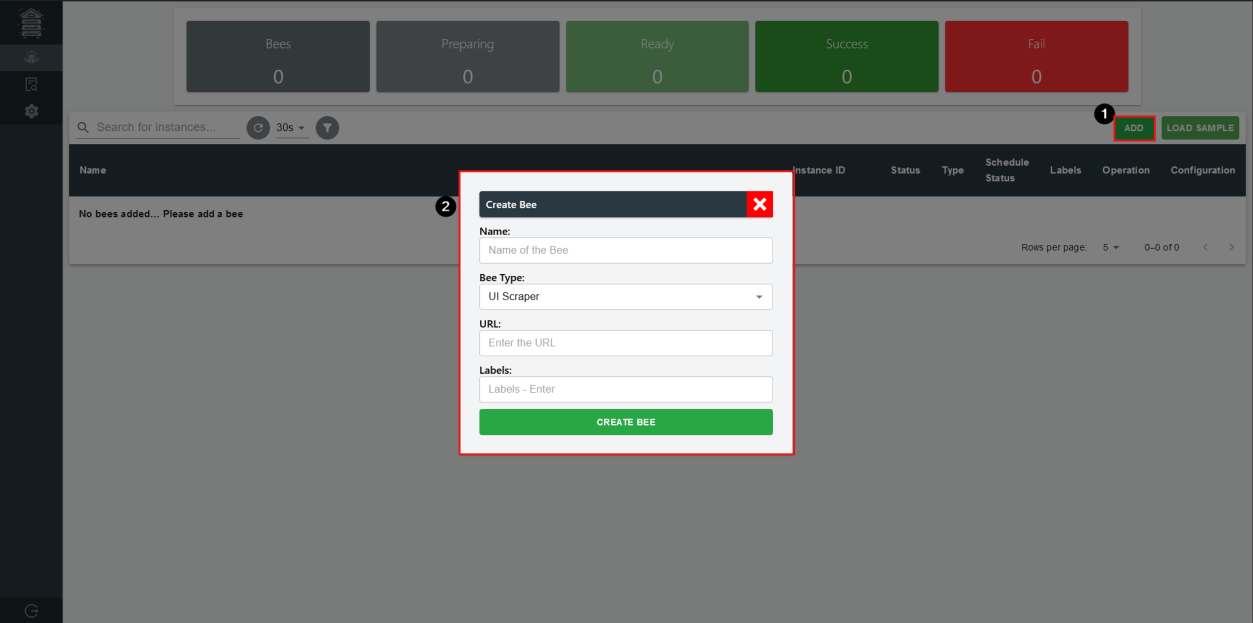
To enable the creation of a bee, users can utilize the functionality of the system by selecting the "ADD" button positioned at the top of the table. By inputting the relevant information such as the bee's name, type and optionally assigning labels, users can successfully generate a new bee within the system.
Furthermore, users are provided with an additional convenience feature. By clicking on the "LOAD SAMPLE" button located adjacent to the "ADD" button, they can swiftly create a fully configured bee. This option significantly simplifies the process of creating a bee from scratch by instantly populating all necessary settings.
- Search for Bees
Users can search for a bee with their name, instance id or status.
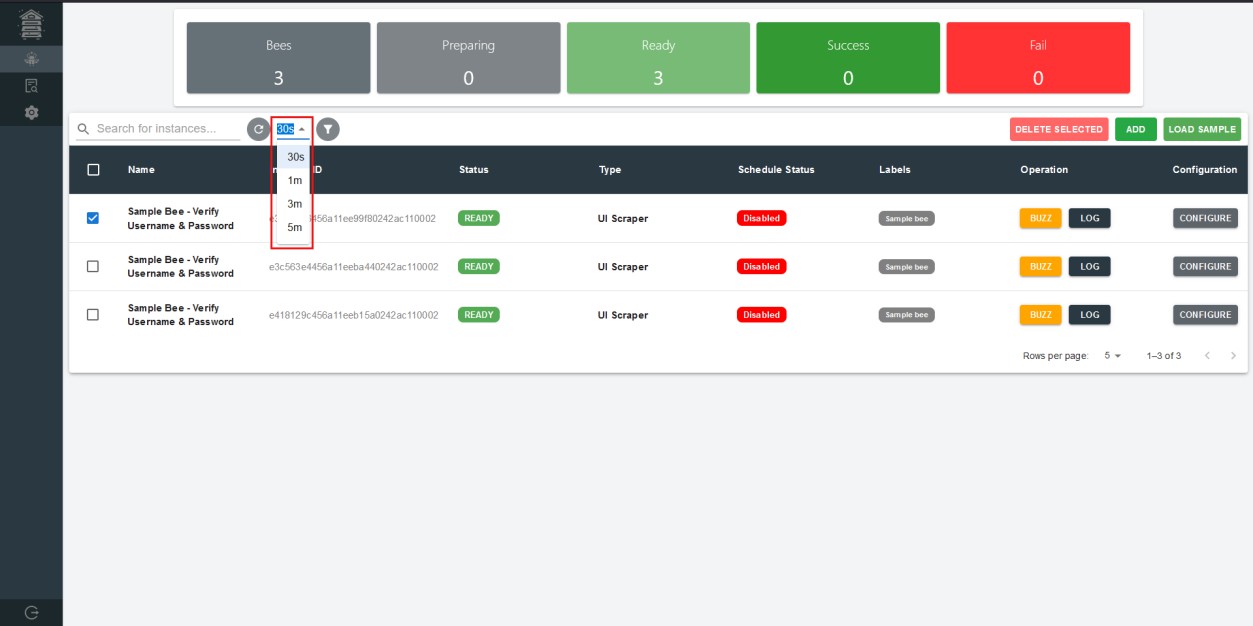
- Select Bees
Users can multi-select bees and remove them if and when needed.

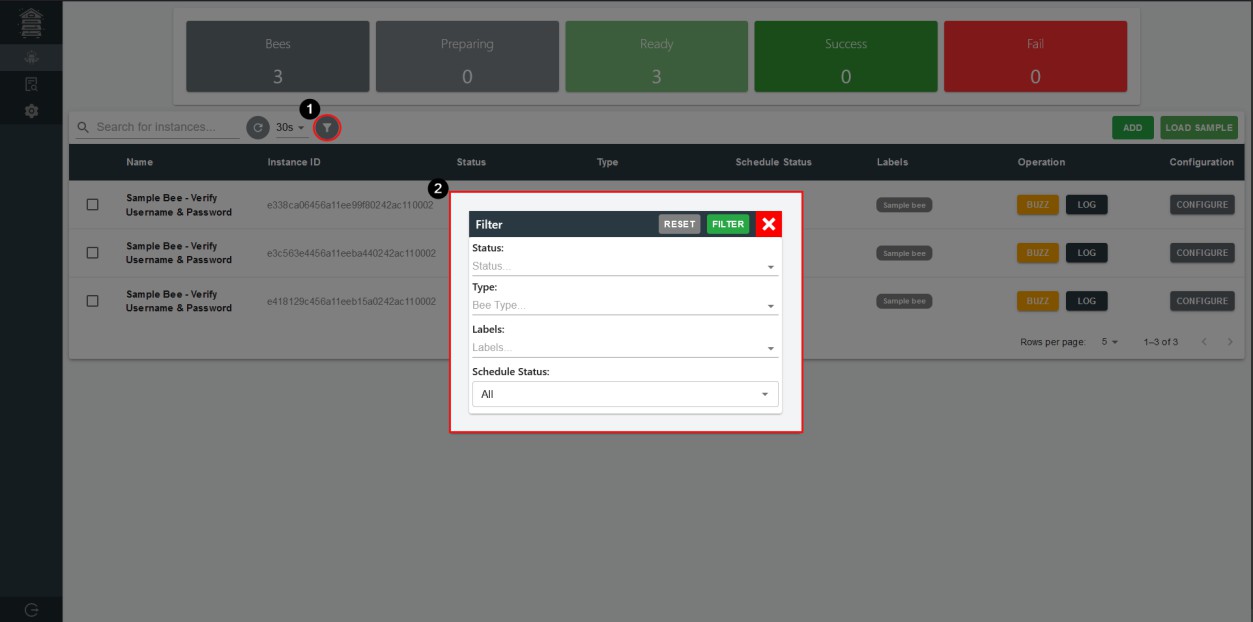
- Filter
Users can filter the bees with their status, bot type, labels, and schedule status.
Auto Refresh
By default, the bee table will refresh every 1 minute, but users can configure it with the following options.
Operations
Users can buzz, quick view log, enable and configure bees.

Bot Configure
To configure a bee instance that users have created, they can simply click on the "Configure" button located within the operations section depicted above. The configuration interface presents users with six distinct sections, namely Info, Tasks, Schedule, Output, Logs, and Integration, each serving a specific purpose. On configuration, users will be directed into info page.
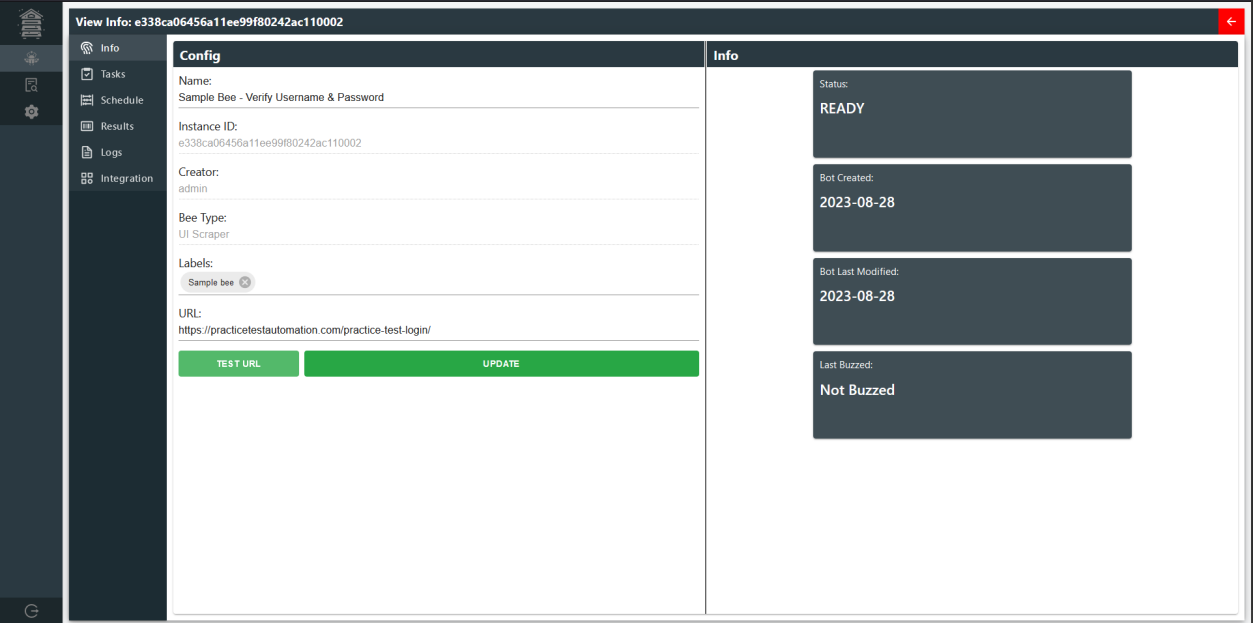
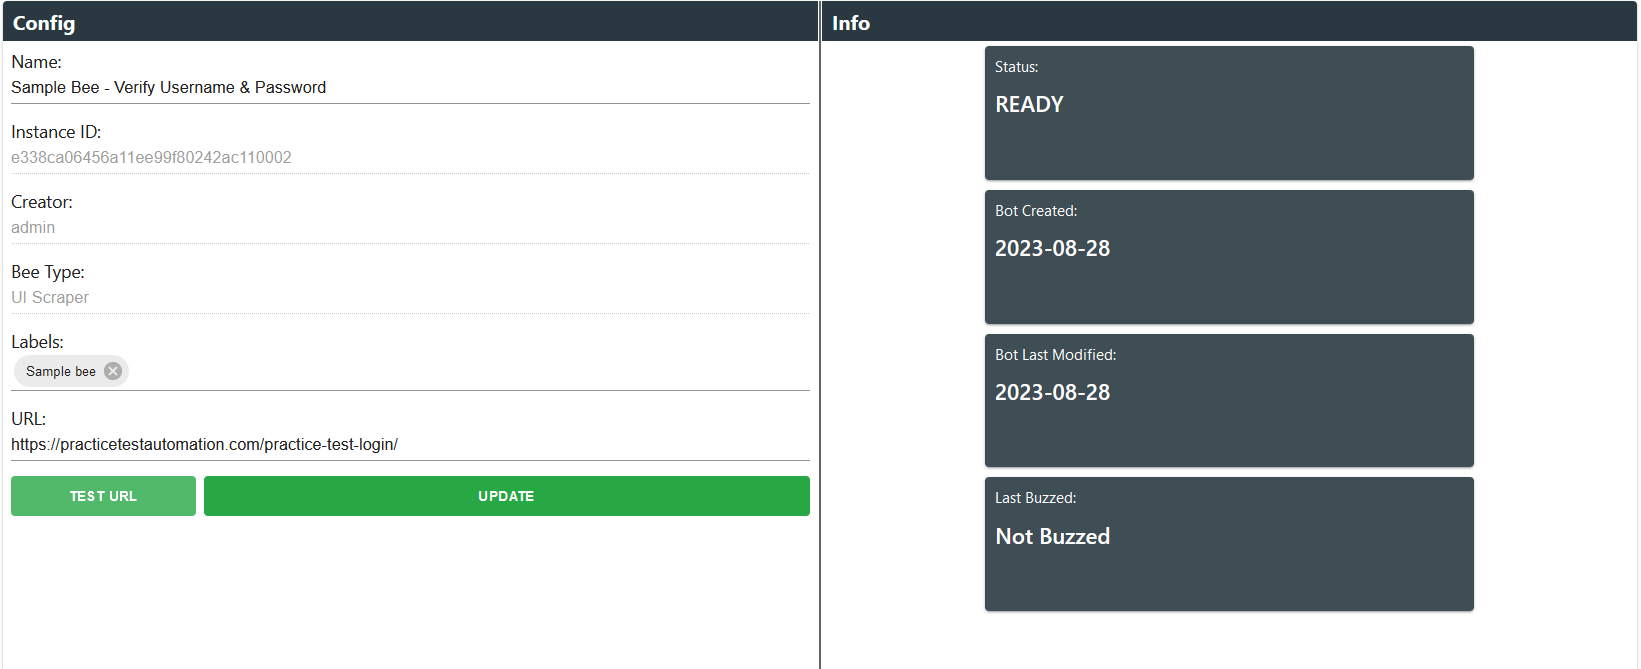 Info
Info
The Information page provides users with a comprehensive overview of the bee instance, including its current status, creation date, modification date, and the most recent buzz activity. Users can conveniently configure various properties of the bee on this page. Additionally, there is a functionality to validate the URL's validity before updating the bee's properties, allowing users to ensure the accuracy and integrity of the URL (only for UI Scrape).
Note: the page will not have URL for API Test type bees.
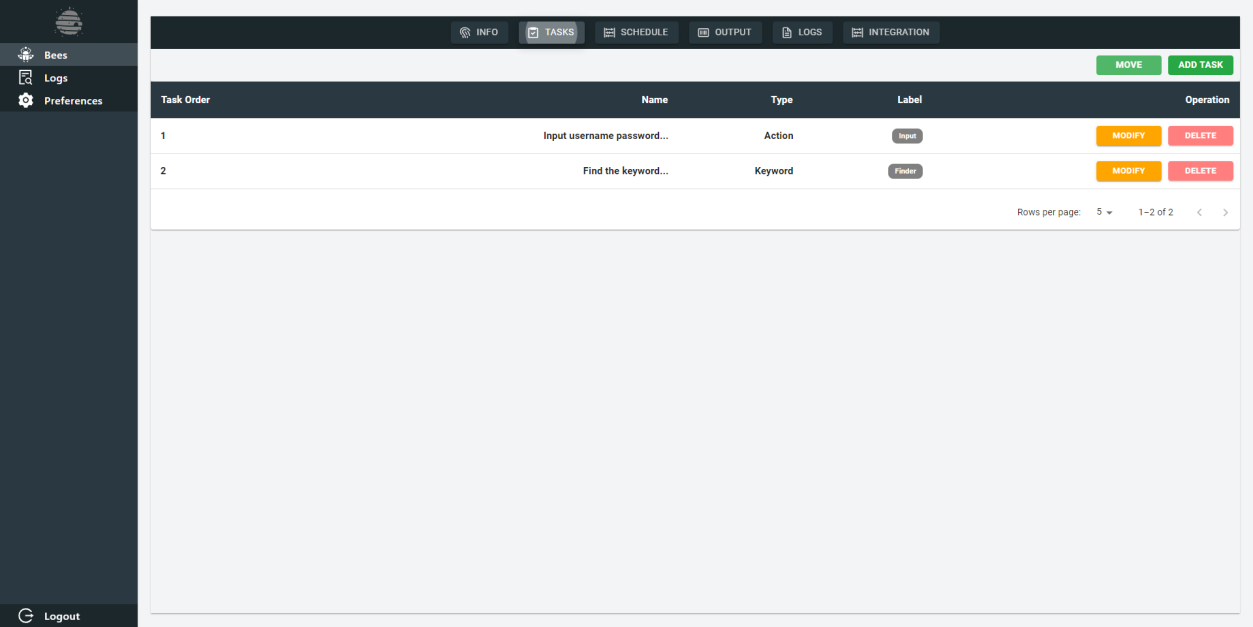
Tasks
Within the tasks page, users are granted the capability to meticulously configure the sequential steps that the bee instance will undertake to successfully locate the specified keyword, which in this case is "health check." This entails defining the precise actions, procedures, and algorithms that the bee will employ during its execution to fulfill the objective of identifying the required keyword within the designated context.
UI Scrape Bee
UI Scrape Essentials specializes in extracting HTML content and conducting in-depth analyses to identify both fundamental and advanced keyword search patterns.
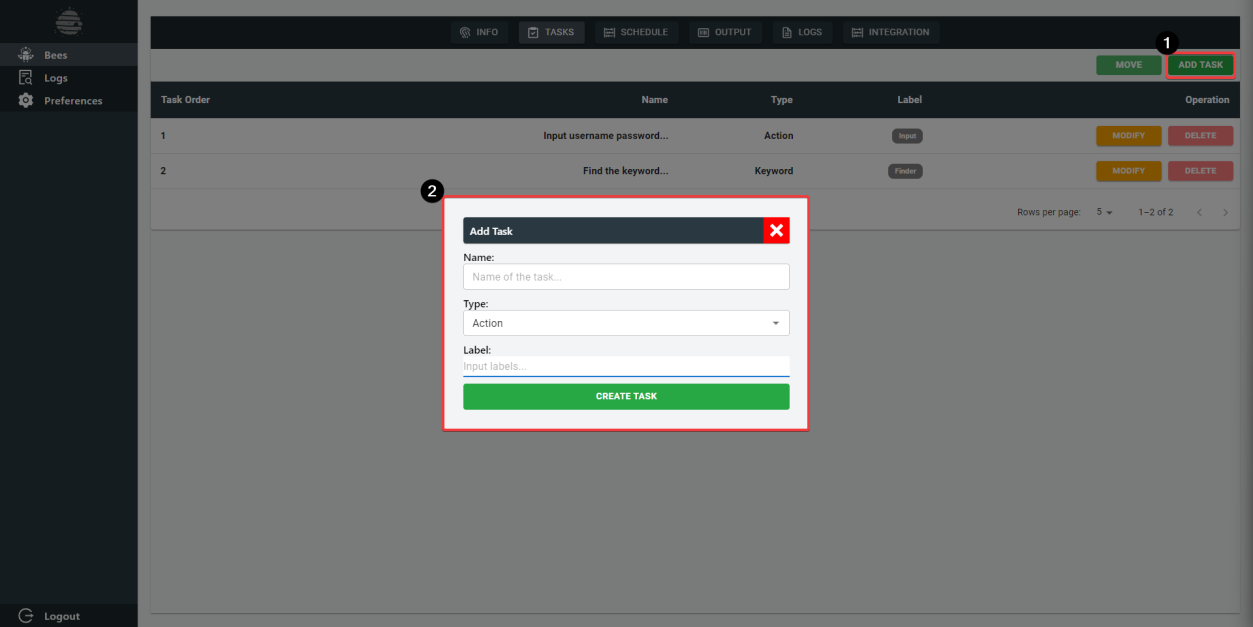
UI Scrape Bee: Task Creation
To create a task, users can click on "ADD TASK" button on the top right, and be prompted to input
name, type of action and label.
Note: these values can be changed at any time.
After creating a task, you can modify the task steps by clicking on the "MODIFY" button.

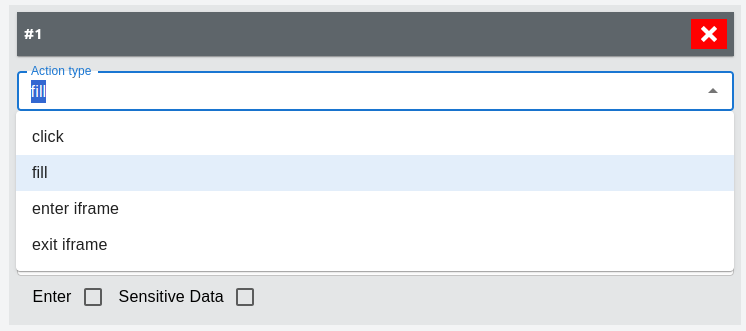
UI Scrape Bee: Task Setup
In the task edit/modify section, users can select between two different types of tasks:

- Task Type: Action
Within this type of task, users can create action that can enable selenium tool to fill and click on specific HTML elements. User can also enter an iFrame or exit an iFrame
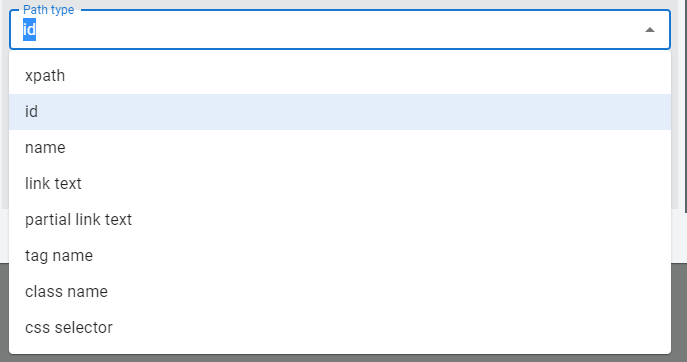
For fill -- input action:
Users can select the path type and path to give the BBIT tool to input a text field. Supported Path Types:
When dealing with sensitive data, users can opt to sensitive data where the data will be stored in a hashed format.
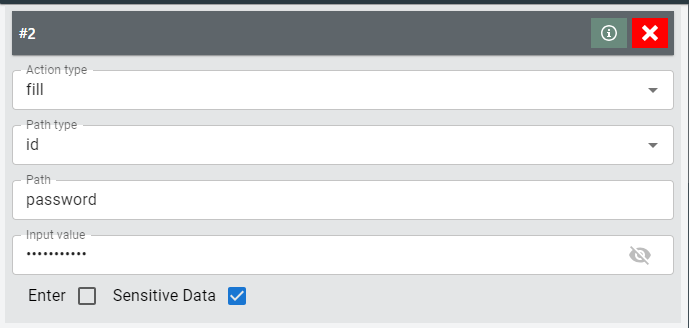
Additionally, users can decide to "ENTER" -- to submit the form to allow for quick keyword find.
For Click -- input action:

Like the fill action type, a click action type requires the path type and path value for BBOT to click on the specified HTML element.
For Enter iFrame -- action:
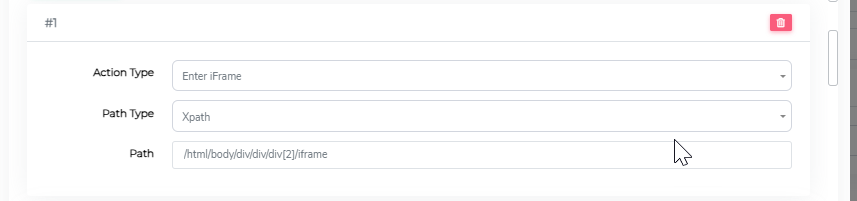
Similar to the above types, enter iFrame type allows BBOT to enter an iFrame and proceed with the operations.
For Exit iFame -- action:

Exit IFrame type immediately returns the BBOT back to parent html.
- Task Type: Keyword
For basic keyword setup:
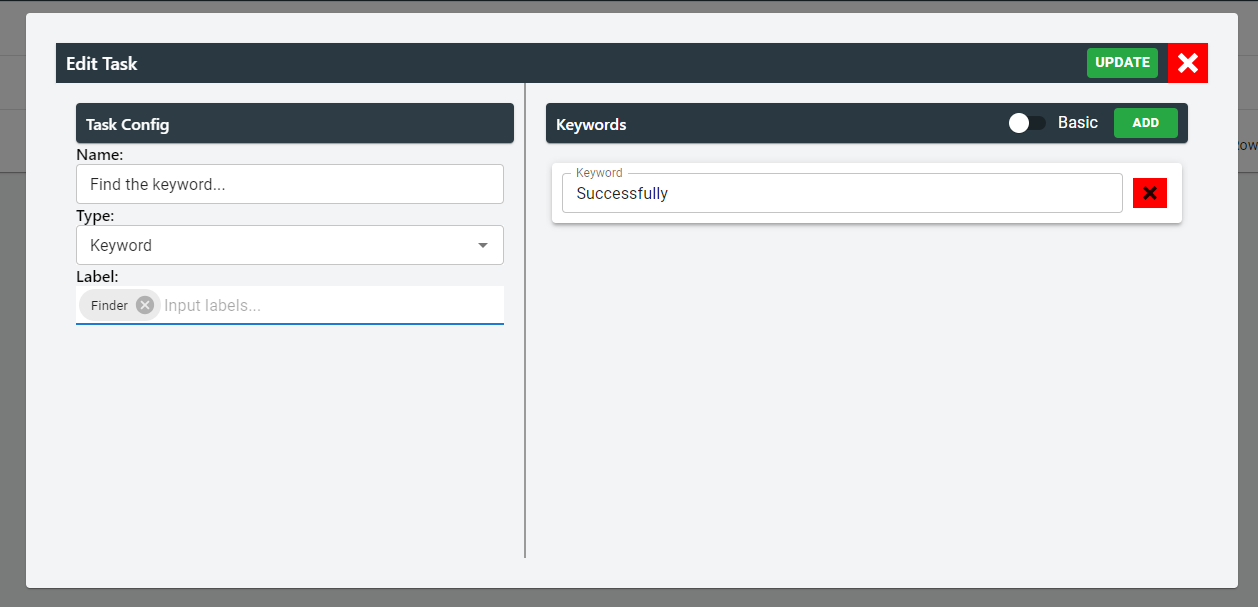

Users can define the keywords to find by simply clicking the add button and add as many keywords as needed.
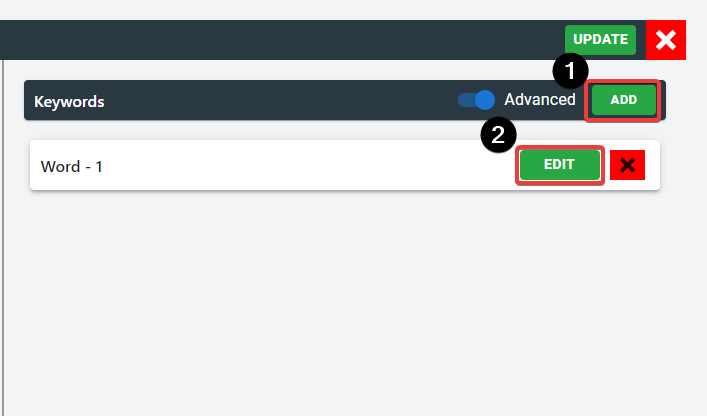
For advanced keyword setup:
Advanced keyword setup offers a deep search capability to HTML contents. Simple click on "ADD" button and click on "EDIT" button to configure the advanced keywords. Like basic, users can create as many keywords as needed.
Then a prompt will open up requesting users to input various components of the HTML content to find the exact word.
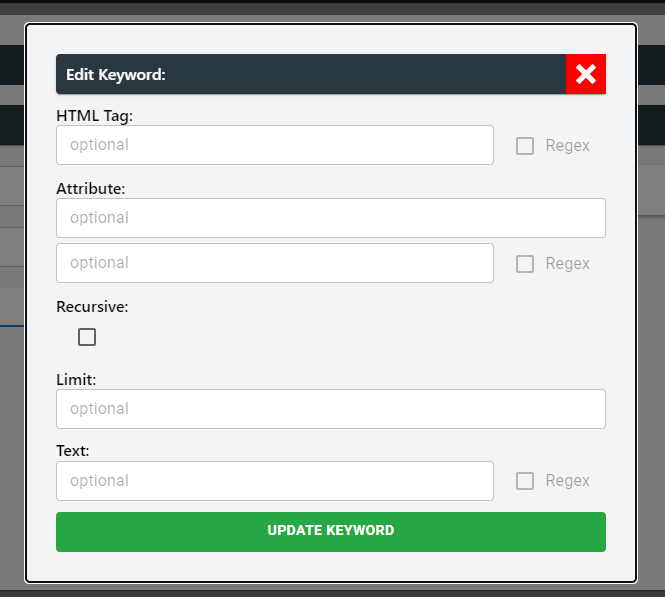
The properties are:
| Property | Description |
|---|---|
| HTML Tag | An HTML tag is a set of characters used to define the structure and formatting of elements within an HTML document, such as <p> for paragraphs or <img> for images. |
| Attribute | An attribute in HTML provides additional information or modifies the behavior of HTML elements. For example, the href attribute in an <a> tag specifies the URL of the hyperlink. |
| Recursive | In the context of HTML, recursive refers to the ability of an HTML element to contain other elements of the same type within itself. For instance, an <ul> (unordered list) element can have multiple <li> (list item) elements nested inside it. |
| Limit | The term "limit" in HTML refers to various restrictions or bounds that apply to different aspects. For example, there may be a character limit for the content of an input field or a limit on the number of elements allowed within a certain container. |
| Text | In HTML, text refers to the content or written information within an HTML element. It can include plain text, headings, paragraphs, links, and more, which are all essential components of the textual content displayed on a web page. |
Each properties have regex support to easily identify keywords.
API Test
API Test Suite primarily focuses on evaluating APIs by thoroughly testing their GET, POST, PUT, DELETE, and PATCH functionalities. It meticulously verifies expected keywords, headers, and responses to ensure the integrity and reliability of the API.
To create a task, just click on "ADD TASK" and you will be prompted to create a task. For API Test, there is only one type of task at the moment of writing this. API Request -- handles all types of HTTP requests.
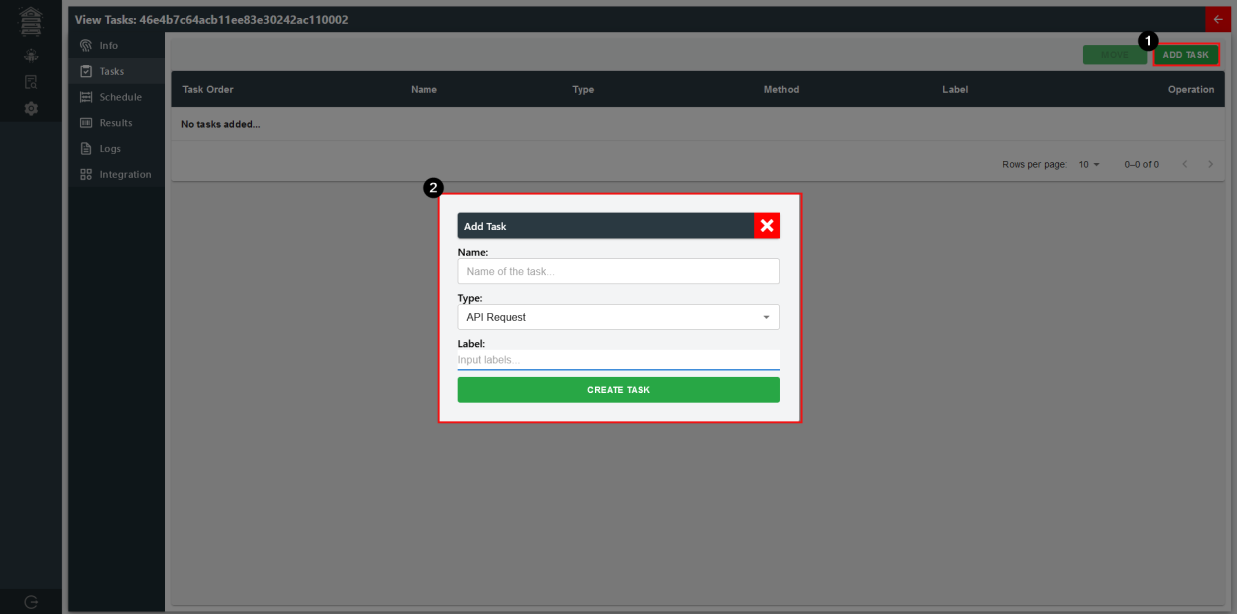 API Test Bee: Task Creation
Then proceed to modify the task by clicking on "MODIFY".

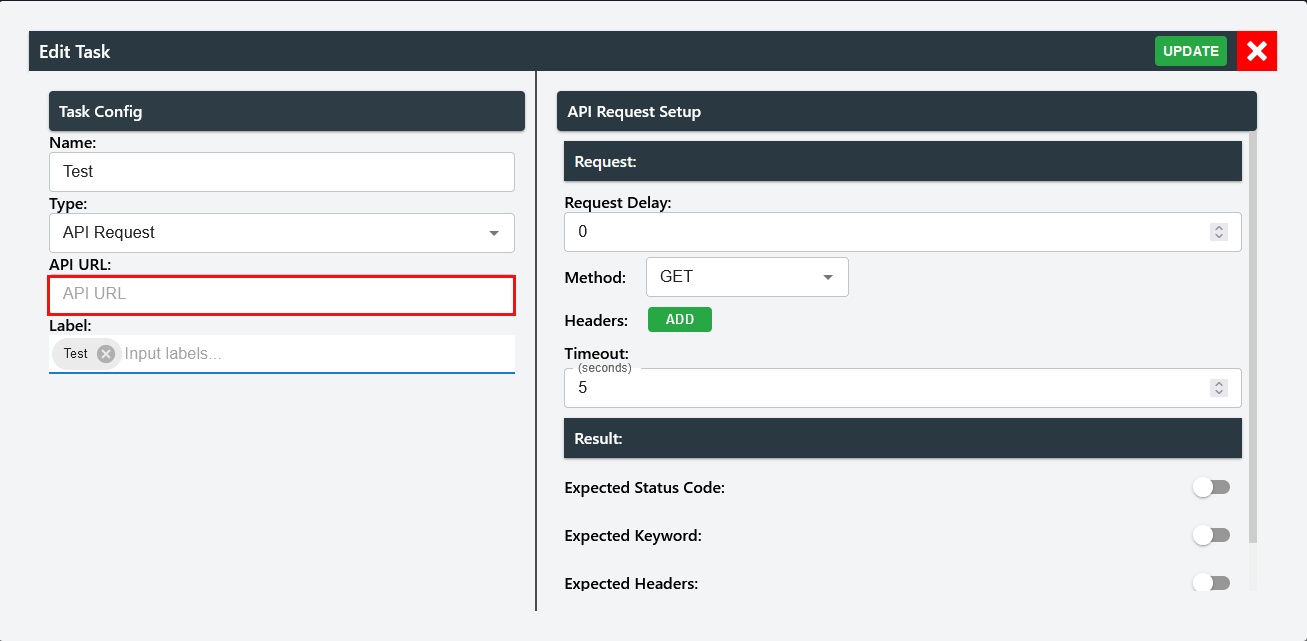
Test Bee: Task Setup
To add your endpoint, you can input in the API URL text field:
Within URL, you can use stored variable with
"**{ storedvariable }**".Here the stored variable can be any variable stored in the prior tasks.Within API Request setup, it is categorised into two section - request and result.
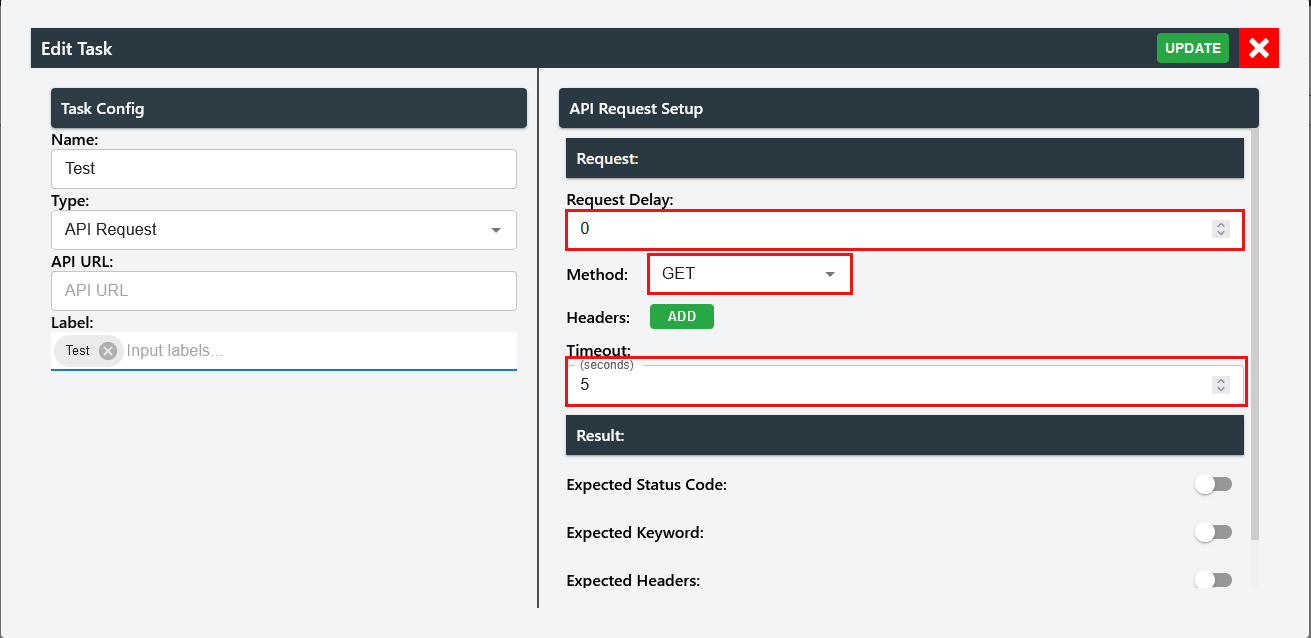
In request:
Request Delay -- A delay to prevent the next task from activating immediately upon this request. Default: 0 seconds.
Method -- GET, POST, PUT, DELETE, PATCH.
Timeout -- To limit the run time of the request. Default: 5 seconds.
Users can add headers by clicking on "ADD" and input a key and value.
Users can also used stored variables from previous requests by ticking the enabling use stored. This will allow users to select a drop-down menu of the available stored variables.

Note: Stored variables must be set in the prior tasks for this to work.
After the header is created, it gets added below the header title. Here you can continue to configure the value of header and/or delete the header.
Note: Users cannot change the key of the header.
For methods (except for "GET"), user have the option to add body to their request.
Simply click "EDIT" and you can add a JSON, XML and Text body to your request.

To use stored variable in body, make sure to input the value in as " storedvariable ". For example, if the token value is stored as "token" when setting up stored variable, then users can use the variable in the following task's body by using " token ".

In request
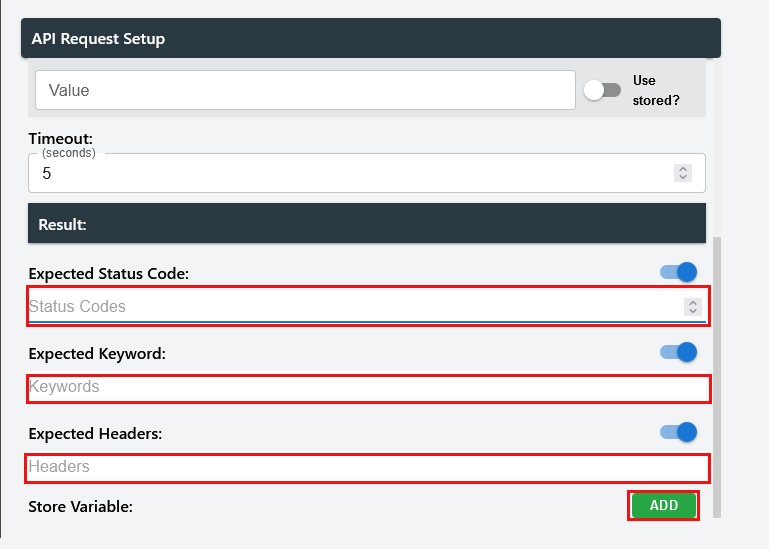
Here you can up expected status codes, expected keywords and expected headers. Each of them supports multiple values. However:
Expected Status Code -- If one of them is present the task will pass.
Expected Keywords & Expected Headers -- expects all the values to be found for the task to be found.
To add a stored variable, users can click on "ADD" and be prompted to create a variable.
Here the key ("Variable Store *") would be the name the variable would be stored at and the value would be of what to save from the response from the request.
For example, if the return looked something like this.
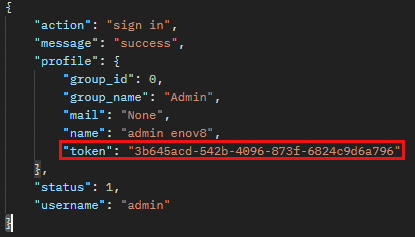
To store token, the value would be profile.token.
Port Scanner
Port Scanner searches through hostname and port list to find out if the ports are open at the scanned time.
To create a task, just click on "ADD TASK" and you will be prompted to create a task. For Port
Scanner, there is only one type of task at the moment of writing this: Port Scan.
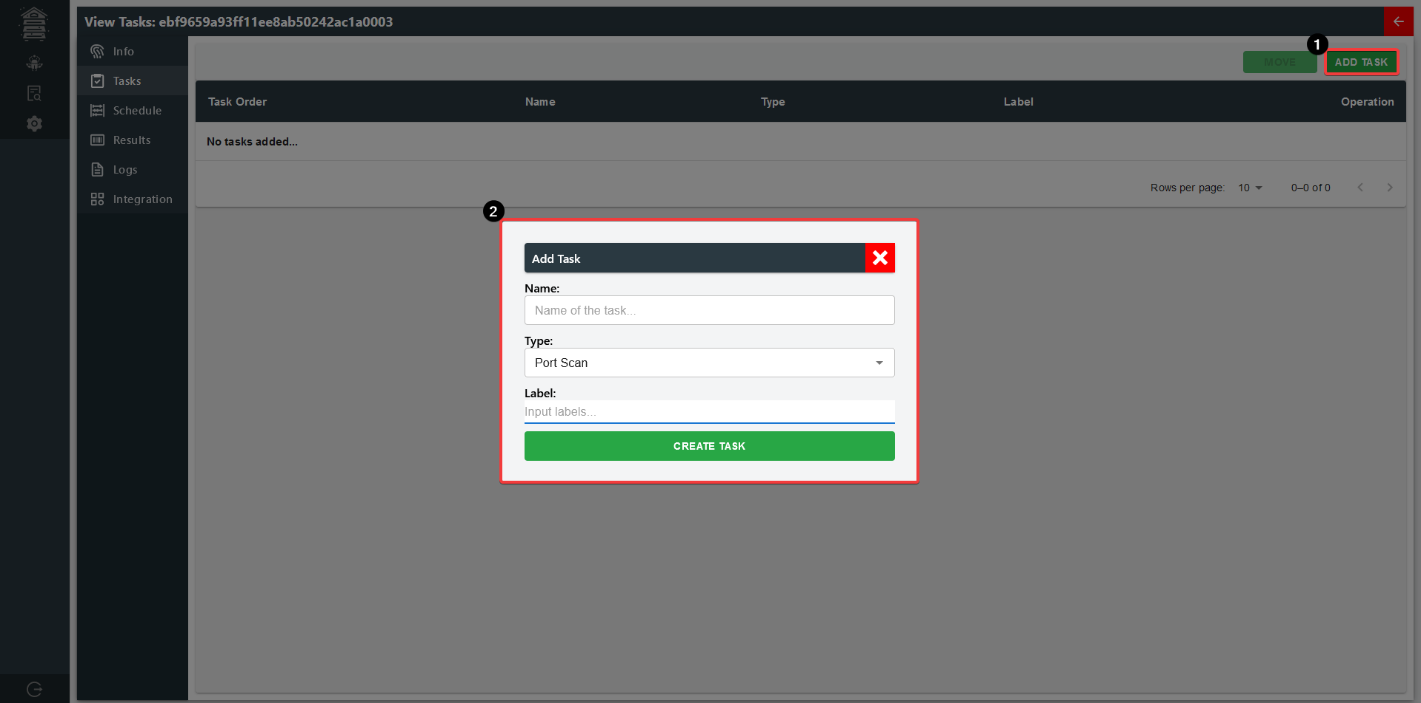 Port Scanner Bee: Task Creation
Then proceed to modify the task by clicking on "MODIFY".

Port Scanner: Task Setup
To setup port scanner, user must specify timeout, hostname and ports. Optionally, they can enable/disable strict mode.
Enabling strict mode will require all the ports in the port scan to be successful for the task to pass.
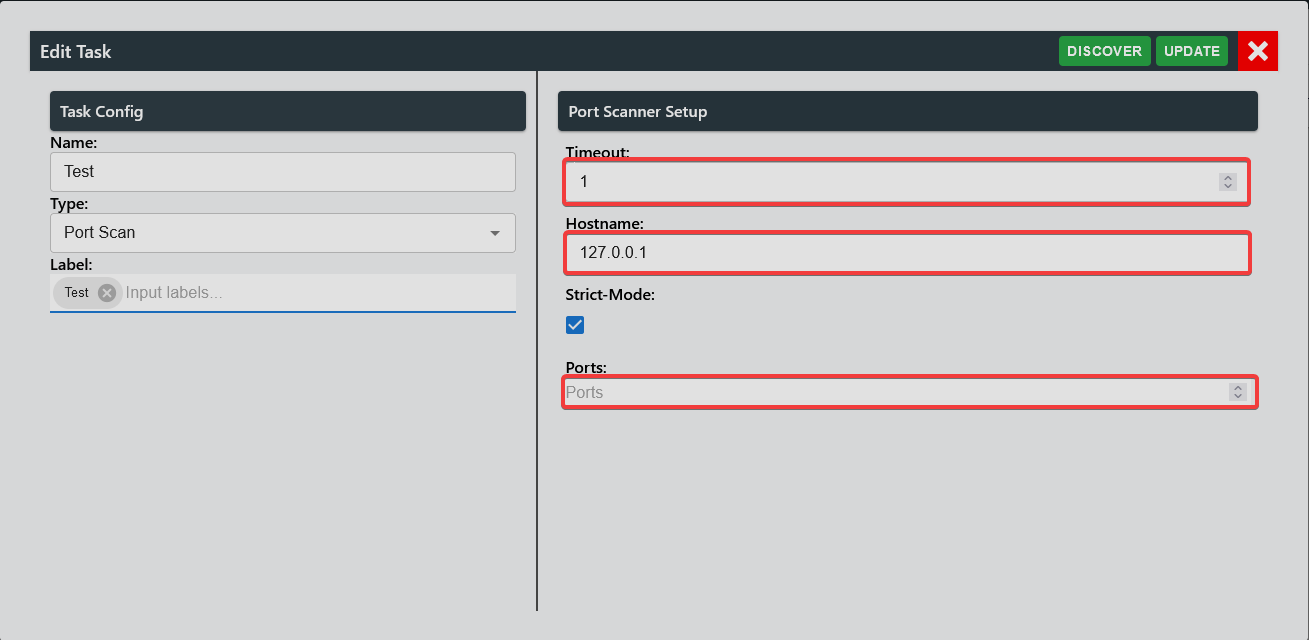
Additionally, user can discover open ports by selecting clicking on" DISCOVER" button.
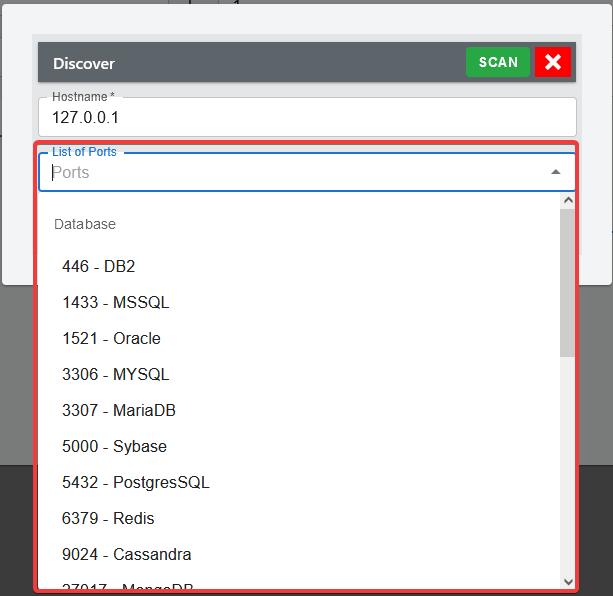
Then user must specify a hostname, followed by selecting common ports for the specific hostname.
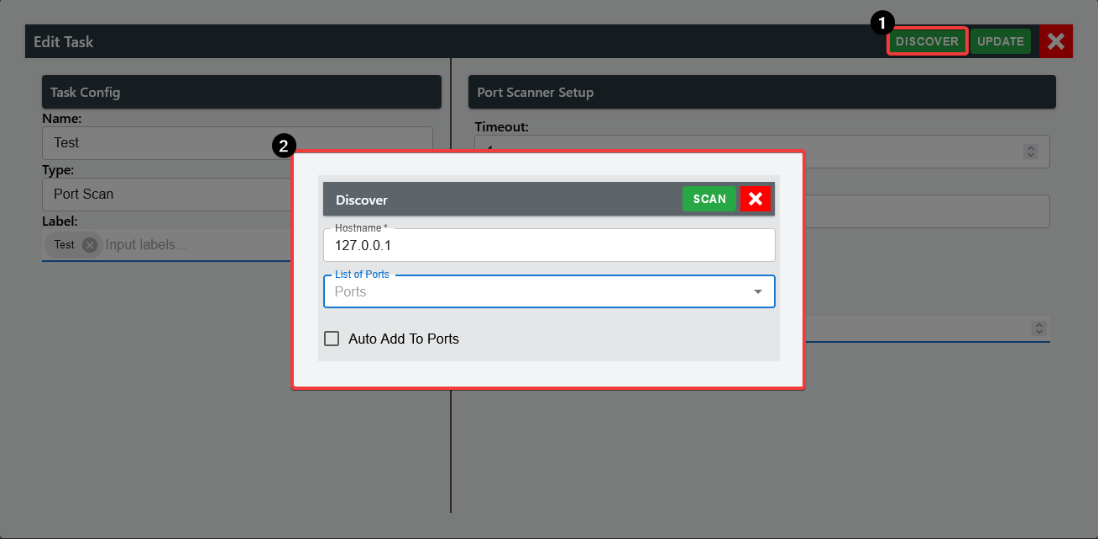

A maximum of five (5) can be selected for quick-scan. Refer to settings page to configure the common port list.
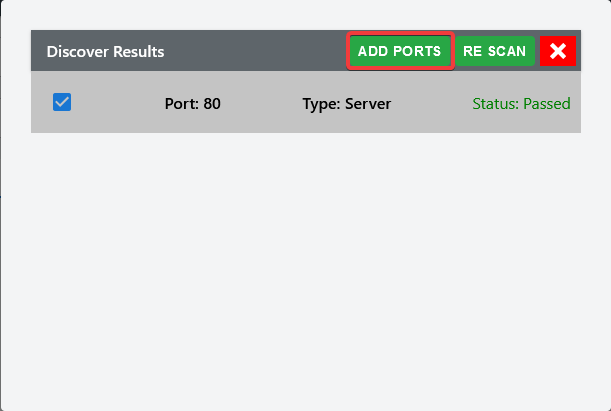
Once the scan is completed and if the port status is open (passed), then you can add those ports to list or rescan.
Schedule
The schedule page allows users to easily configure the timing of the bee's tasks using cron syntax. They can specify the desired intervals, days, months, and weekdays for the bee's execution.
Additionally, the page provides instant translations of the cron expressions into the next few scheduled runs, helping users validate and plan the bee's execution times effectively.
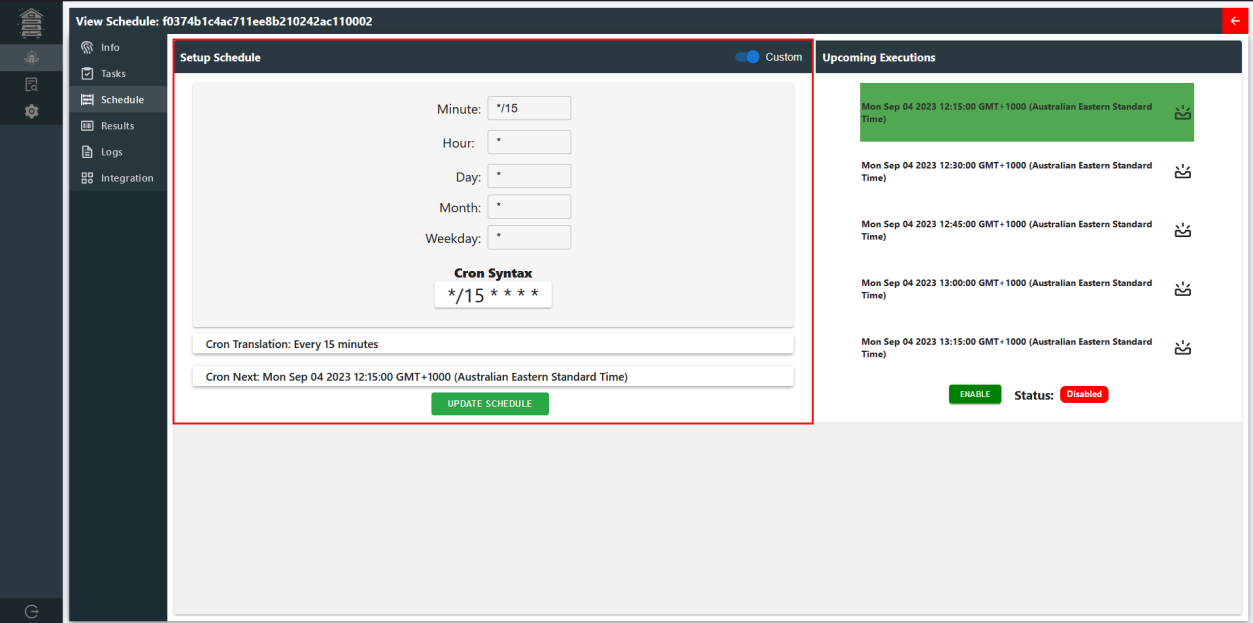
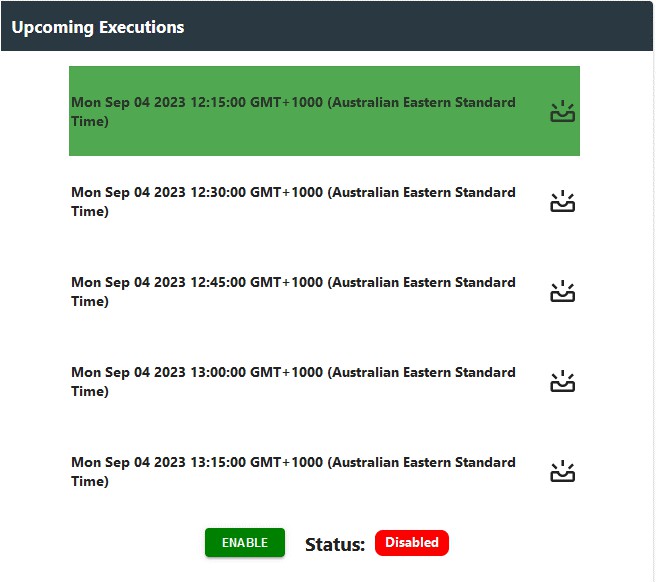
By default, schedule interval is set to every 15 minutes. They can see the next upcoming execution followed by the option to toggle the schedule on/off.
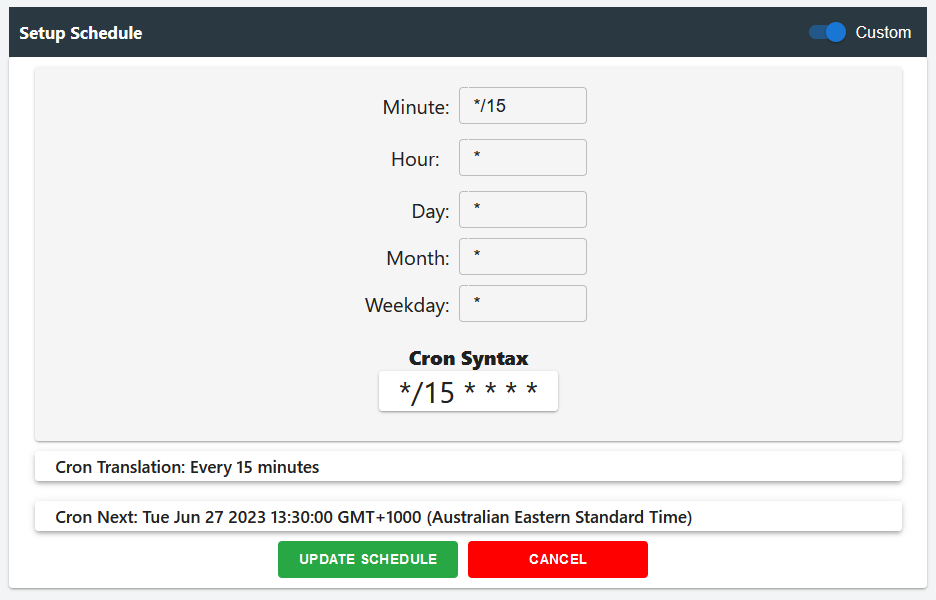 Custom Setup
In the custom setup, users can input their own CRON expressions to configure the scheduling for the bee. They also have the convenience of viewing the CRON translation, which presents the CRON expression in a human-readable format. Additionally, users can instantly see the details of the next scheduled run based on the configured CRON expression. This level of control and visibility allows users to fine-tune the bee's execution schedule according to their specific requirements.
By toggling off the custom, users are taken into basic setup where they can configure basic CRON scheduling.
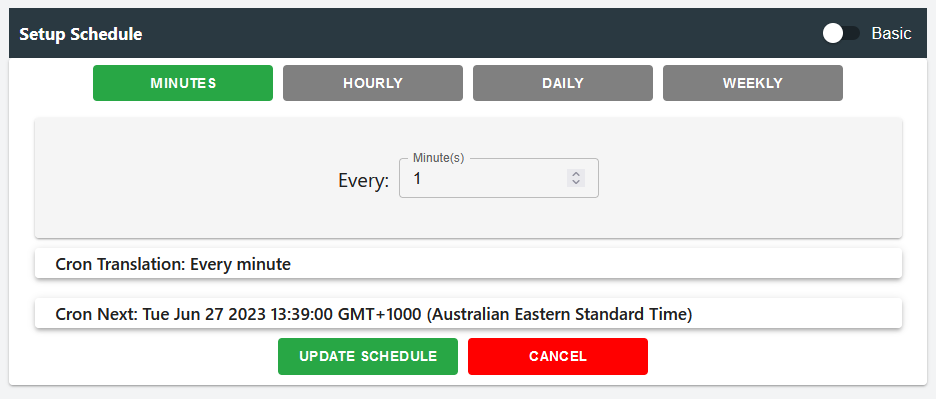
Basic Setup
In the basic setup, users are presented with a user-friendly interface to configure the scheduling for the bee instance. They can easily set up the execution intervals in terms of minutes, hourly, daily, or weekly. Alongside this simplified setup, users are provided with the same benefits of viewing the CRON translation and the details of the next scheduled run. This intuitive interface allows users to conveniently define the bee's execution schedule based on their preferred time intervals, making the scheduling process efficient and accessible.
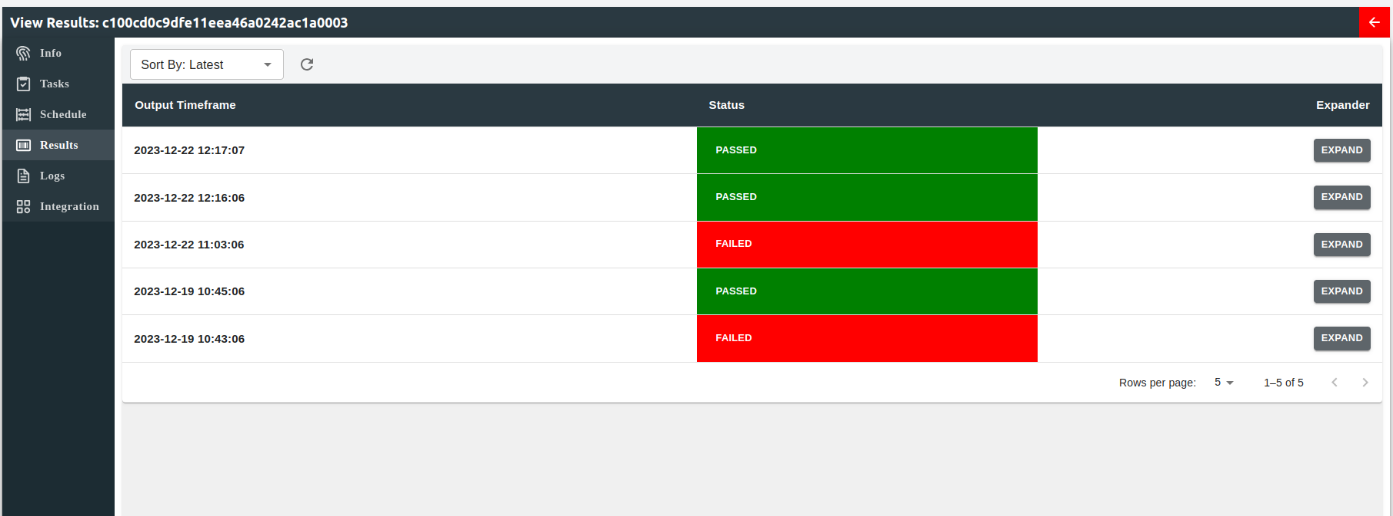 Output
The output page contains all the outputs from the Bee's buzz (run). Each run has their run timeframe and the status of each run. Users can see an advanced view of the output by clicking on "Expand" button on the specific.
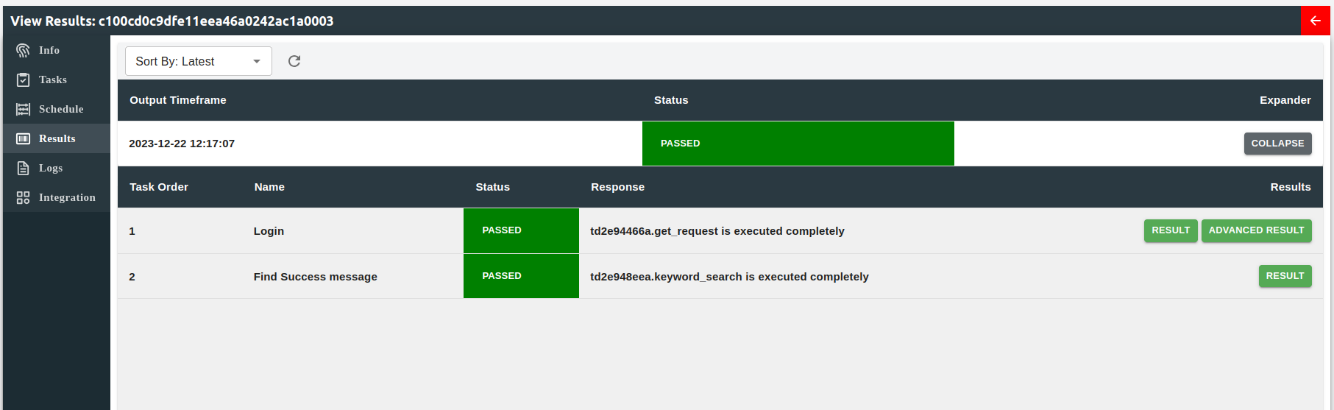
In the advanced view, users are granted the ability to access a comprehensive overview of each task associated with the bee instance, along with their respective statuses. This feature provides users with valuable insights into the progress and completion of individual tasks. Additionally, users can conveniently review the results obtained from each task, enabling them to evaluate the outcomes and take necessary actions based on the task's output. The advanced view empowers users with a high level of visibility and control, facilitating effective monitoring and management of the bee's tasks and their corresponding results.
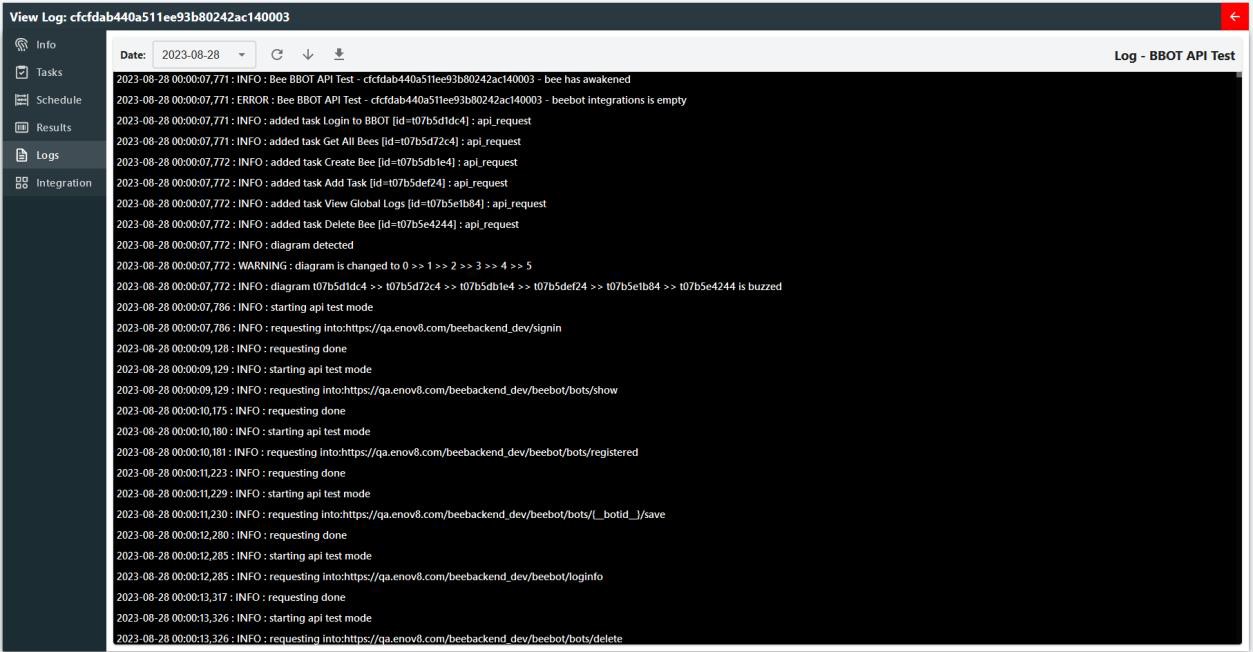
Logs
Each bee will contain their own sets of logs which includes their run period and results of each action. This can be seen in the logs page.
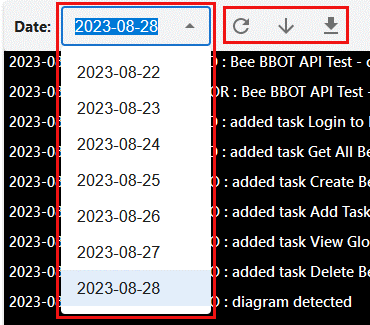
User can select the date, refresh and download the selected log.
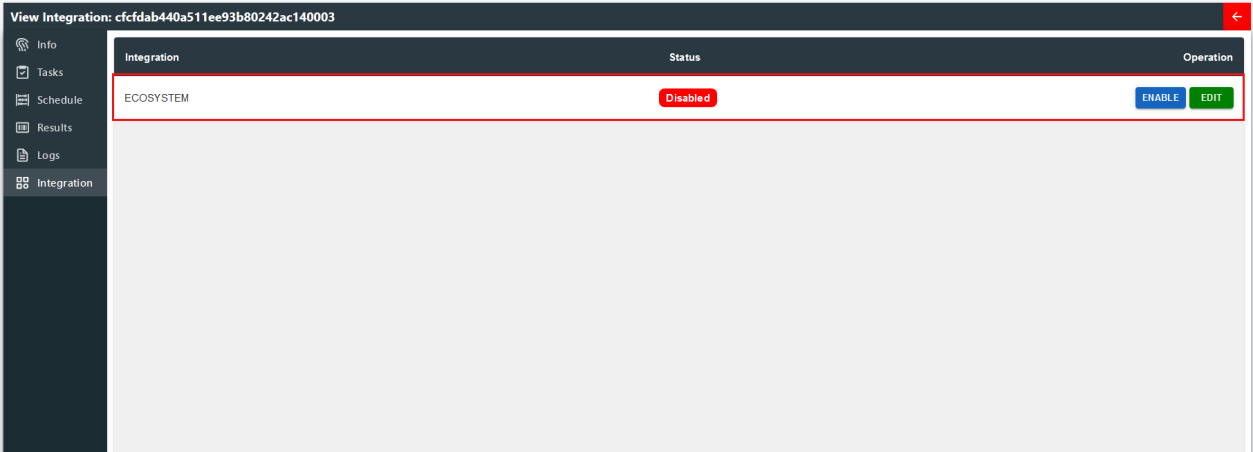
Integration
Note: Refer to 5.5 to setup ecosystem integration prior to this step.
Here you can setup integration to ecosystem. To configure ecosystem integration, click on "EDIT"
and add Environment Instances/System Components by inputting their "System ID".
After adding system id, the system will verify whether the System ID exist in the ecosystem and add it onto integration. It supports multiple system ids.
Then users can enable it to update the components with the status of the bee.

Global Logs
Similar to the individual bee's log records, this encompasses comprehensive global information pertaining to accessed pages, scheduled, and executed bees, as well as other backend server activities.
1
This section also provides easy access to the features found in the 3.5 section. These features include download logs, date selection, and the option to refresh logs.
 Options
Options have five sections to explore:
-
Profile
-
Settings
-
Model
-
Schedules
-
Management
-
Integrations
-
Extensions
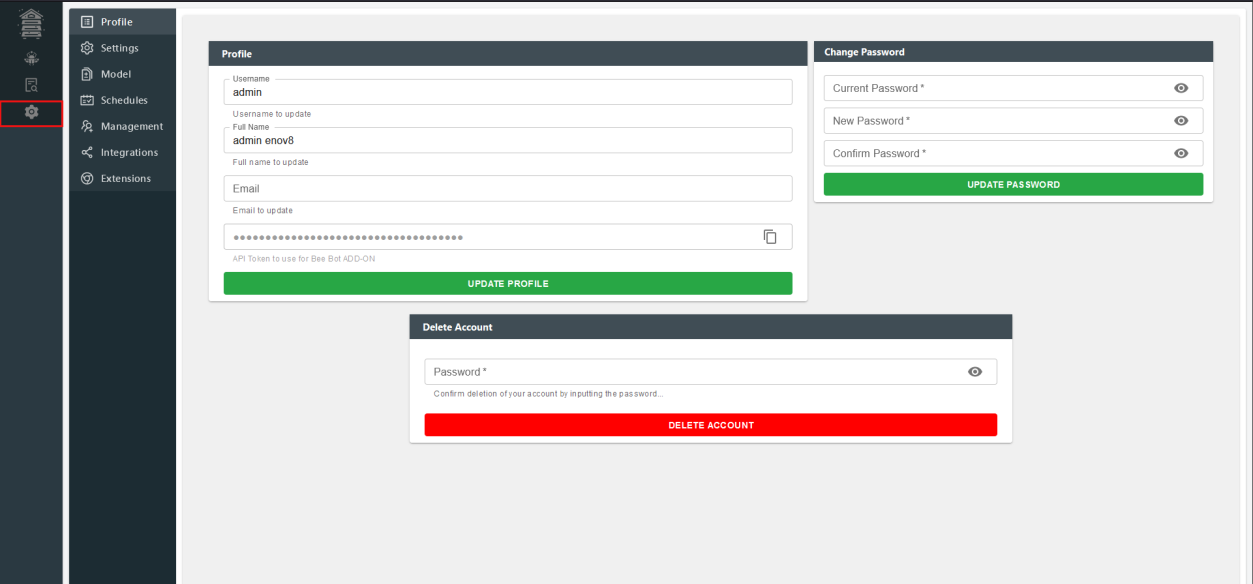
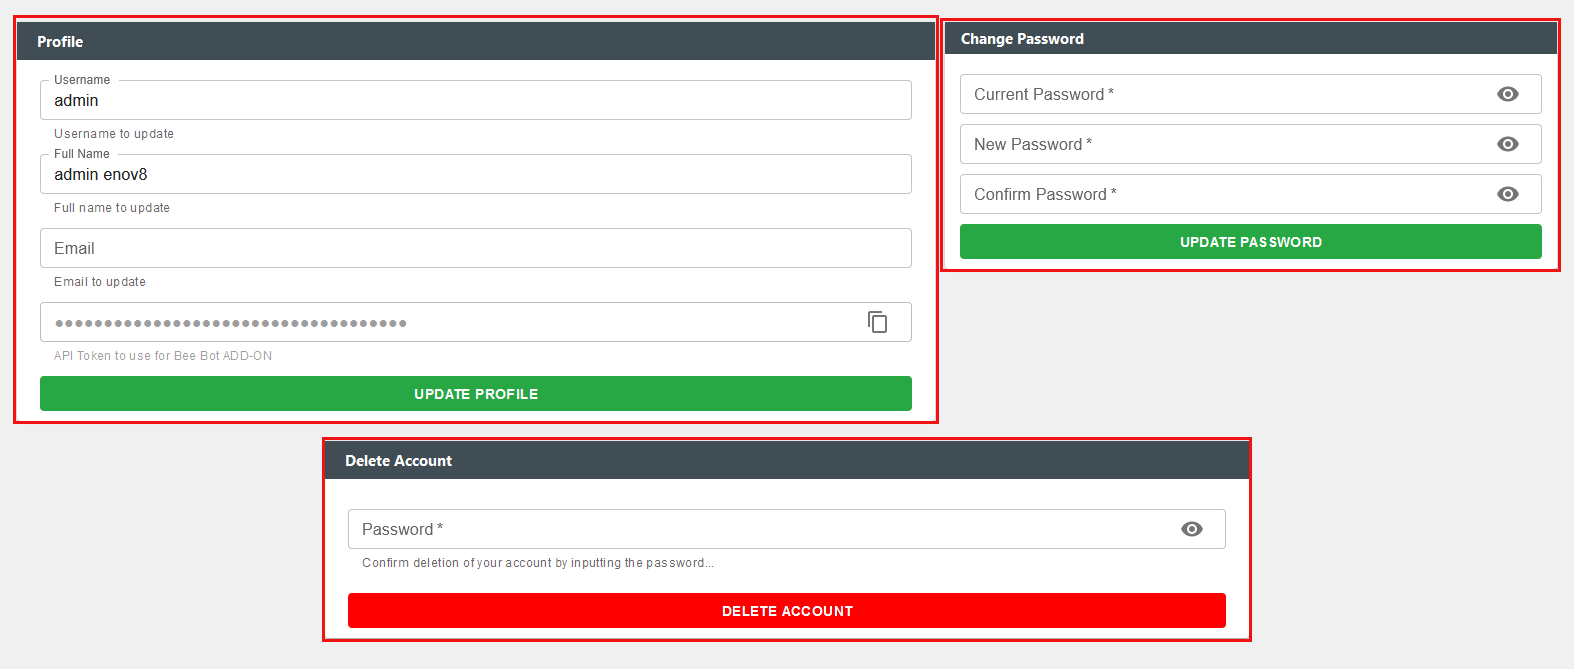
Profile
Within profile section, users can configure their username, full name, email address, password and can permanently delete their BBOT account.
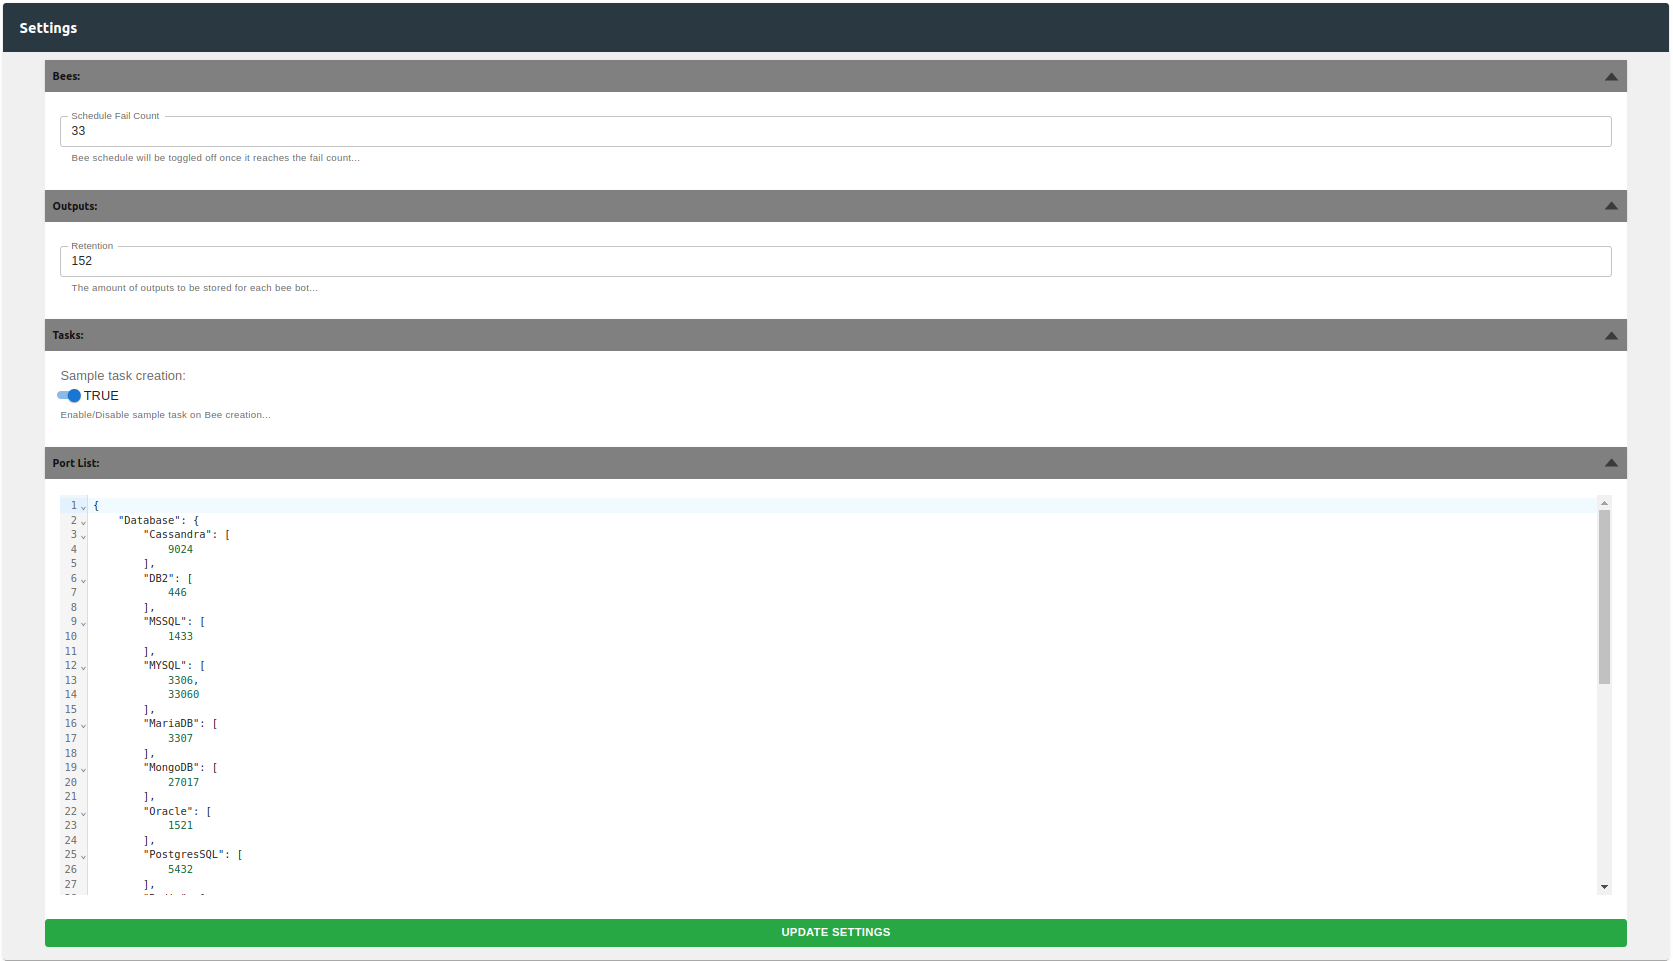
Settings
Global settings can be configured here. As of now, there are only few settings to change:
-
Schedule Fail Count -- The number of fails it needs to meet before schedule is toggled off. Default: 3 counts
-
Output Retention -- The number of outputs to store for each bee. Default: 5 saves.
-
Sample Task Creation -- Gives user the option to load sample task from the bee table. Default: True
-
Port List -- Configure the common ports for discovery scan.
Model
Within Model section, users can create models of the current bees within the BBOT and keep them for backup purposes or to load in for alternative purposes during their use.
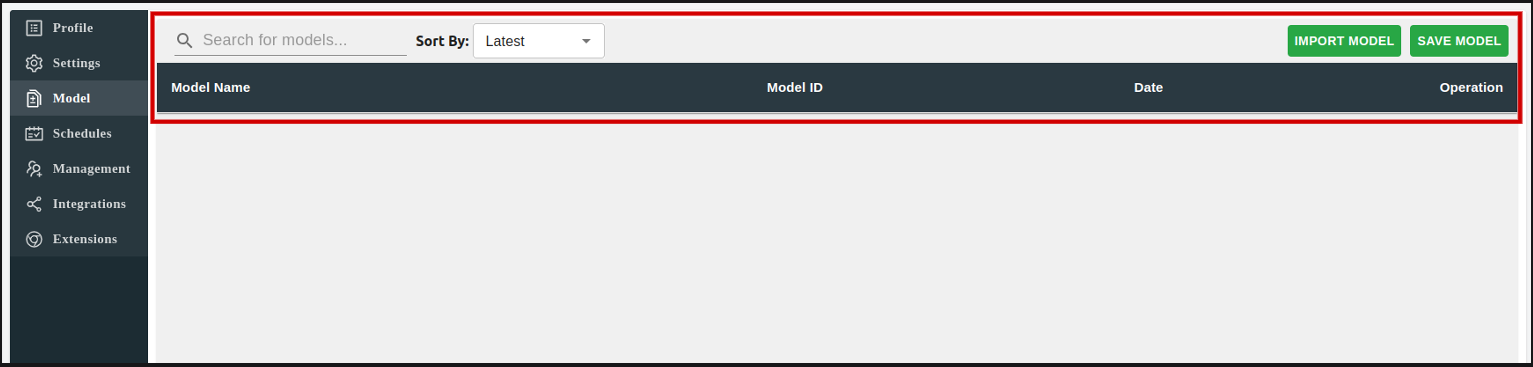
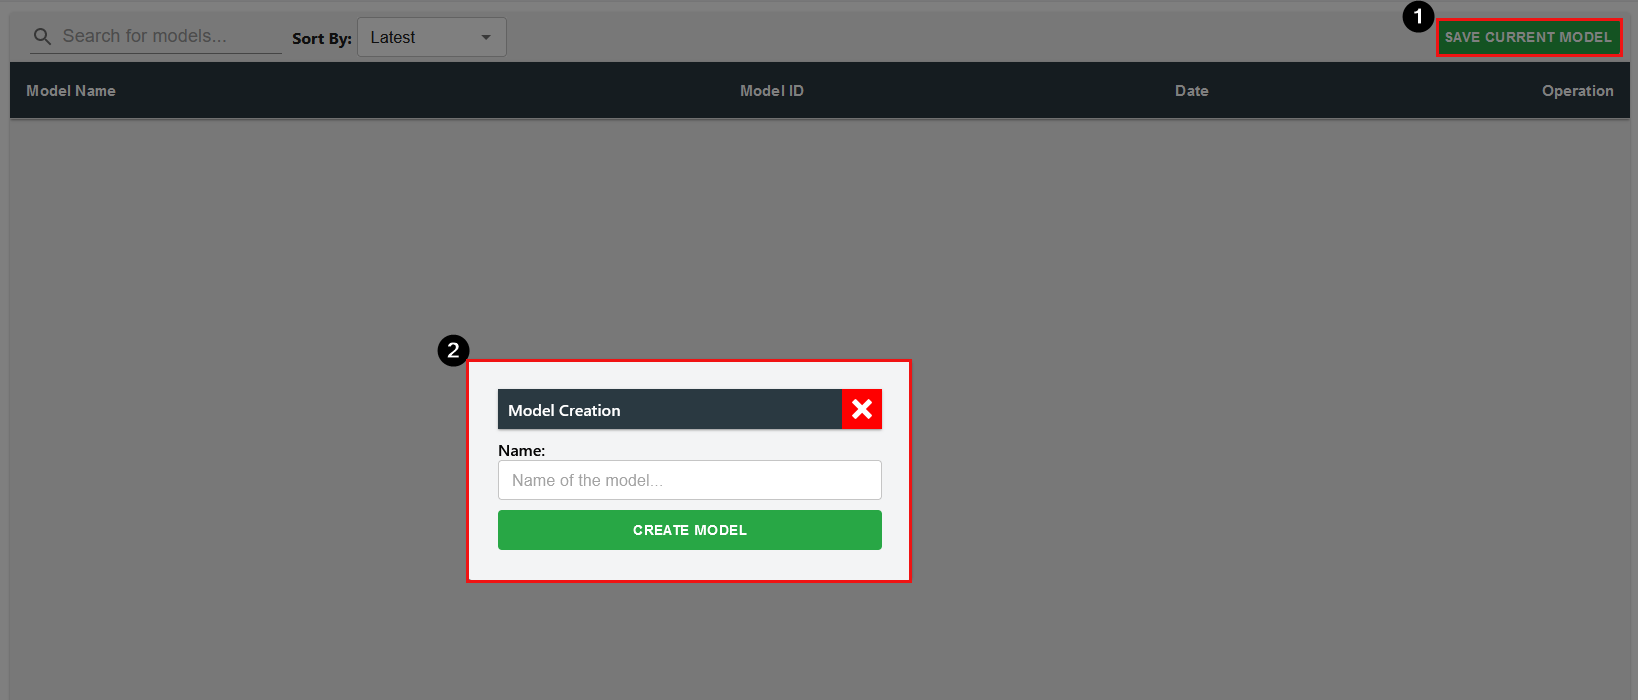
To create a model, simply click on "SAVE CURRENT MODEL" and input the name of the model.
Users can search for a model and/or filter it by the recent/oldest.

To import model, user can click on "IMPORT MODEL" and choose a model file.

User can download the model after saving it.

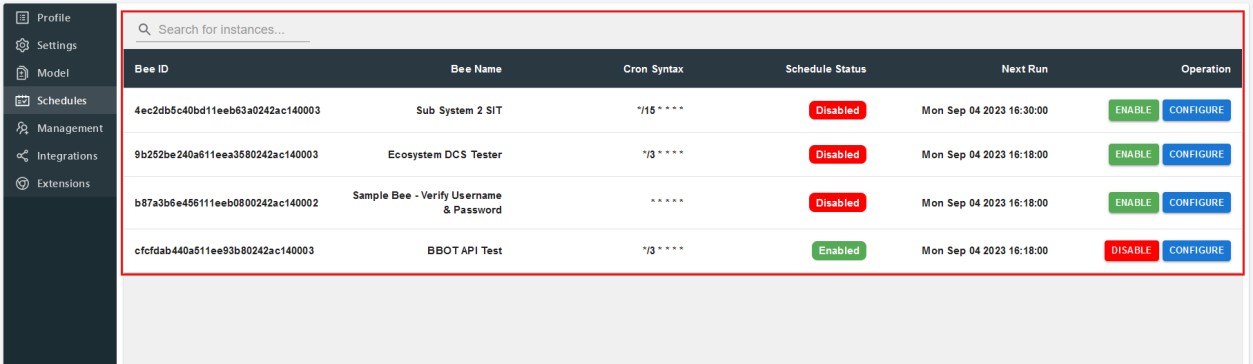
Schedules
Within Schedule section, you can see the bee's and their scheduled properties. Here you can manage them by configuring their CRON syntax and toggling the status of schedule on/off.
You can configure a bee's CRON syntax by clicking on "Configure" and it'll open up a modal of schedule (refer to 3.3 section).
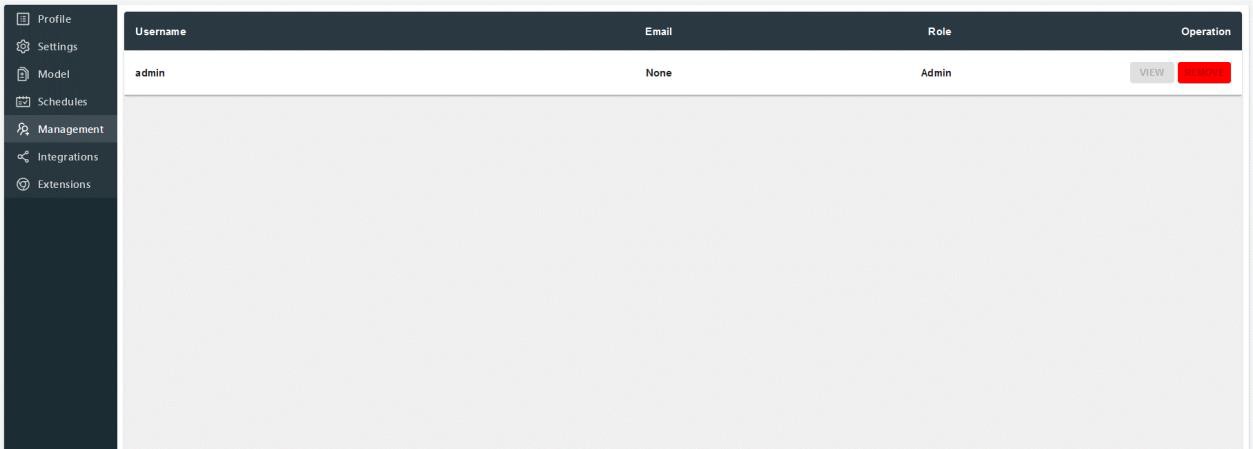
Management
Within management section, admin users can see the list of users and can delete their account if required.
Integrations
Within Integrations, users can setup integration with Ecosystem.
To setup ecosystem, you require the following:
Then you must click on "Test" to validate the API details and users can successfully add their integration.
Note: Proof Of Life and VirtualizeMe are not implemented yet.
Extensions
Extension section includes the prototype of a google chrome extension developed to ease the process of creating UI scrape bees.
Instructions on setting up the extension and usage of it is available in the section.
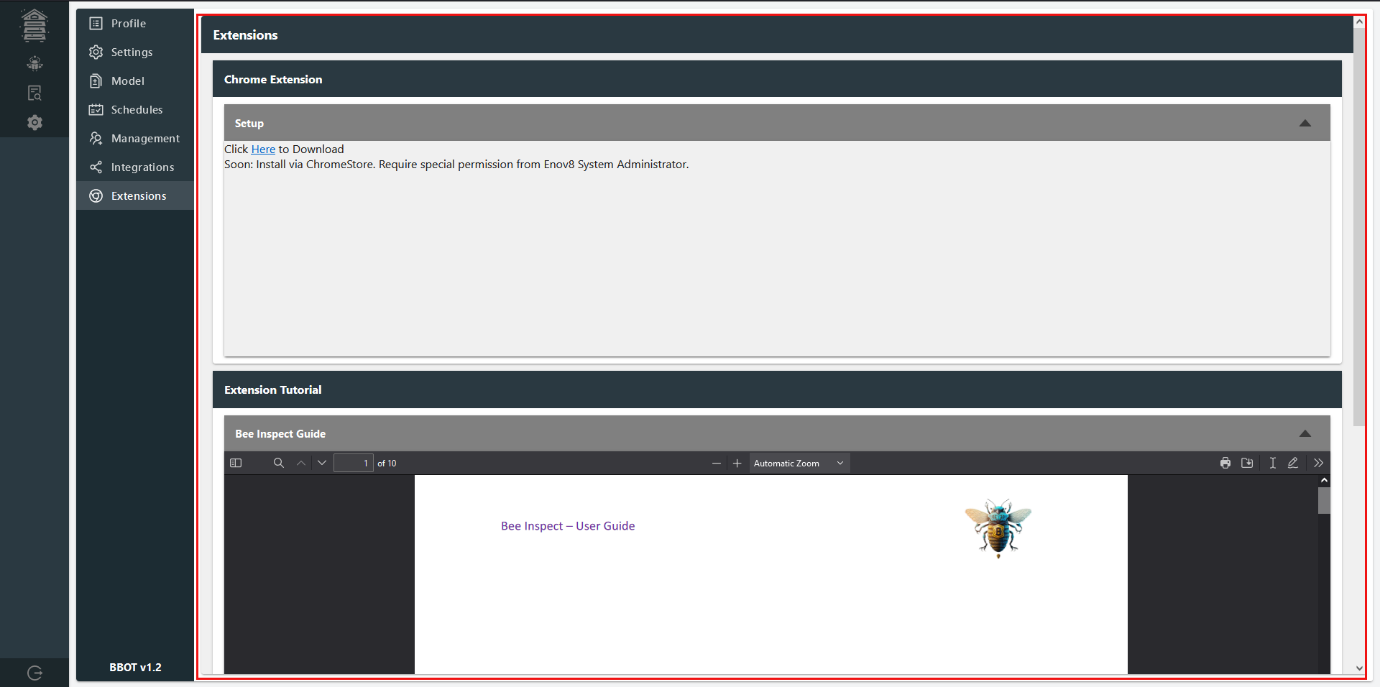
Note: Extension may or may not work from BBOT 1.2 version or higher of BBOT.