Hyper-V Install & Getting Started Guide
vME for Hyper-V is a ready-made virtual machine: a Generation 2 (UEFI) VM with its root disk and a blank storage pool disk, which you import into Hyper-V Manager. It runs on Windows Server 2019 or later.
Steps to Deploy vME on Microsoft Hyper-V
1. Download, verify and extract the appliance
The appliance is one .zip file with a .zip.sha256 checksum beside it:
| File | Purpose |
|---|---|
enov8-vme-<version>-vmconfig-<cfg>.zip | The virtual machine to import |
enov8-vme-<version>-vmconfig-<cfg>.zip.sha256 | Checksum of the .zip |
Contact your enov8 representative for the latest vME release for Hyper-V.
Verify the download, then extract it (PowerShell):
# The result must match the value in the .zip.sha256 file
Get-FileHash .\enov8-vme-<version>-vmconfig-<cfg>.zip -Algorithm SHA256

# Extract the virtual machine
Expand-Archive .\enov8-vme-<version>-vmconfig-<cfg>.zip -DestinationPath .\vme-appliance
The extracted enov8-vme-<version>-vmconfig-<cfg> folder holds Virtual Machines, Virtual Hard Disks (the root disk and <name>-pool.vhdx, the storage pool disk) and Snapshots. Keep the three folders together; this is the folder you import.
2. Check the host can run it
vME hosts, snapshots and clones full database environments, so it is a large appliance. It is configured at the recommended production size:
| Resource | As configured (recommended) | Minimum |
|---|---|---|
| vCPU | 32 | 16 |
| Memory | 128 GB (131072 MB) static, Dynamic Memory off | 64 GB static |
| Root disk | 128 GB, included | as included |
| Storage pool disk | 1 TB, included, blank | sized to your sources |
Hyper-V Manager only imports a VM the host can run as configured. On a host with at least 32 logical processors and comfortably more than 128 GB of memory, import with Hyper-V Manager (step 3). On a smaller host, import with PowerShell instead (step 4).
3. Import with Hyper-V Manager
- Open Hyper-V Manager, select the Hyper-V host to deploy vME on, and in the Actions pane click Import Virtual Machine...
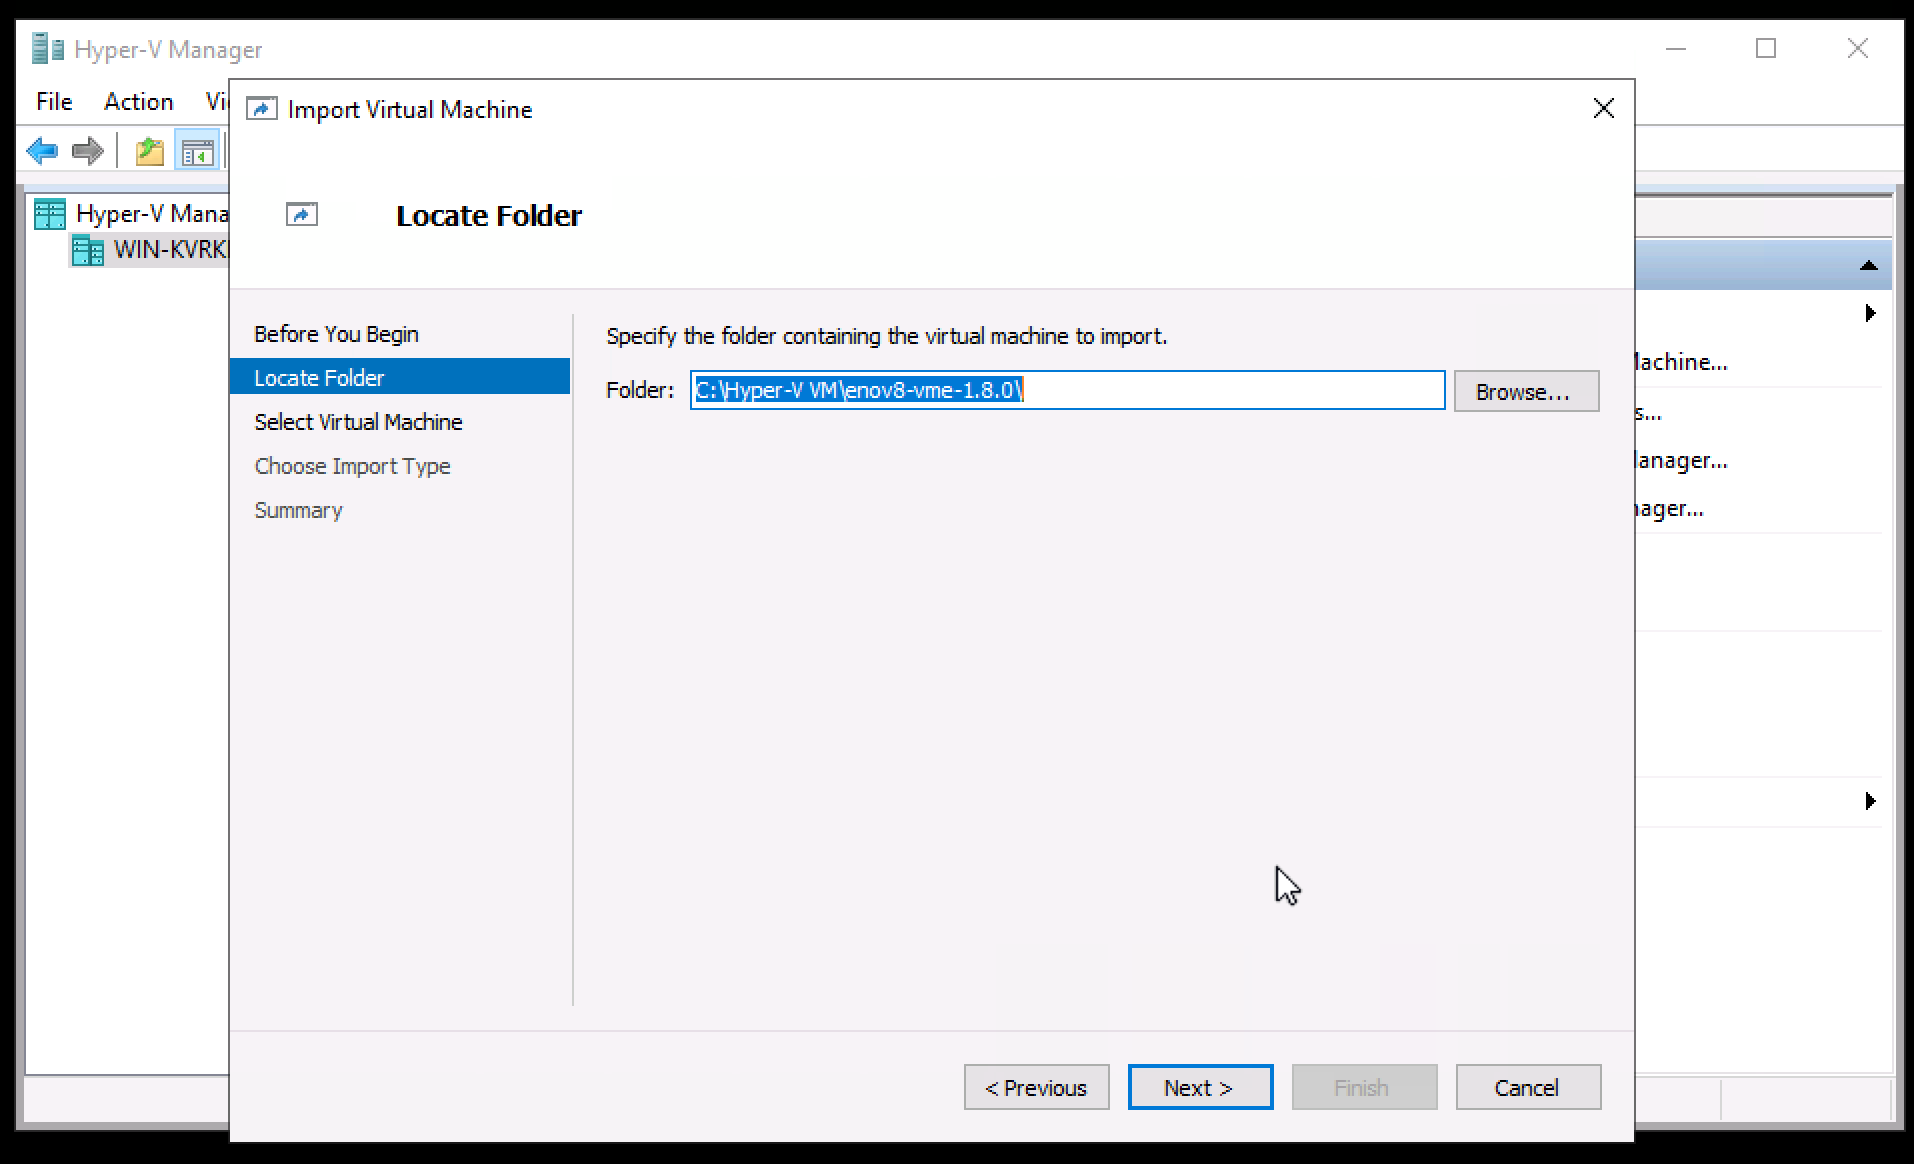
3.1 Locate Folder
- Click Browse, select the extracted
enov8-vme-<version>-vmconfig-<cfg>folder and click Next.
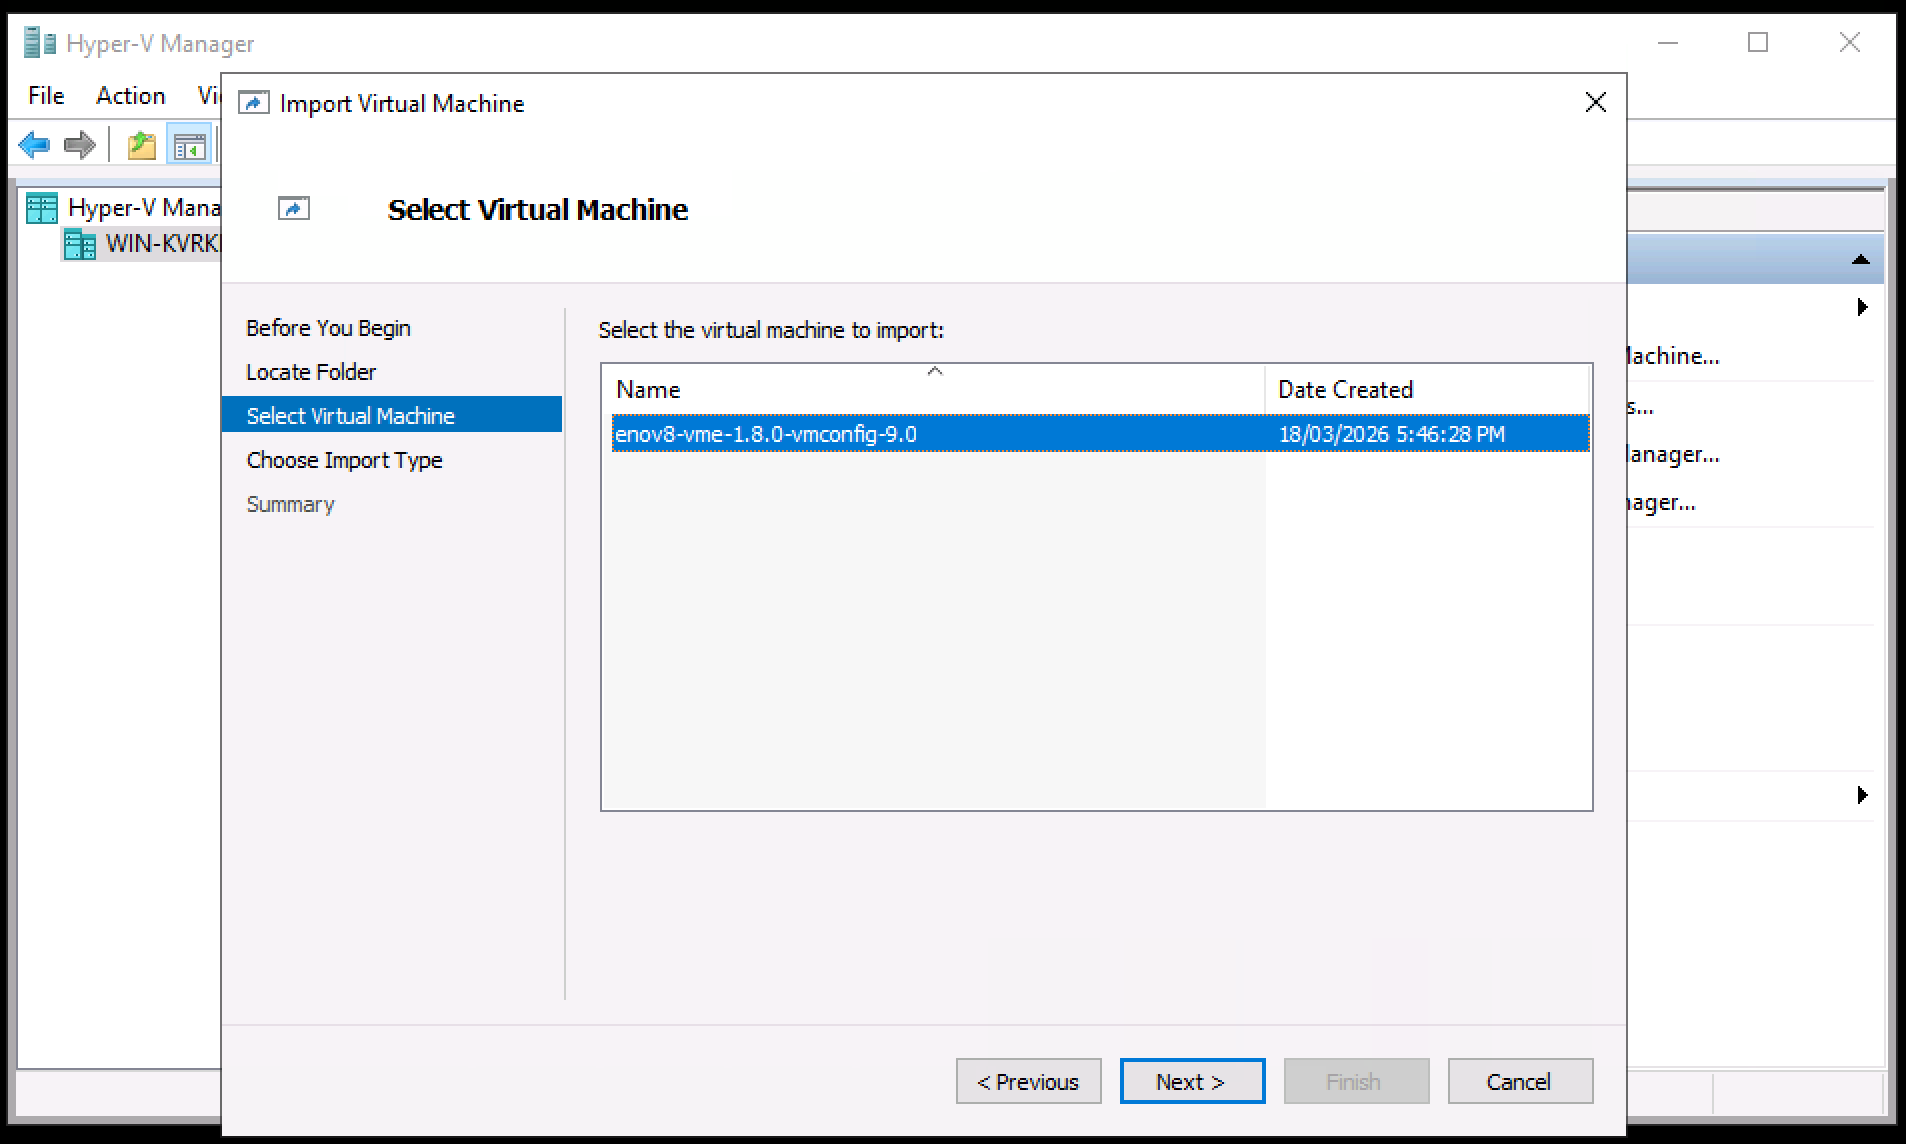
3.2 Select Virtual Machine
- The wizard finds the vME virtual machine in the folder. Select it and click Next.
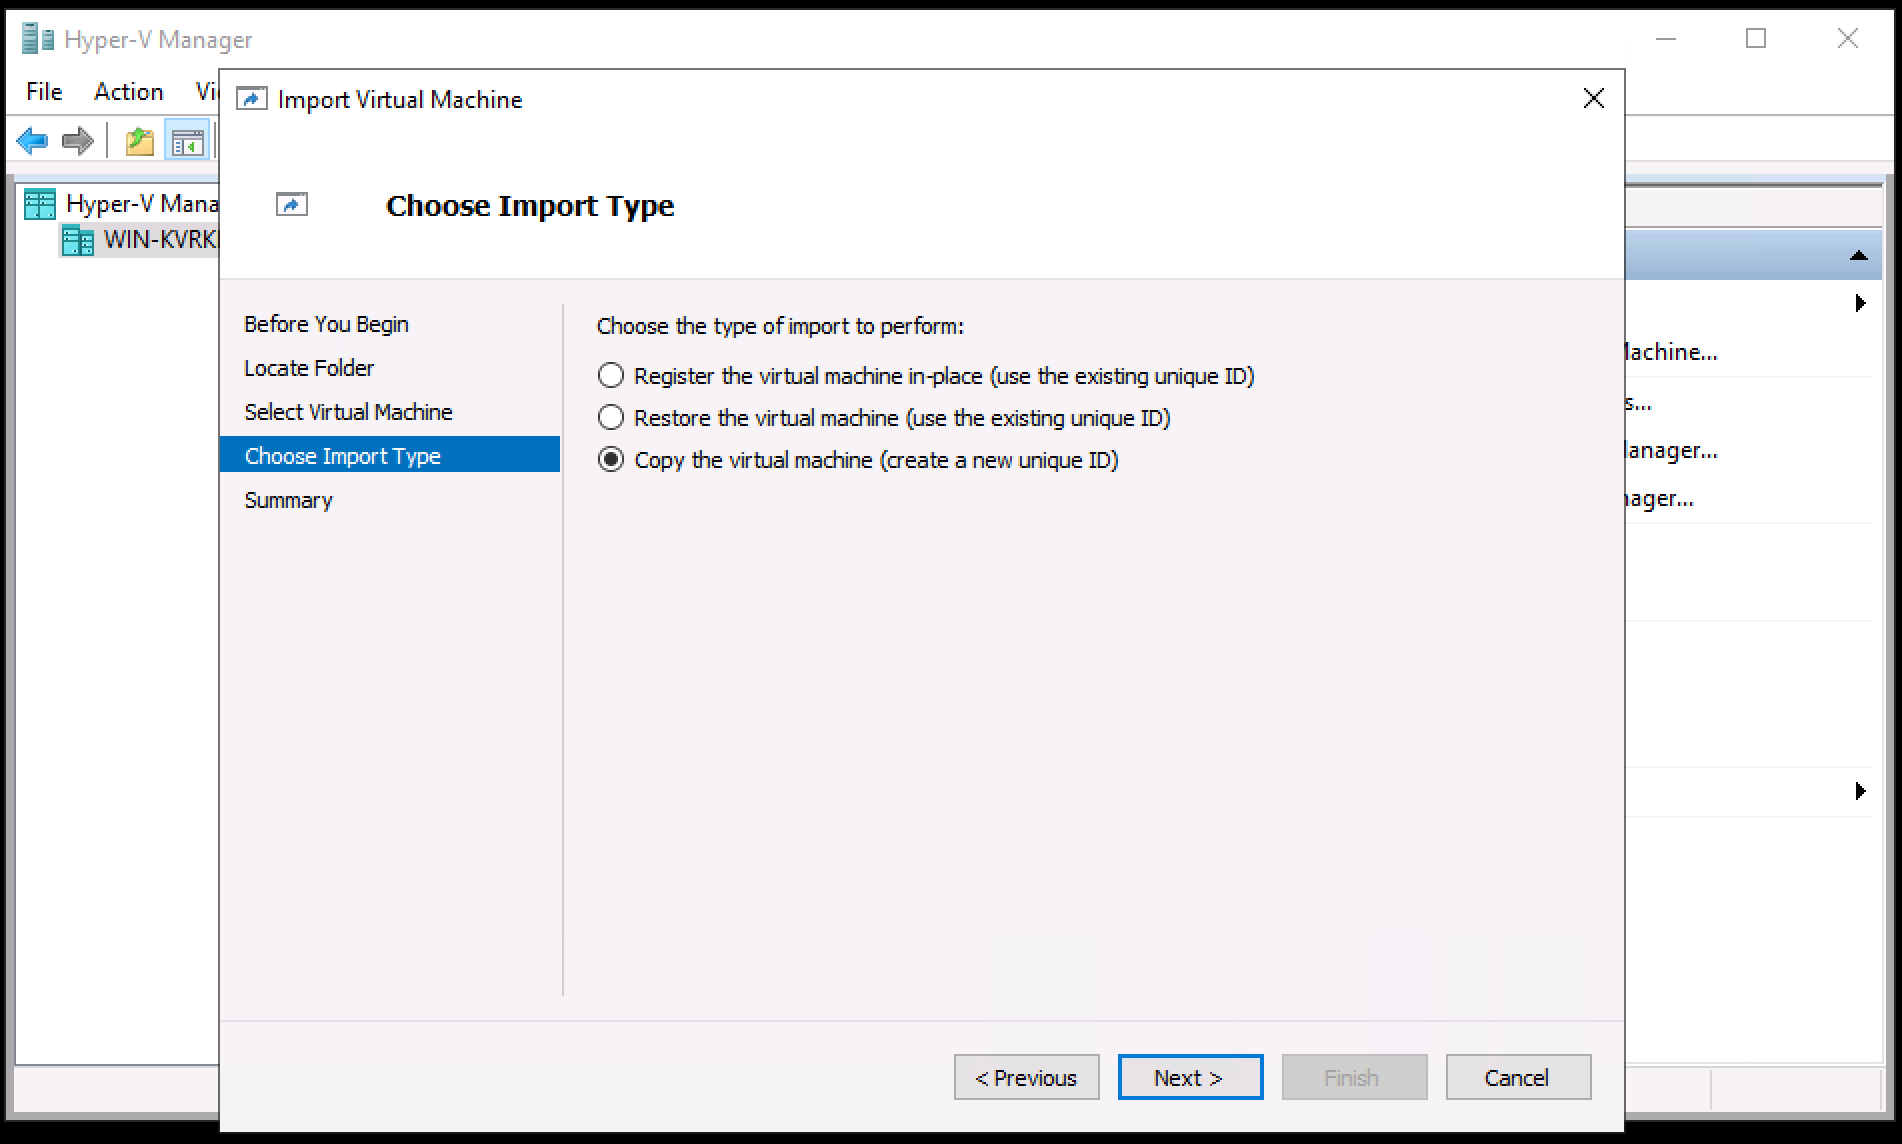
3.3 Choose Import Type
- Select Copy the virtual machine (create a new unique ID) and click Next.
Copying assigns a unique ID, which lets you run more than one vME on the same host.
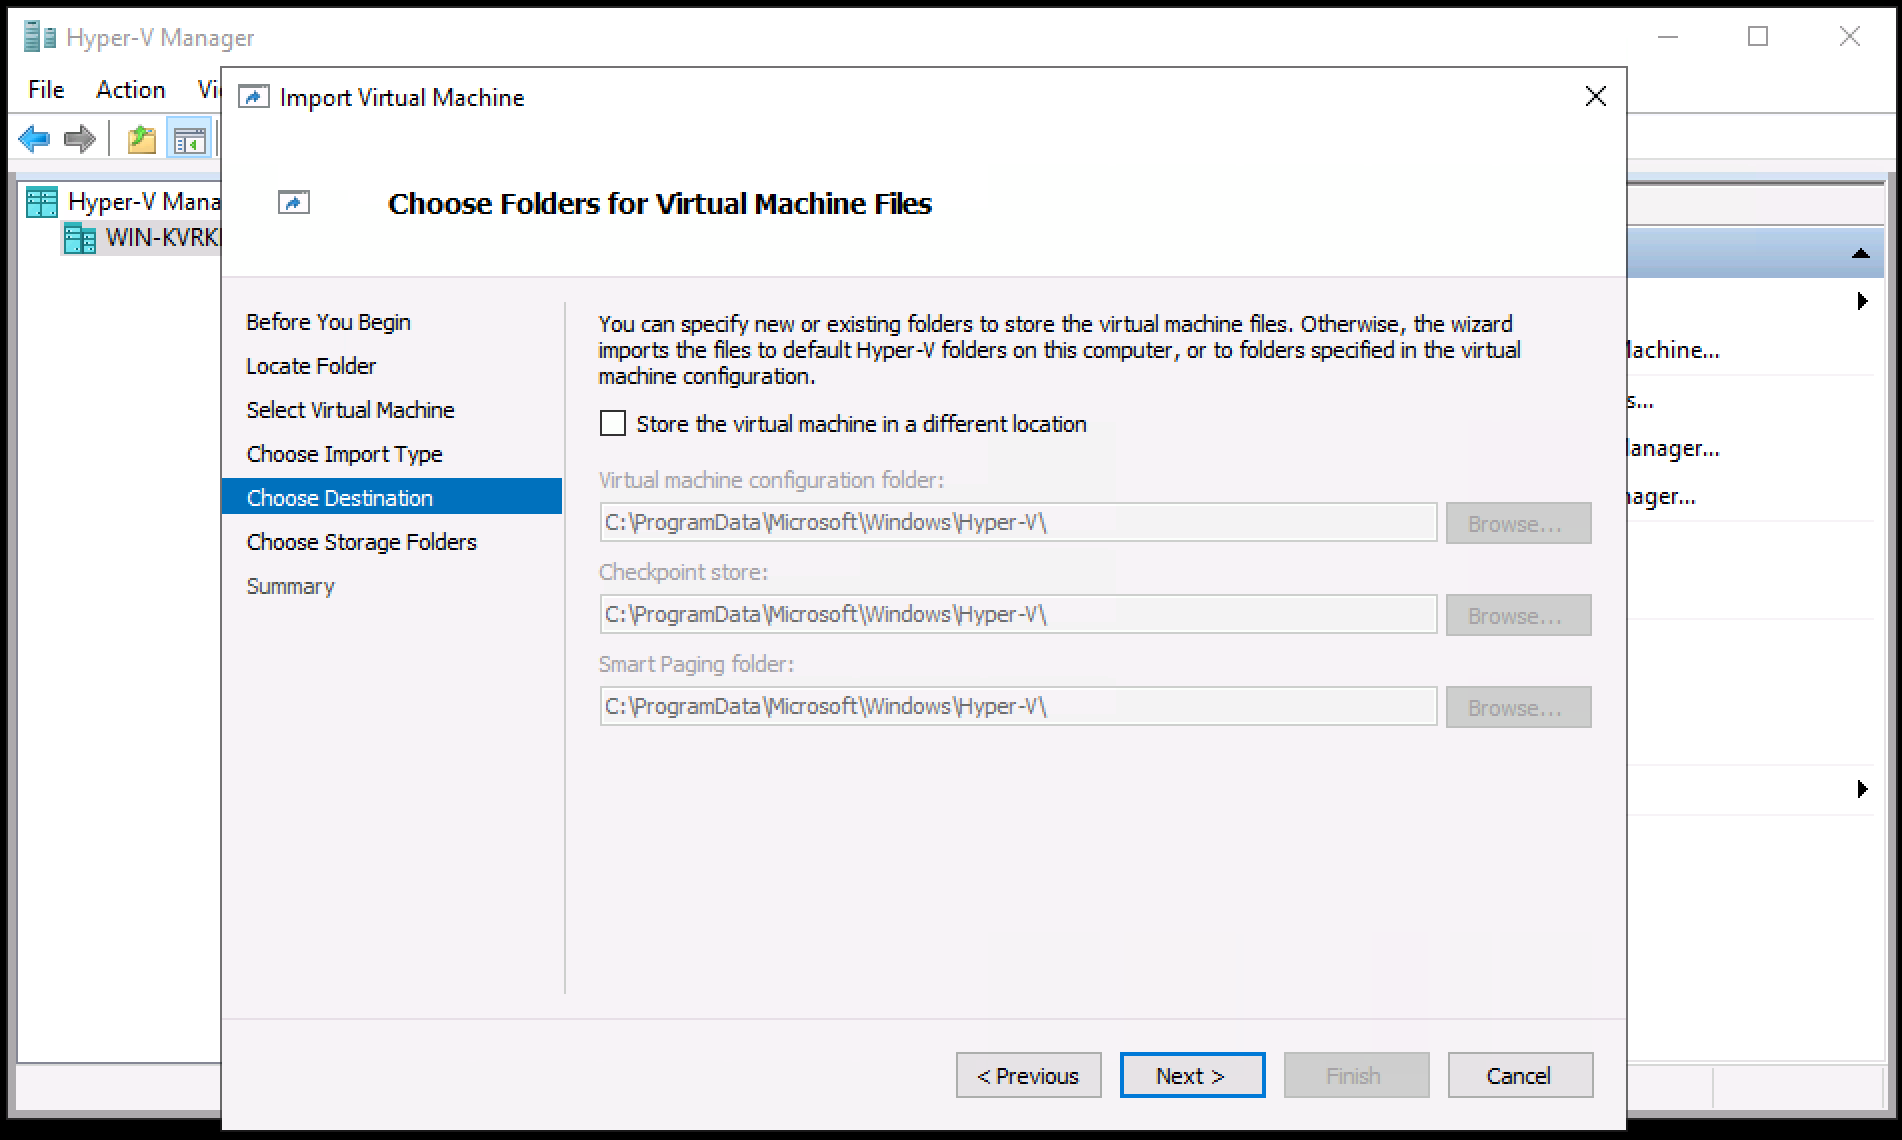
3.4 Choose Destination
- Accept the default folders for the virtual machine files, or browse to your preferred storage location, and click Next.
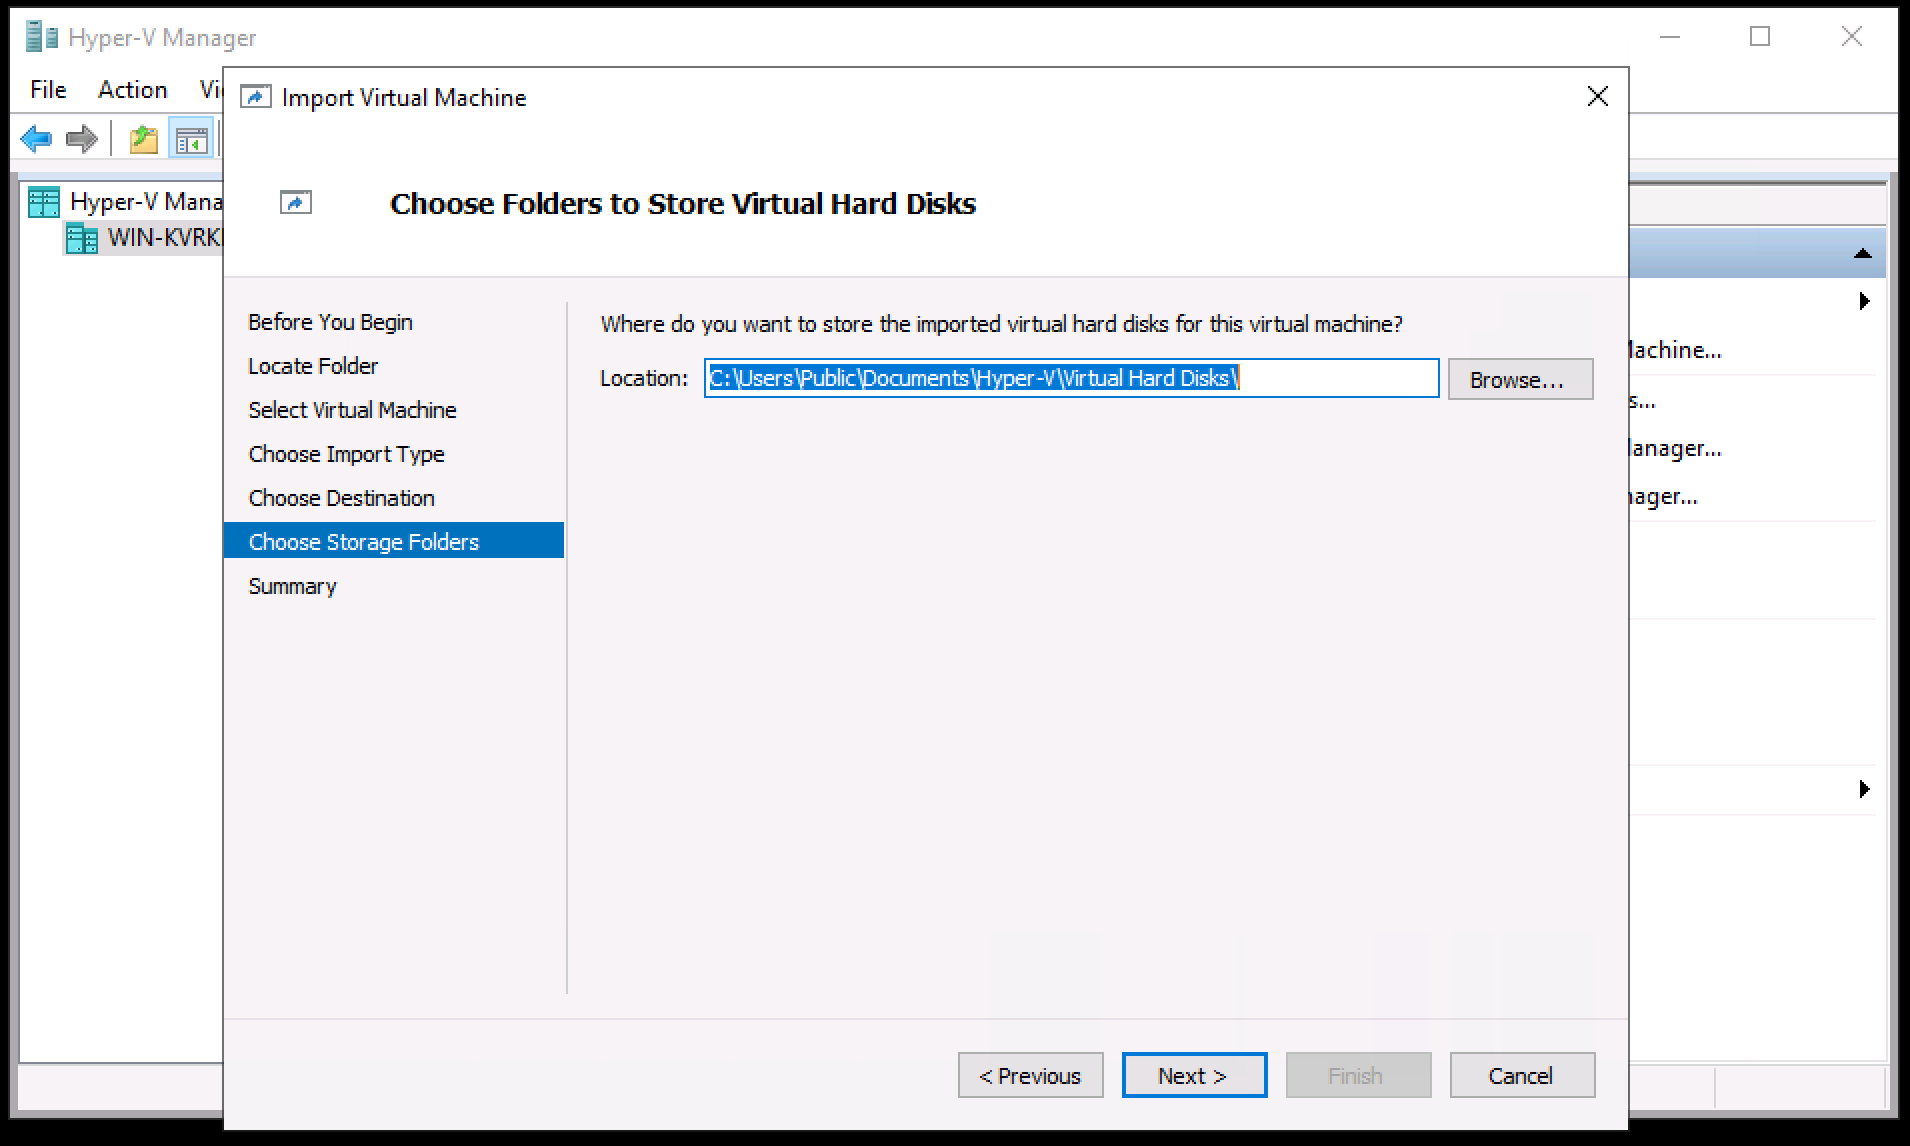
3.5 Choose Storage Folders
- Choose the folder for the two virtual hard disks and click Next.
3.6 Review and Finish
- Review the summary and click Finish. The import runs in the Status pane; when it finishes, the vME virtual machine appears in the Virtual Machines list as a Generation 2 machine.
Do not close Hyper-V Manager until the import is complete.
Continue with step 5.
4. Import with PowerShell (smaller hosts)
From an elevated PowerShell, compare the virtual machine with the host, set the processors and memory the host can run (no lower than the minimum above), and import a copy:
$vmcx = Get-ChildItem '.\vme-appliance\enov8-vme-<version>-vmconfig-<cfg>\Virtual Machines\*.vmcx'
$report = Compare-VM -Path $vmcx.FullName -Copy -GenerateNewId `
    -VirtualMachinePath 'D:\Hyper-V\vME' -VhdDestinationPath 'D:\Hyper-V\vME\Virtual Hard Disks'
$report.Incompatibilities | Format-Table MessageId, Message   # what does not fit this host
Set-VMProcessor -VM $report.VM -Count 16
Set-VMMemory -VM $report.VM -StartupBytes 64GB
Import-VM -CompatibilityReport $report
The virtual machine appears in Hyper-V Manager when Import-VM returns.
5. Before first boot
Right-click the vME virtual machine and click Settings...
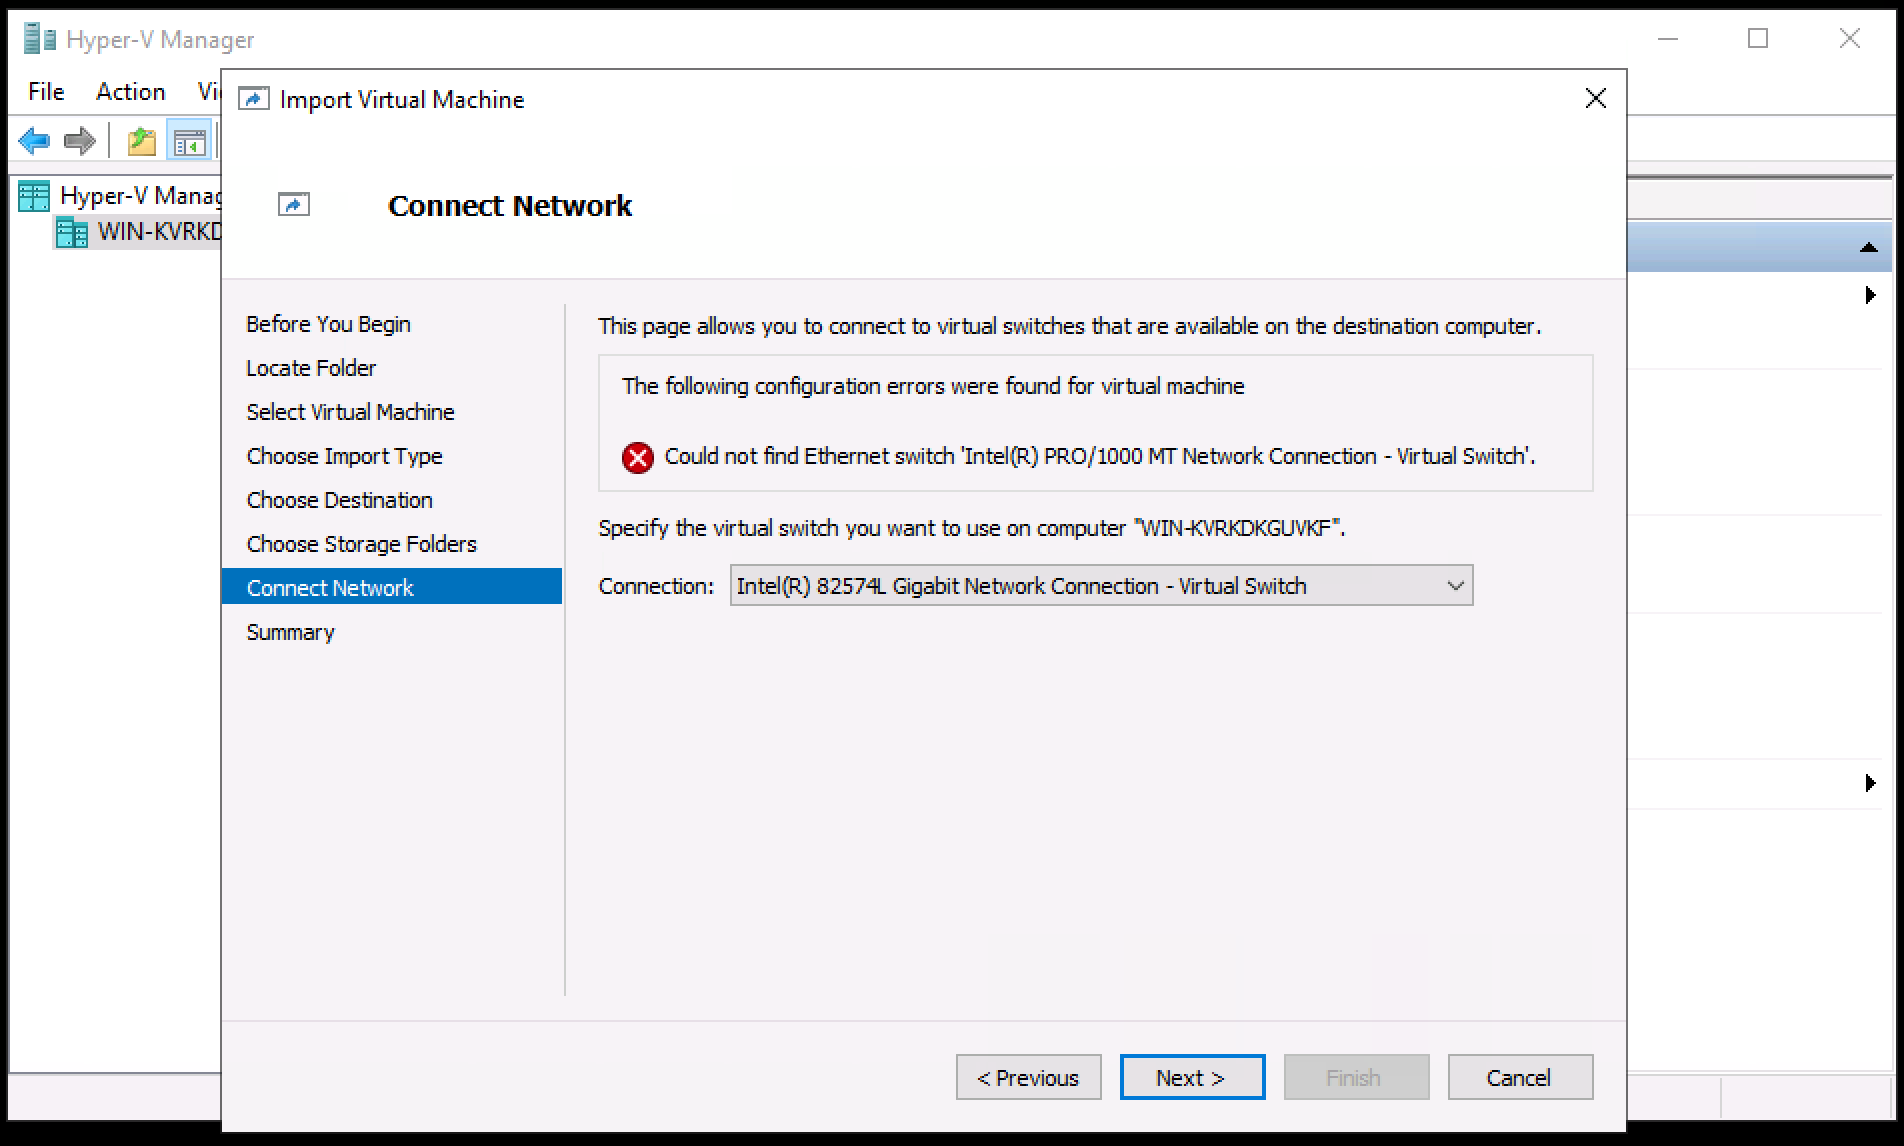
- Network Adapter: the adapter is not connected to a switch. Set the Virtual Switch to one with connectivity to your target database environment.
- Network Adapter > Advanced Features > MAC address: select Static. vME needs a fixed MAC address. Keep the address Hyper-V generated, or set your own.
- SCSI Controller (second) > Hard Drive: this is the storage pool disk, a dynamically expanding 1 TB VHDX. Leave it blank: the setup wizard turns it into the storage pool. vME recommends thick-provisioned storage for the pool; to follow that, convert it to a fixed disk before first boot (
Convert-VHD -VHDType Fixed), or resize it to suit your sources (Resize-VHD). - Click OK to save.
Make sure the selected virtual switch has connectivity to your target database environment.
Secure Boot (template Microsoft UEFI Certificate Authority) and static memory are already set; no firmware or memory changes are needed.
6. Power on and open the console
- Right-click the vME VM and click Start, then Connect... to open its console.
- In a minute or two the appliance opens the VME Appliance Setup menu on the console. Use it to set networking, the hostname and the NTP server; see Console setup. Its header shows the appliance's address and the Web setup link.

Next step: Complete the setup wizard
Once the console setup is done, browse to the address its summary shows (https://<appliance-ip>/, also shown on the console as Web console) and complete the setup wizard before using vME. The wizard walks you through TLS, licence registration, password change, authentication, timezone and creating the storage pool on the blank pool disk.
→ Continue to the Setup Wizard (First Boot) Guide for the full step-by-step walkthrough.
Troubleshooting
- Import fails with "configuration errors" (or "processors ... out of range", "Memory virtual quantity above maximum"): the host has fewer processors or less memory than the virtual machine is configured with. Import with PowerShell (step 4).
- Import cannot find the disks: import from the extracted folder, not from inside the
.zip, and keep theVirtual Hard DisksandVirtual Machinesfolders together. - No network: connect the VM's network adapter to a Hyper-V virtual switch with connectivity on your network.