vME Setup Wizard - First Boot
Purpose
This guide explains the first-boot setup wizard for vME operators.
The setup wizard is a one-time guided flow in the web UI. After you click Finish, it locks permanently and all wizard write APIs return 410 Gone. Normal login is used from then on.
Prerequisites
| Item | Detail |
|---|---|
| Appliance deployed | VMware OVA or Hyper-V virtual machine. See the VMware Install Guide or Hyper-V Install Guide. |
| Network | Appliance has an IP (DHCP or static) and you can reach it on HTTPS |
| Browser | https://<appliance-ip>/ - accept the installer self-signed certificate warning on first visit if prompted |
| Web login | admin / admin (change during the wizard) |
First boot walkthrough
1. Deploy the appliance
Deploy the vME image for your platform: OVA (VMware) or the Hyper-V virtual machine. Complete the platform-specific steps in the install guides linked above.
2. Console setup (first boot)
On an appliance deployed from the vME image, the VM console opens the VME Appliance Setup menu the first time the appliance starts. Its header shows the hostname, the network address, the gateway, and the Web setup address to browse to. Use the arrow keys to move and Enter to select.

| Option | What it does |
|---|---|
| network | Configure IPv4 networking: DHCP, or Static IPv4 with the address, prefix or netmask, default gateway and up to three DNS servers. The settings are applied, then a health check runs. |
| hostname | Set the appliance's hostname. The appliance's certificate is regenerated to match. |
| ntp | Set the NTP server (an IP address or hostname). |
| test | Test connectivity: interface up, gateway reachable, DNS reachable and NTP sync. |
| exit | Finish setup: shows a summary of the settings and the address to continue at in your browser. |
Choose DHCP or Static IPv4:

For a static address, enter the address, then the prefix or netmask, the gateway and the DNS servers when asked:

Set the hostname:


With DHCP, a new hostname can bring a new address from your DHCP server. The menu header always shows the current address.
Set the NTP server:

Run test to check the network before you continue:

When networking, the hostname and the NTP server are all set, choose exit. The summary shows the settings in effect and the address to continue at. Check them and choose Yes, or No to go back to the menu.

The menu does not open again. From then on the console shows the appliance's web address:

3. Find the appliance IP and open the web UI
The console shows the address: as Web setup in the setup menu, and as Web console once setup is finished. The hypervisor's networking view for the VM shows the same address.
Browse to:
https://<appliance-ip>/
Log in with the default credentials admin / admin (you will change the password in the wizard).
4. Walk through the wizard
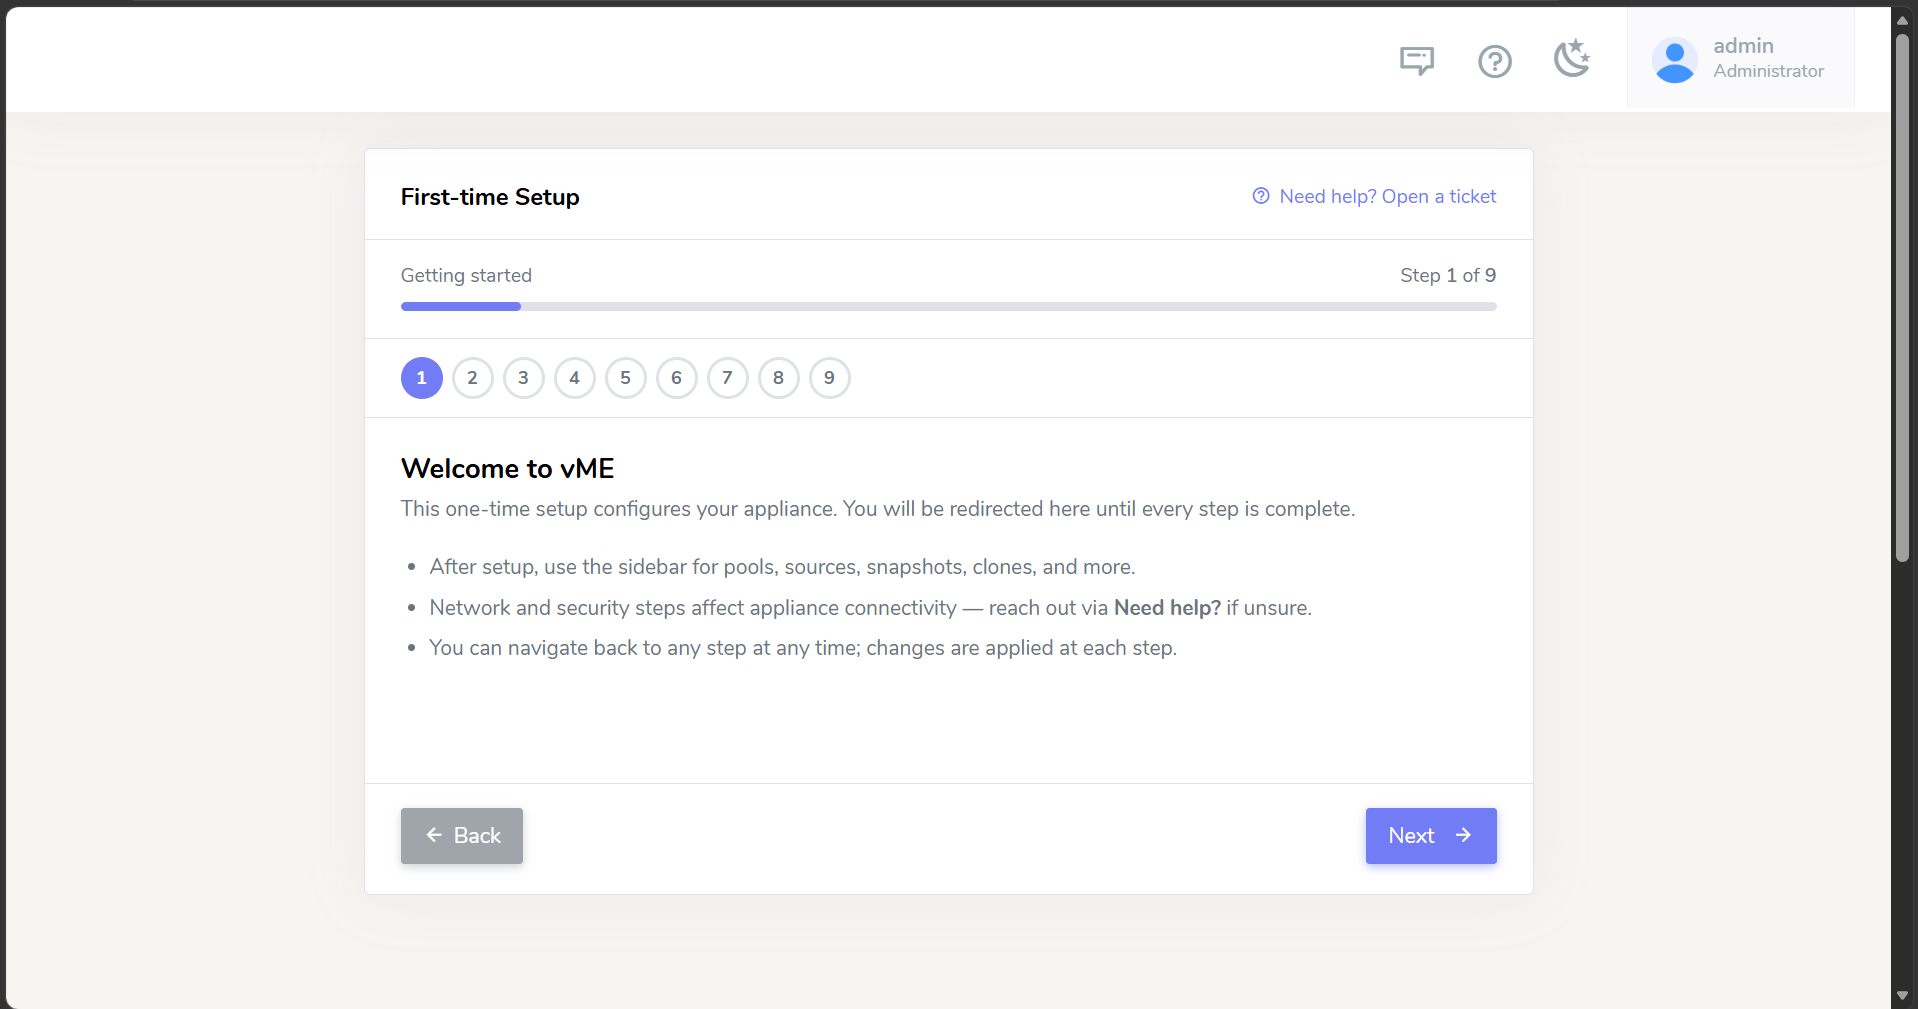
Work through the steps in order. Each screen is shown below, along with whether it is required before you can finish. The wizard opens on a welcome screen:
Network (optional)
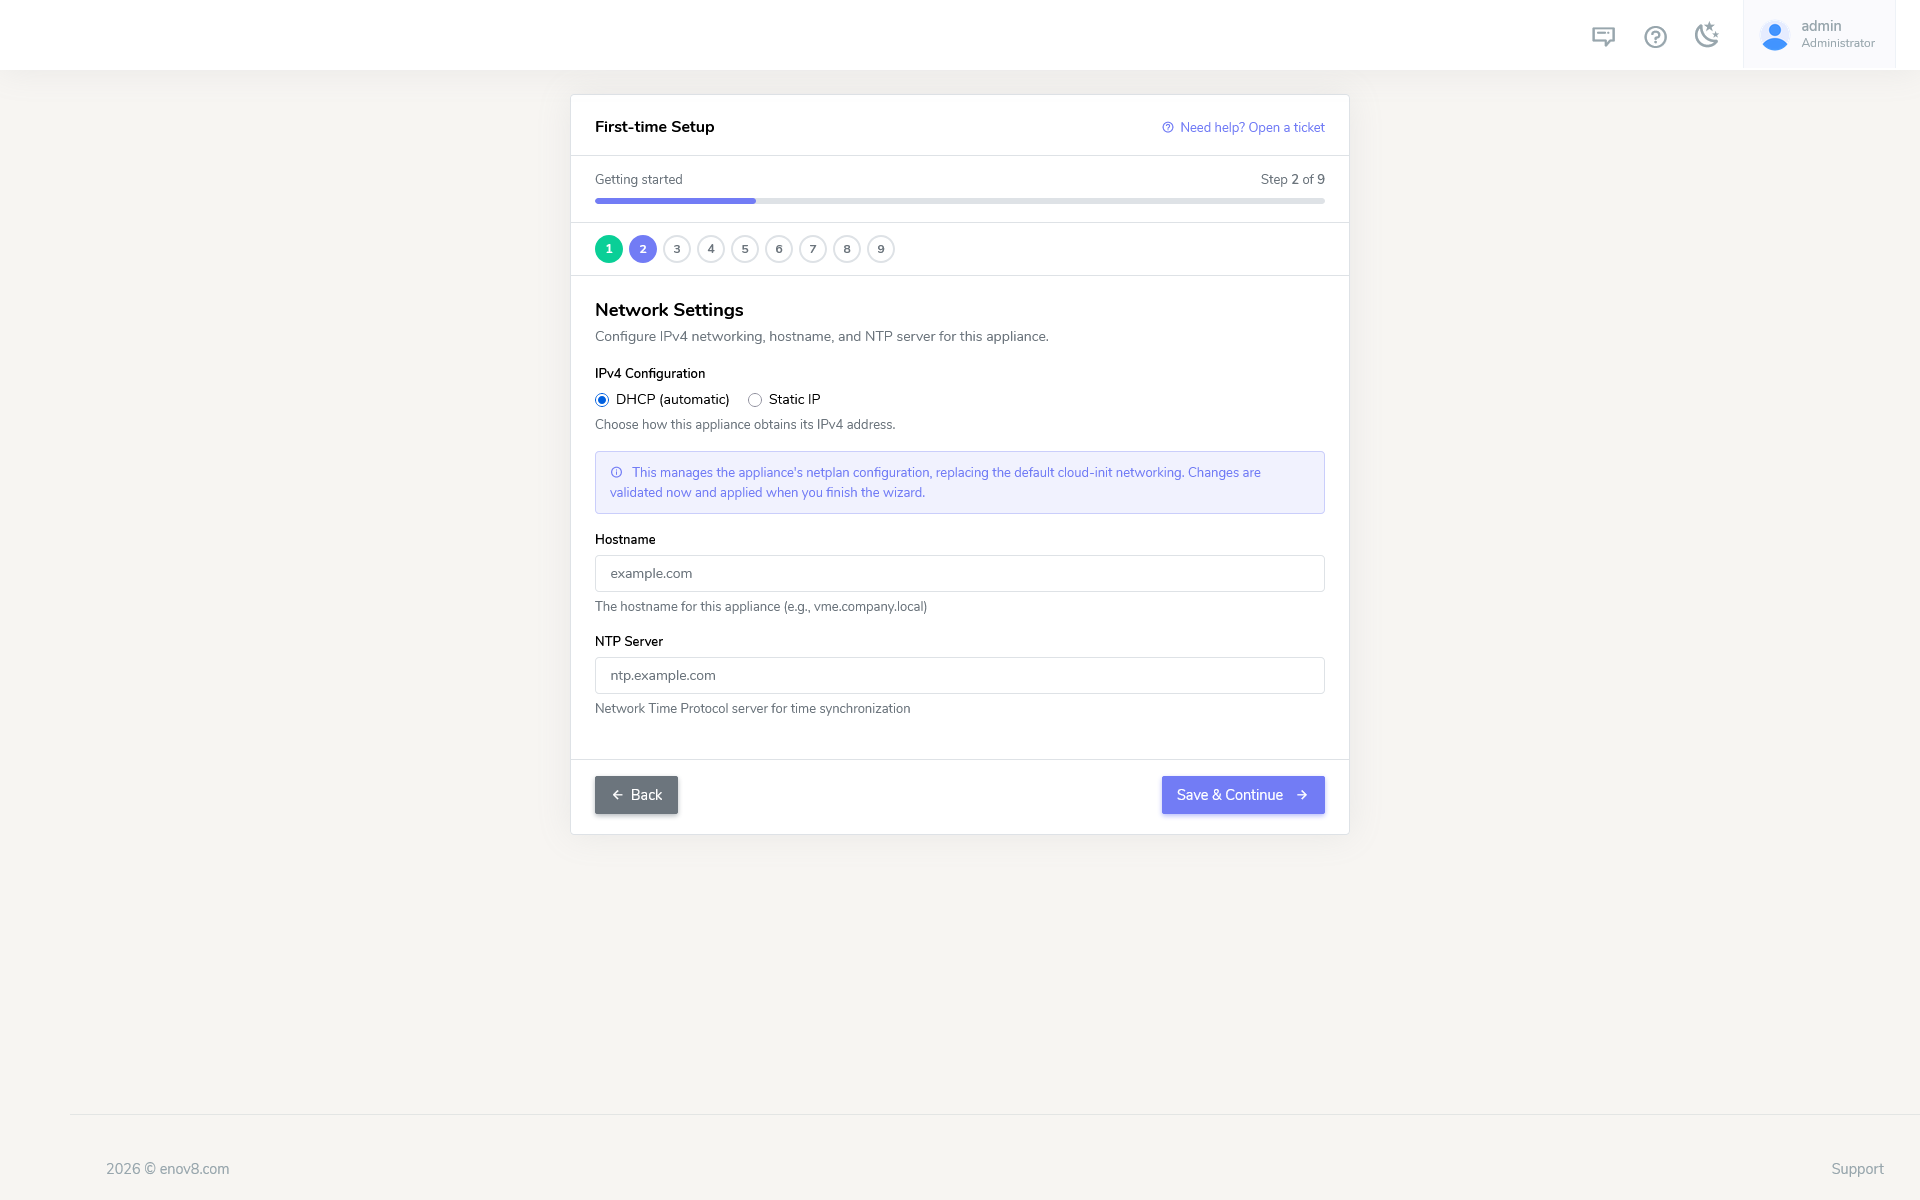
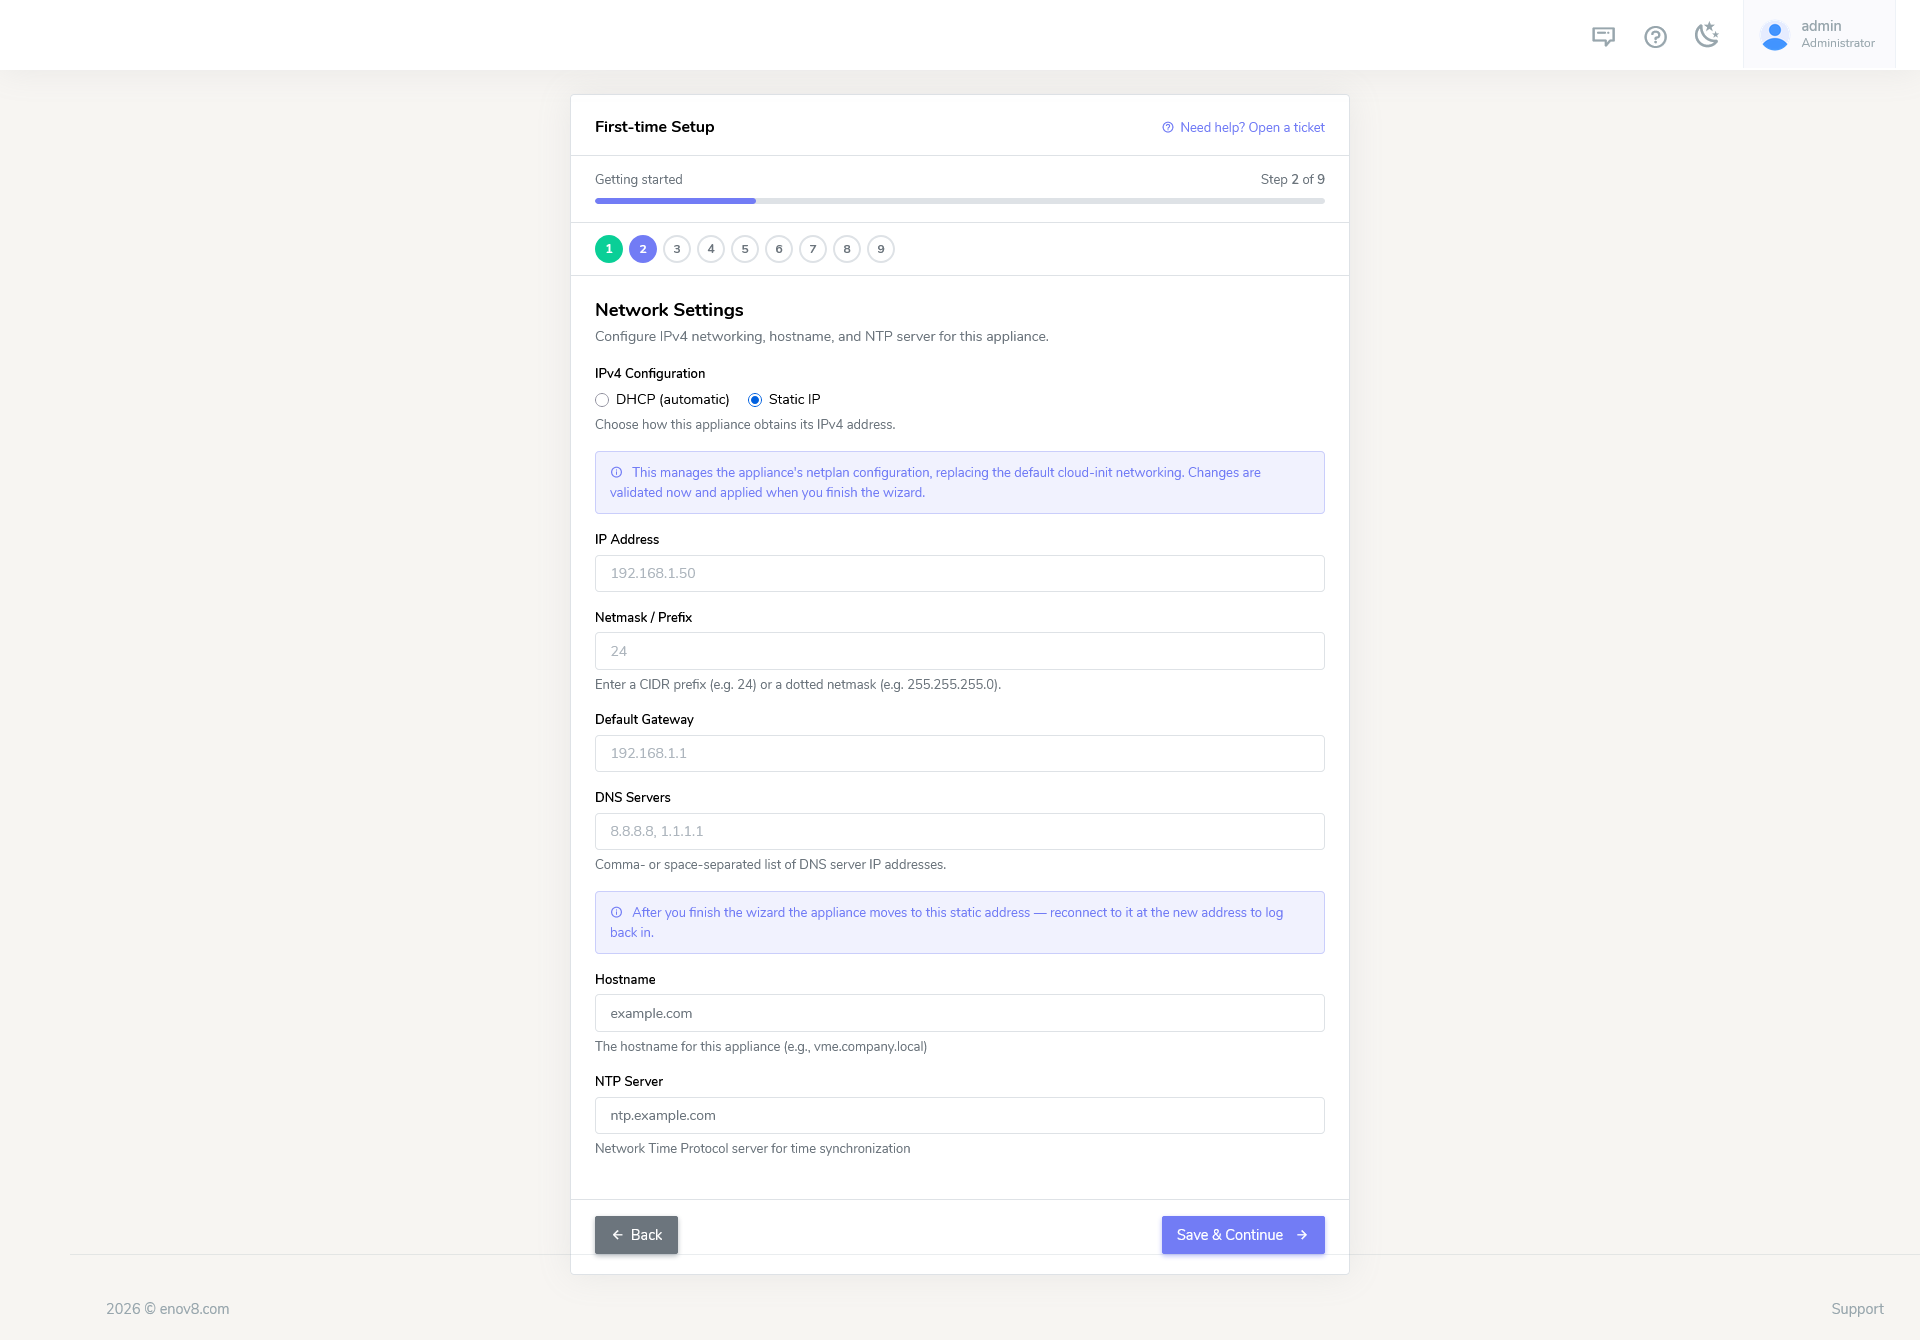
Set the hostname and NTP server, and configure IPv4 networking with netplan: choose DHCP, or enter a static IP with gateway and DNS. Network changes are applied when you finish the wizard.
With DHCP, the appliance obtains its IPv4 address automatically - you only set the hostname and NTP server:
With Static IP, enter the IP address, netmask/prefix, default gateway, and DNS servers. After you finish the wizard the appliance moves to the static address, so reconnect there to log back in:
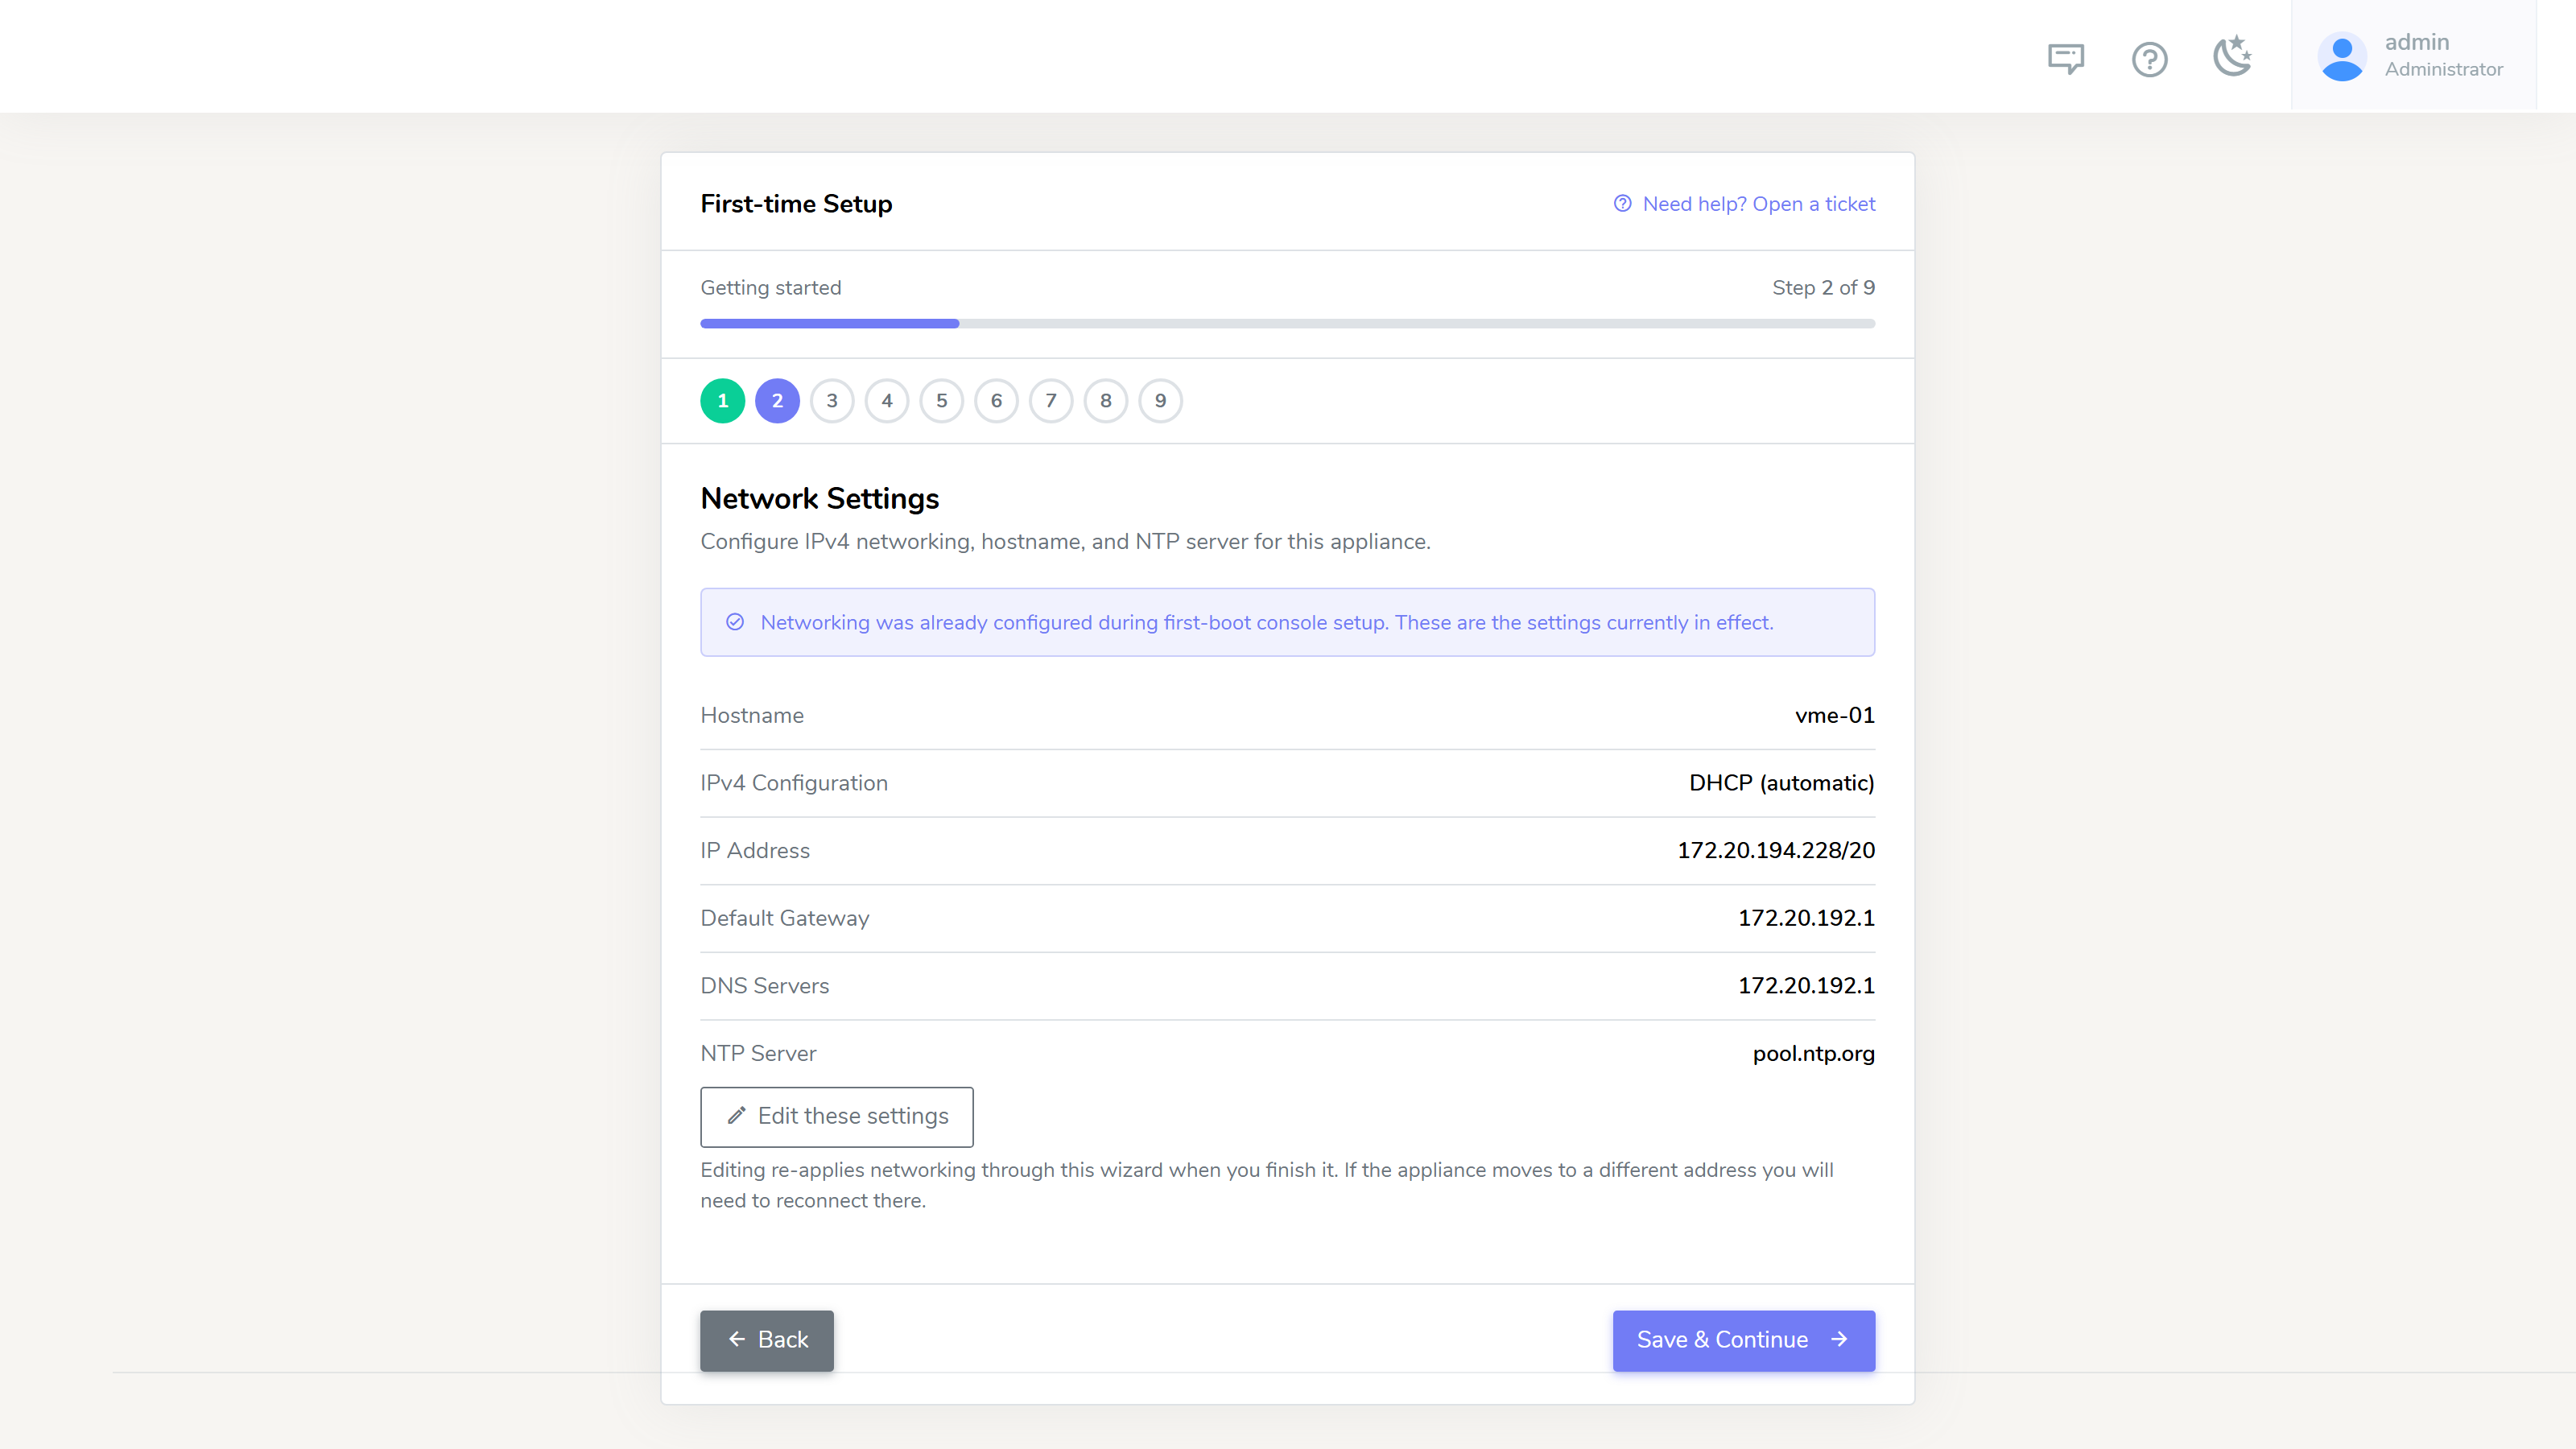
When the console setup has already configured networking, the wizard marks this step done and goes from the welcome screen straight to TLS. Click step 2 to see the settings in effect: hostname, IPv4 configuration, IP address, gateway, DNS servers and NTP server. Edit these settings changes them here; edited settings are applied when you finish the wizard, and if the appliance moves to a different address you reconnect there.
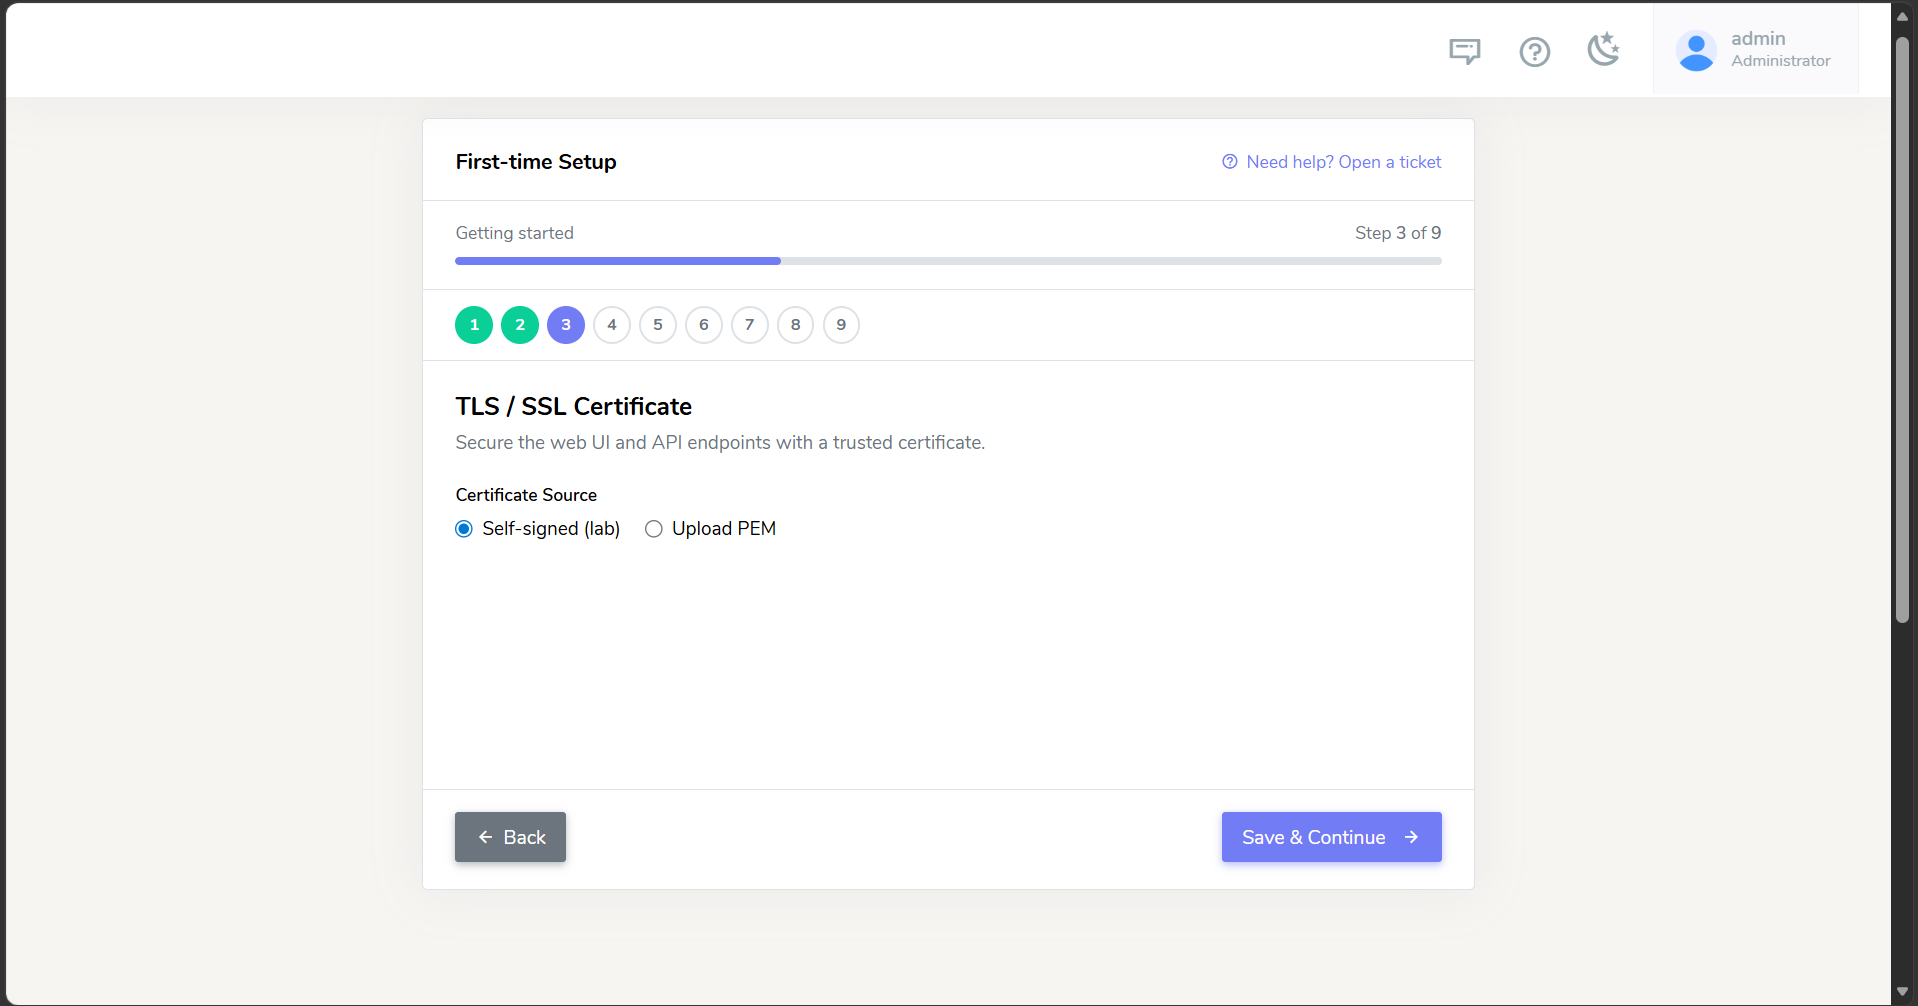
TLS (required)
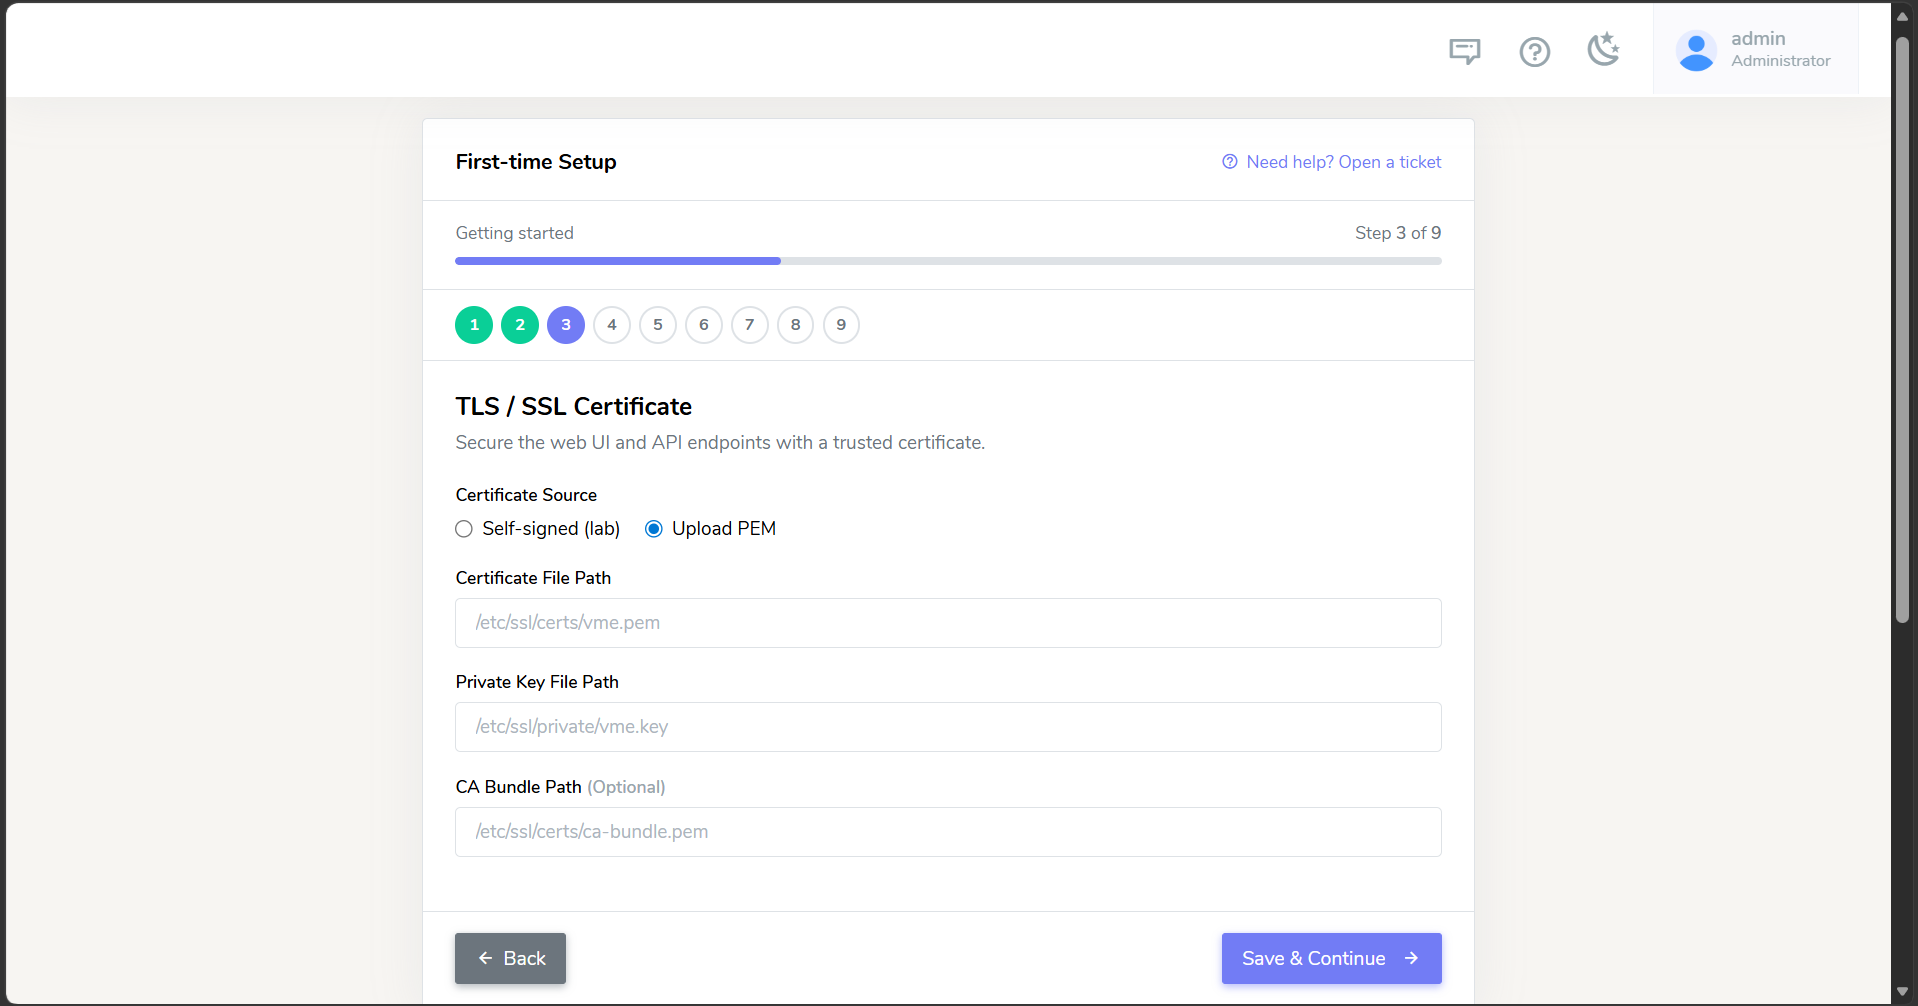
Keep the self-signed certificate (fine for a lab), or install your own from PEM files on the appliance, with an optional CA bundle.
Self-signed:
Provide a certificate:
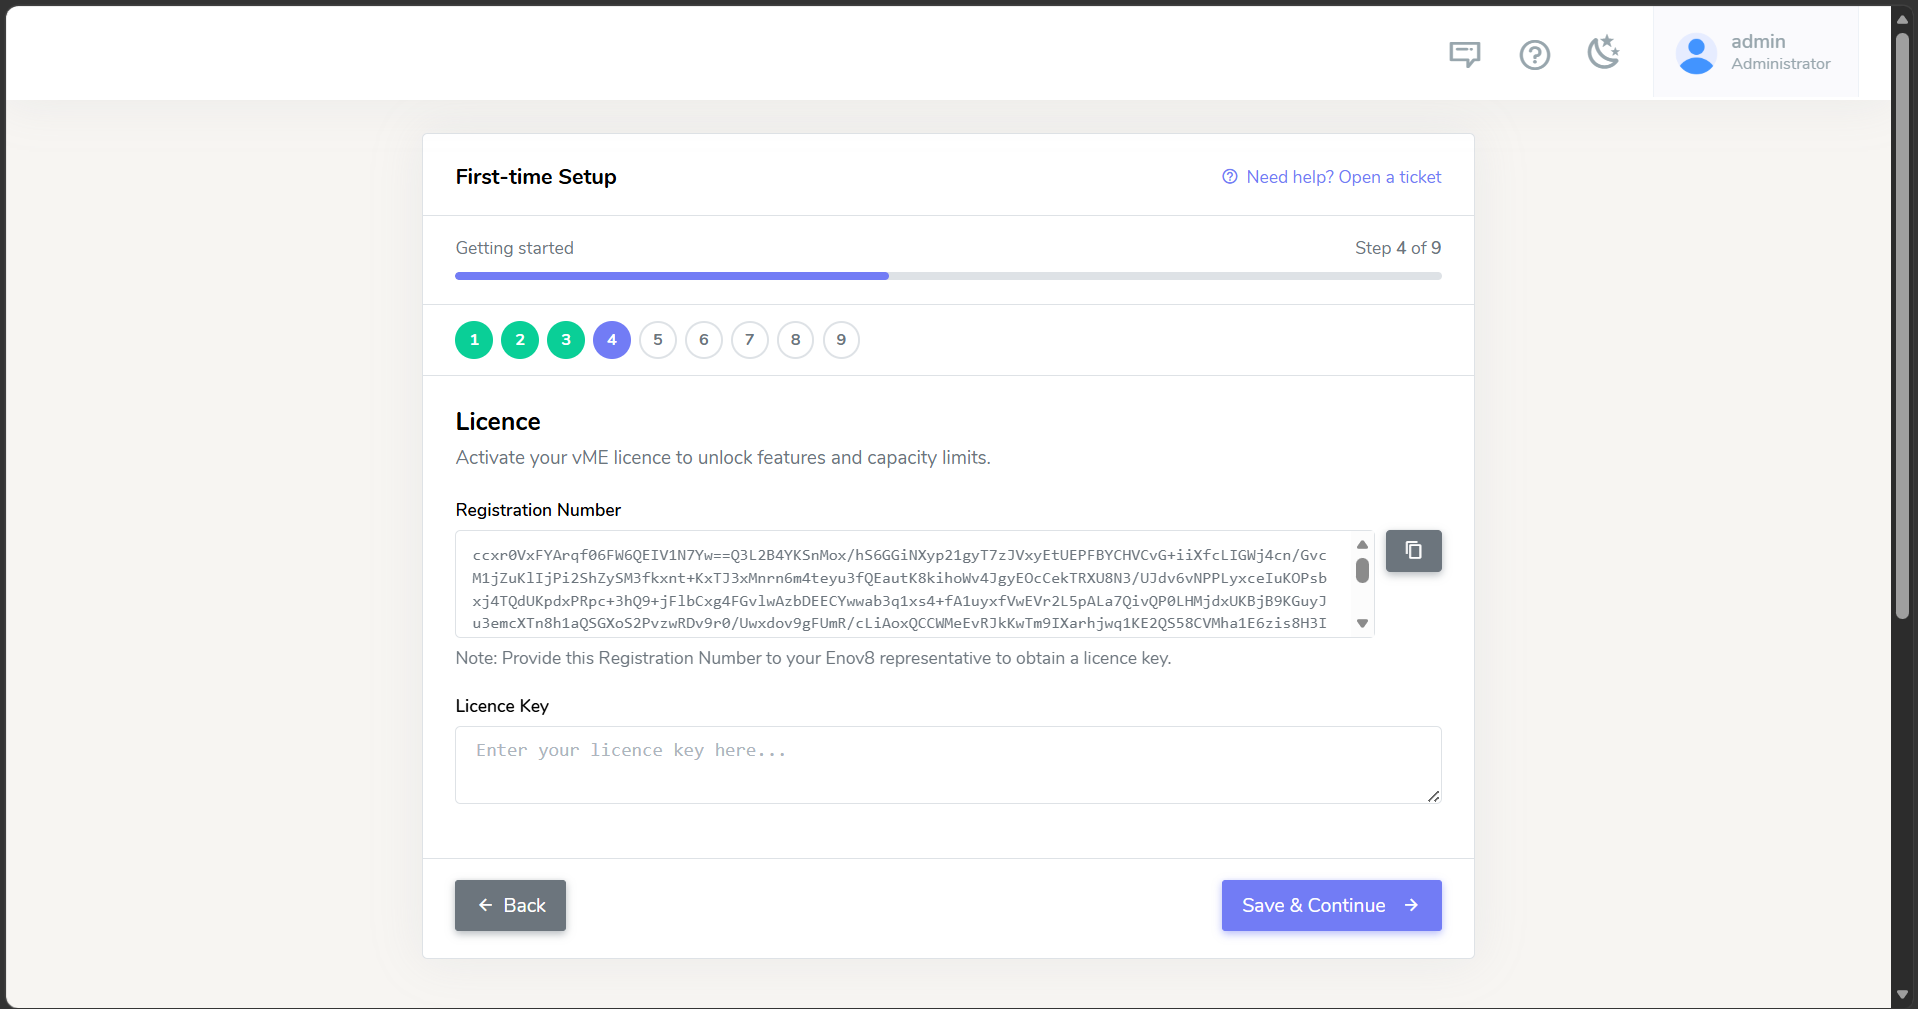
Licence (required)
Enter your licence key to activate the appliance.
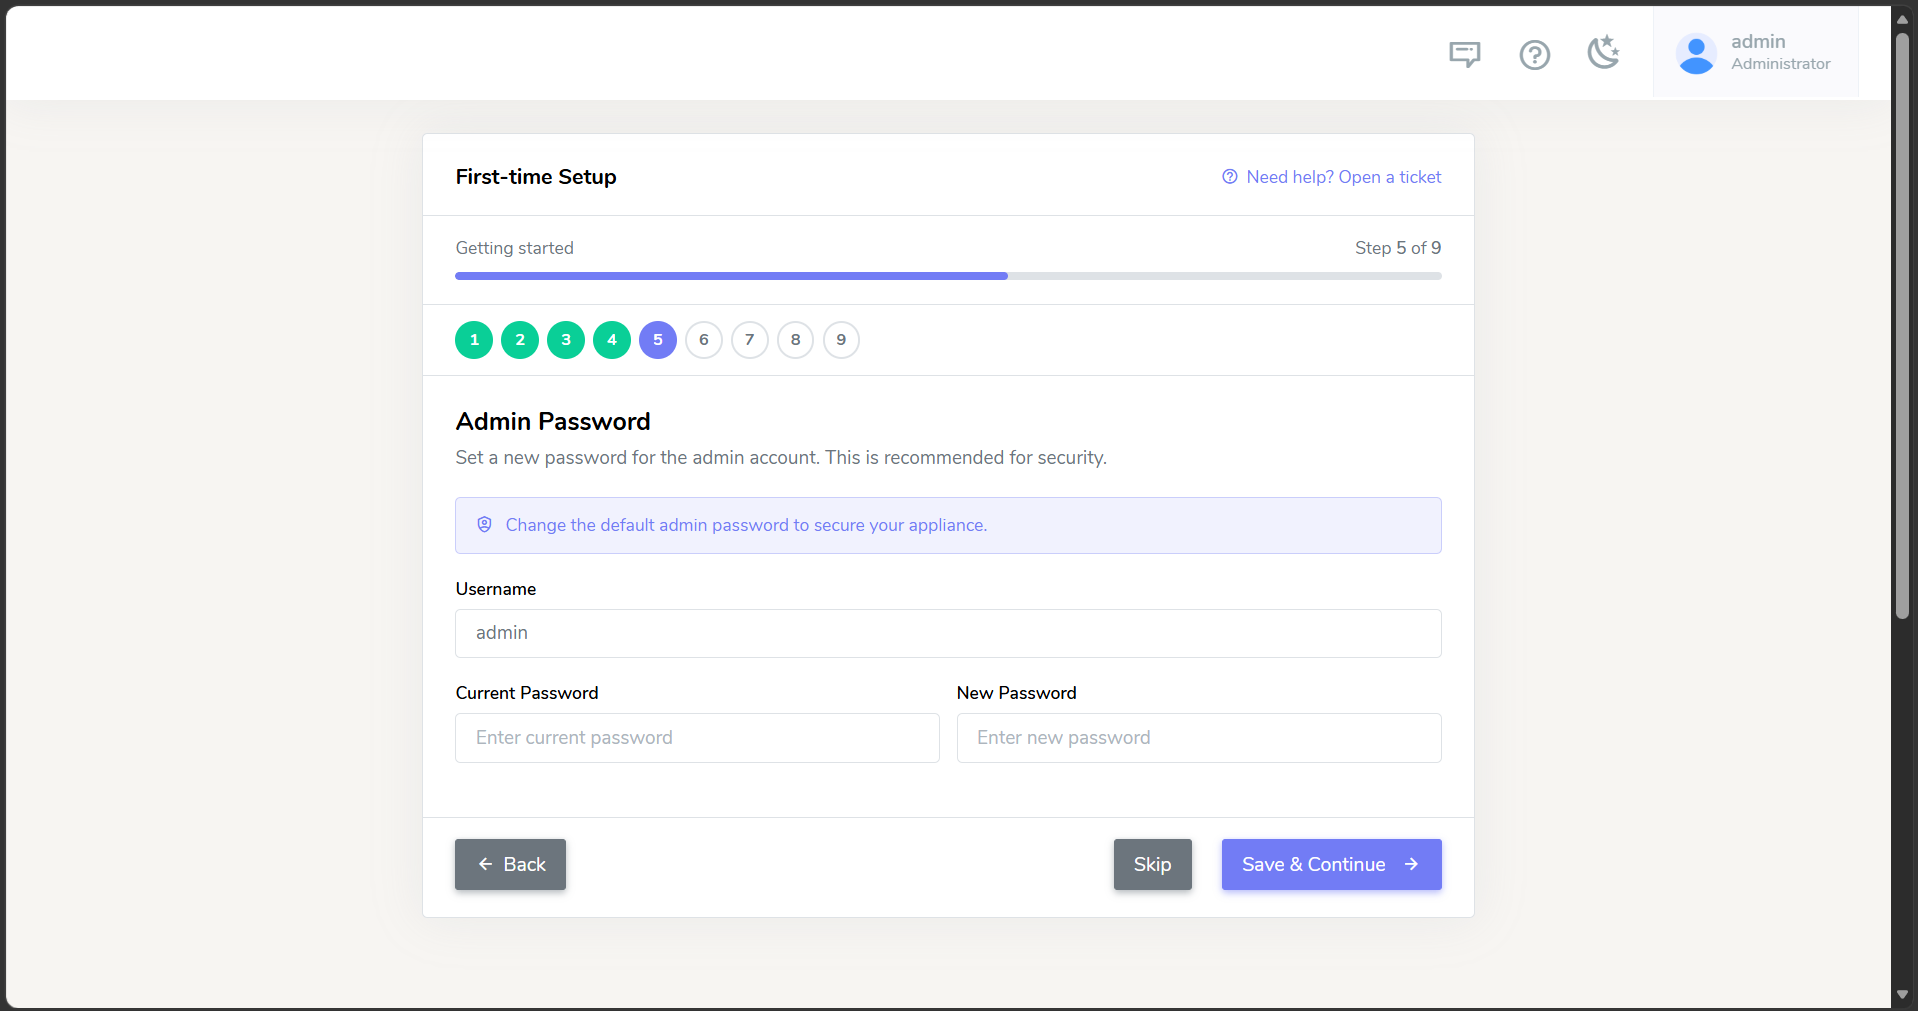
Reset password (required)
Change the default admin password.
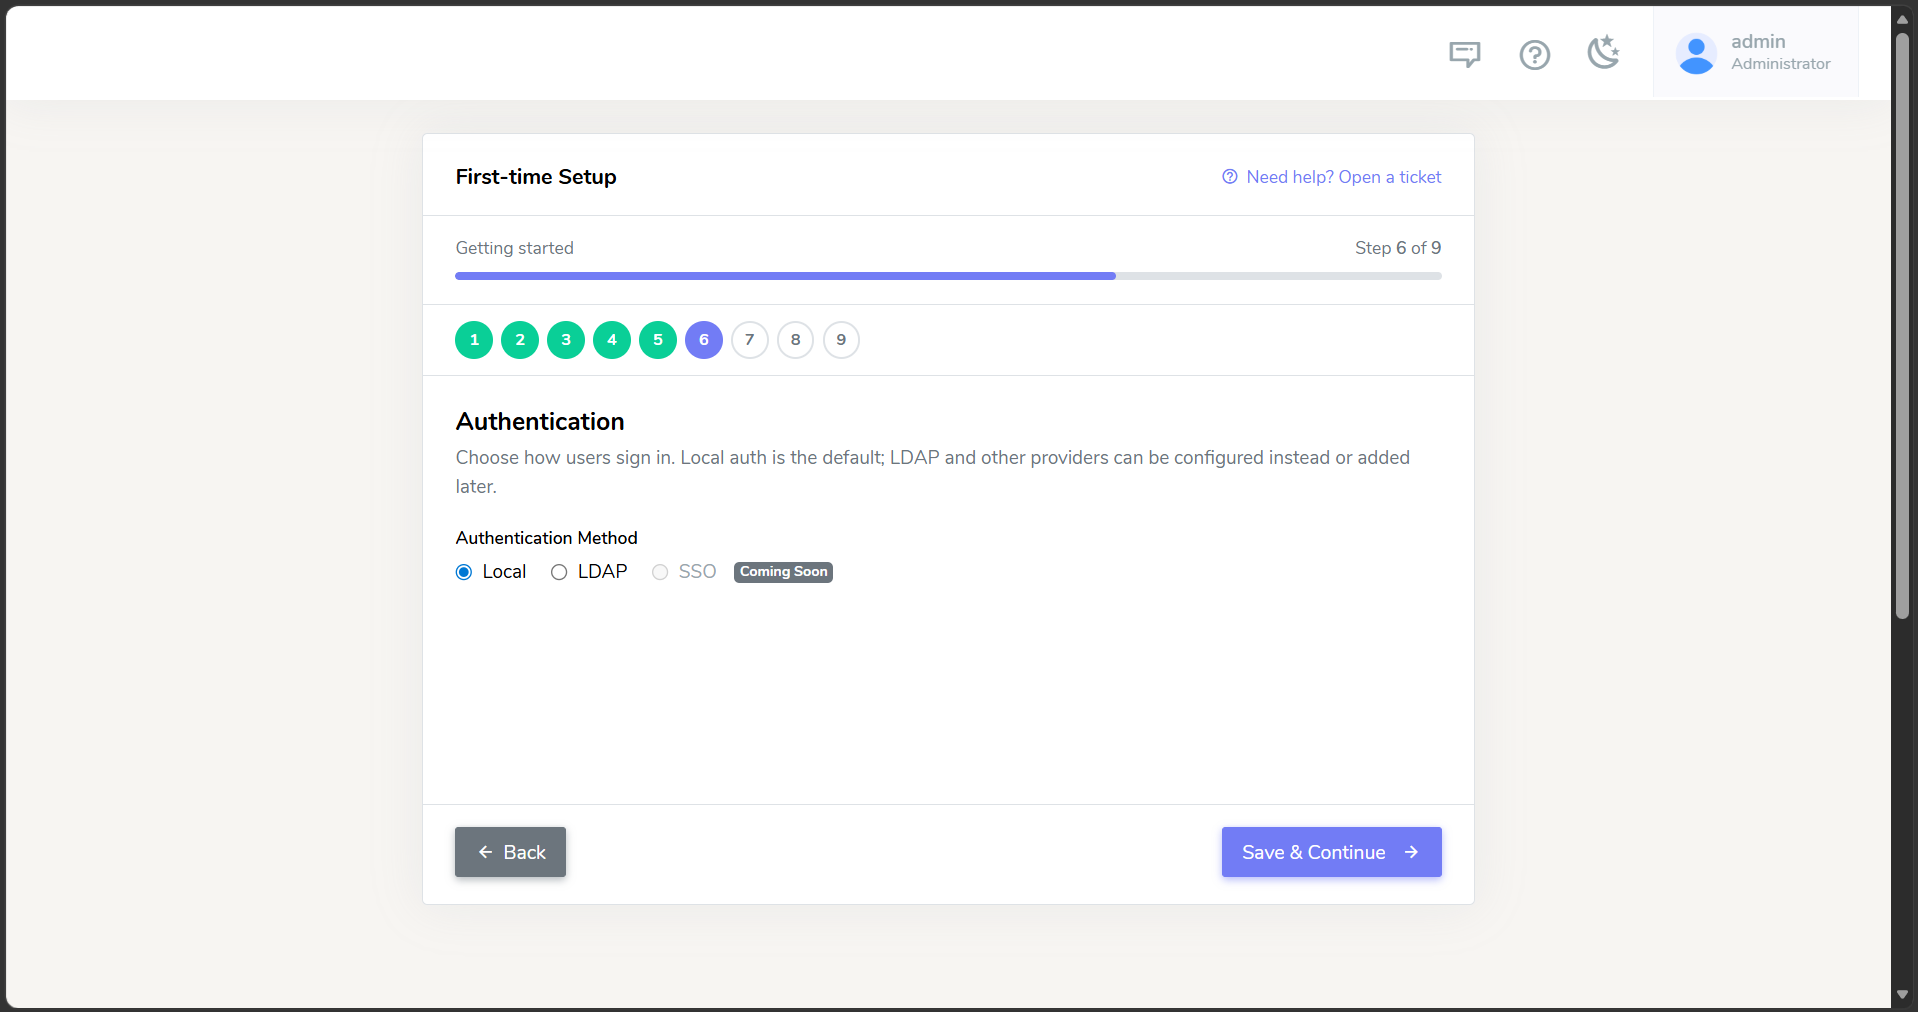
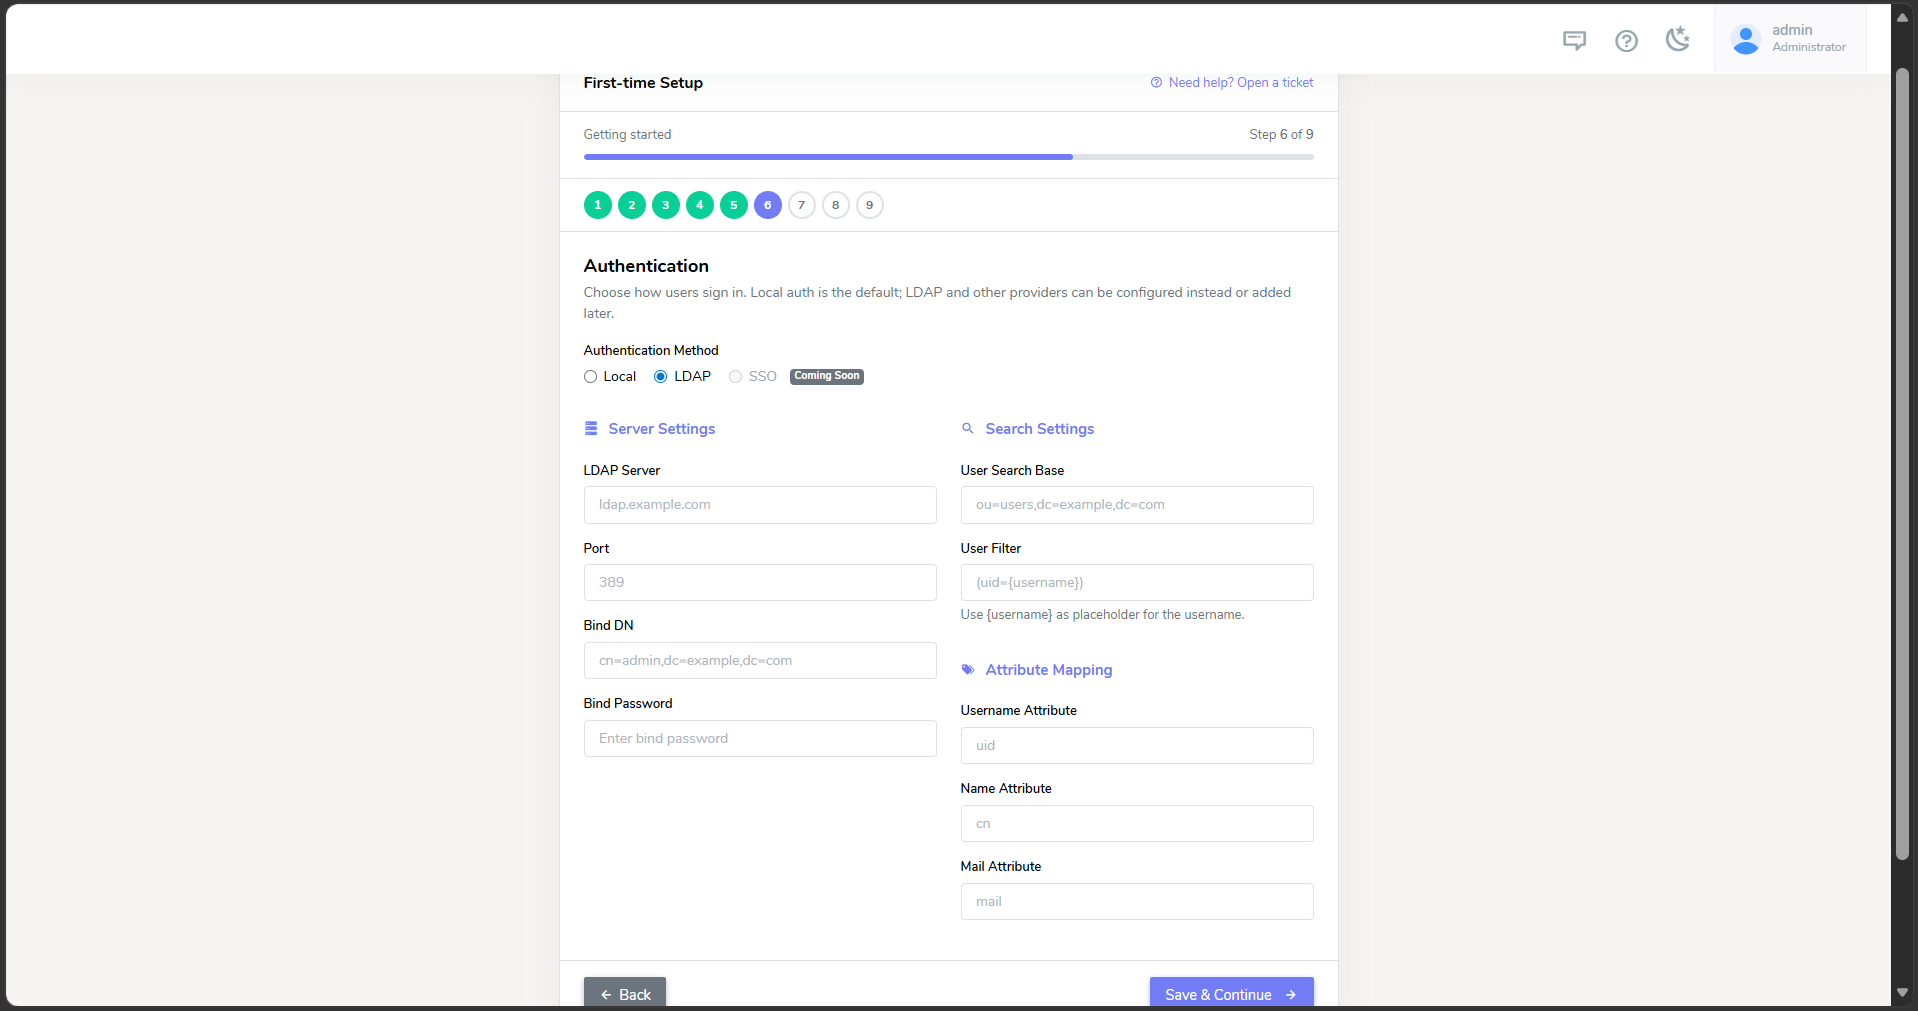
Authentication (required)
Choose Local (default) or LDAP.
Local:
LDAP:
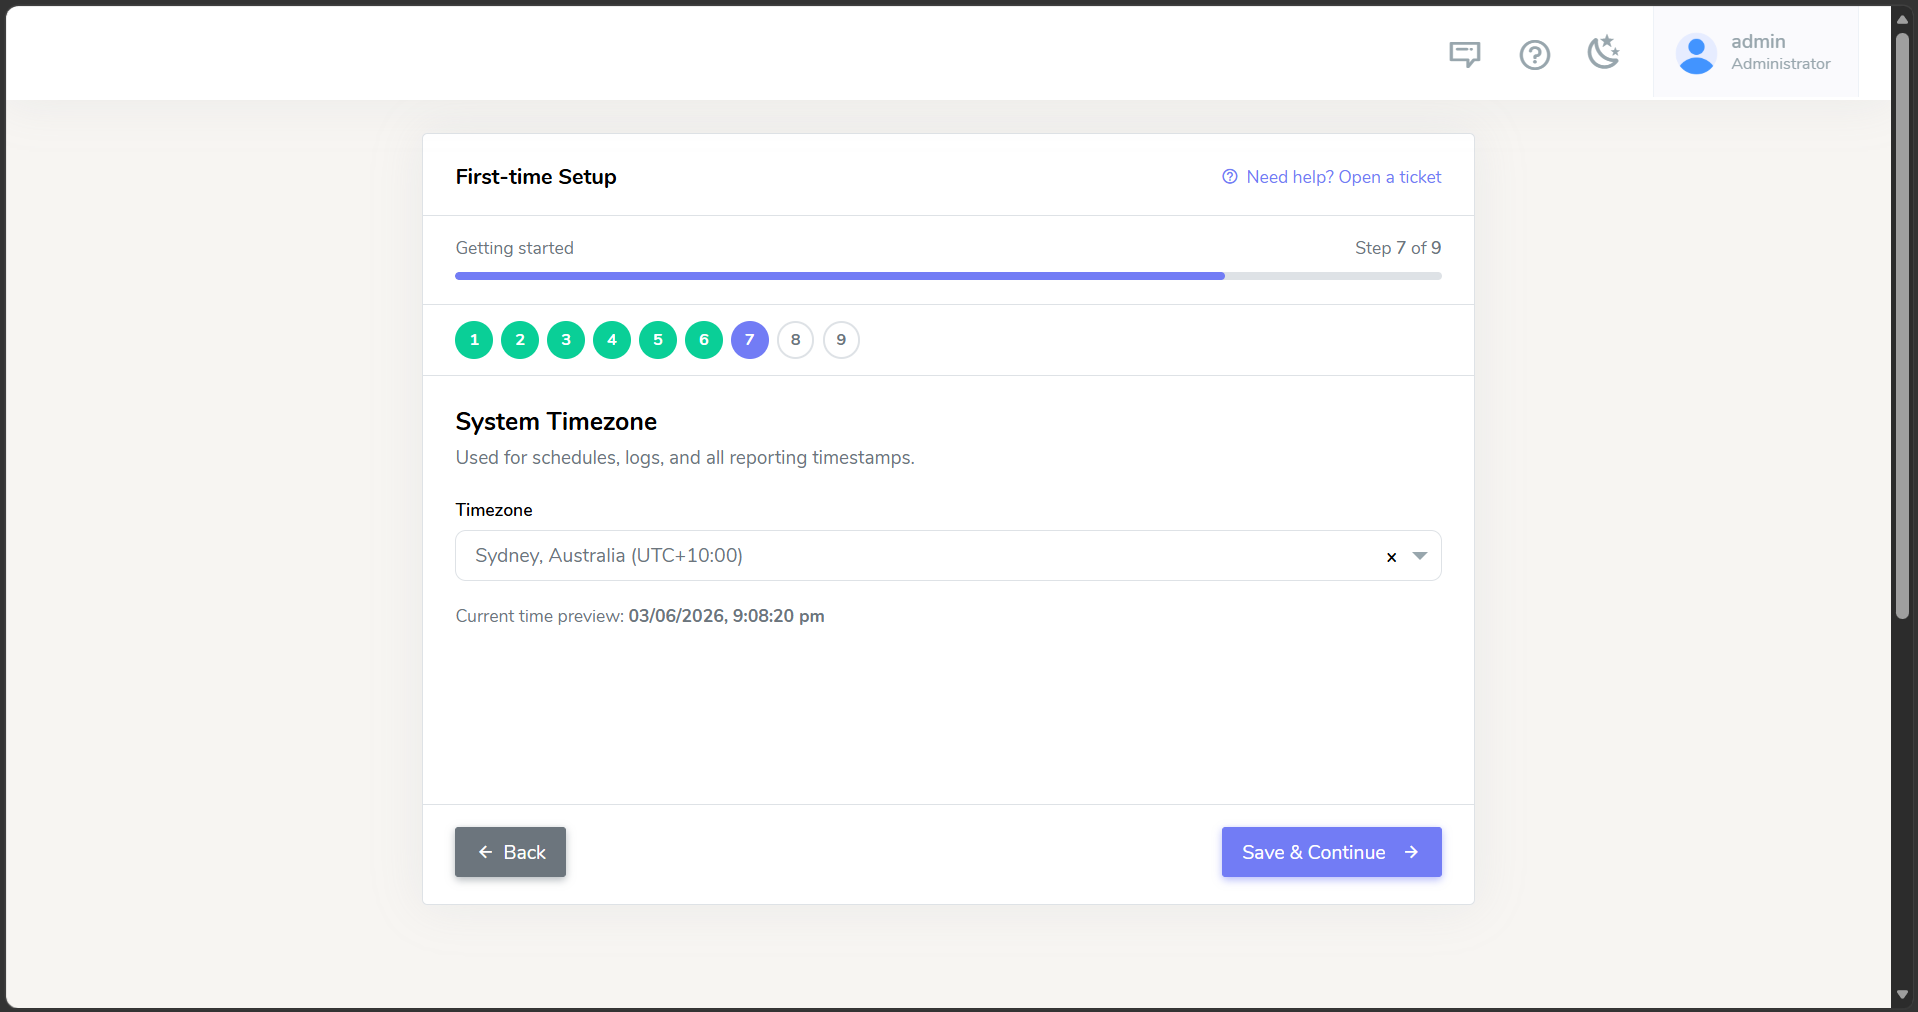
Timezone (required)
Select your region and UTC offset.
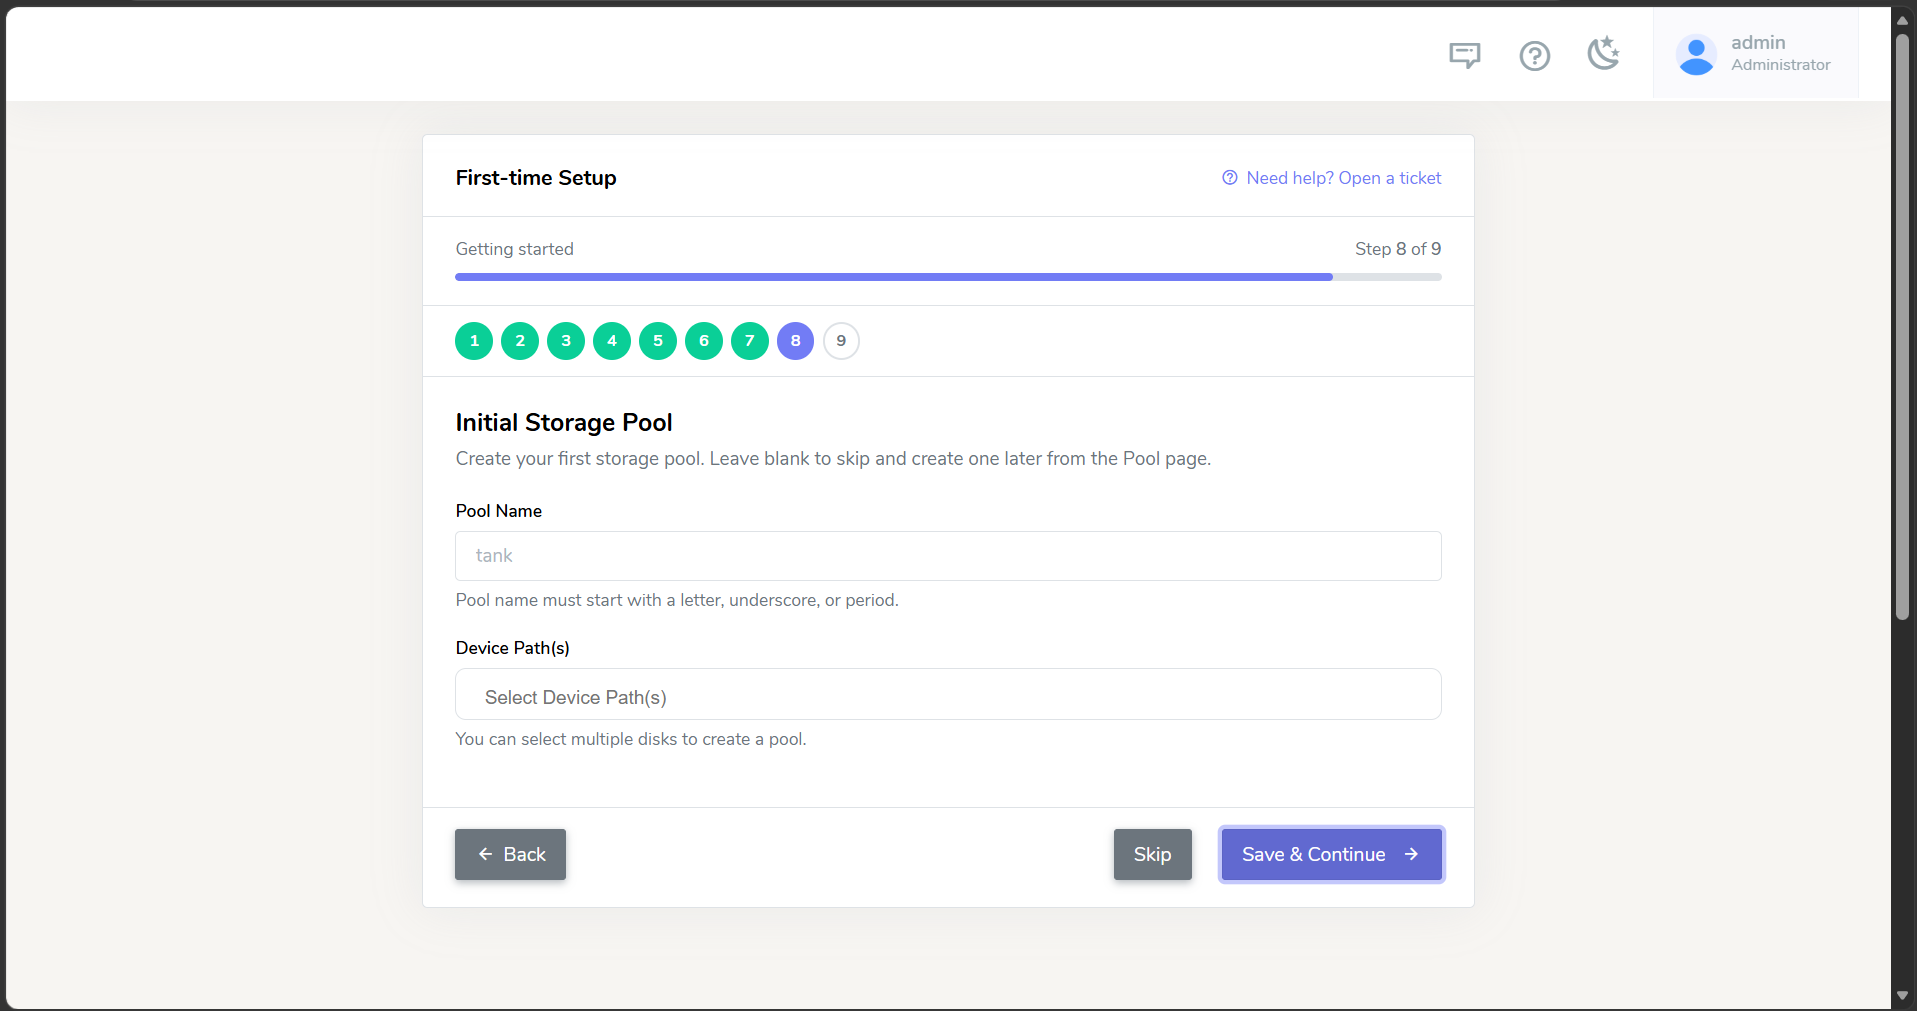
Pool (optional)
Create an initial storage pool now, or skip and create pools later from the main UI.
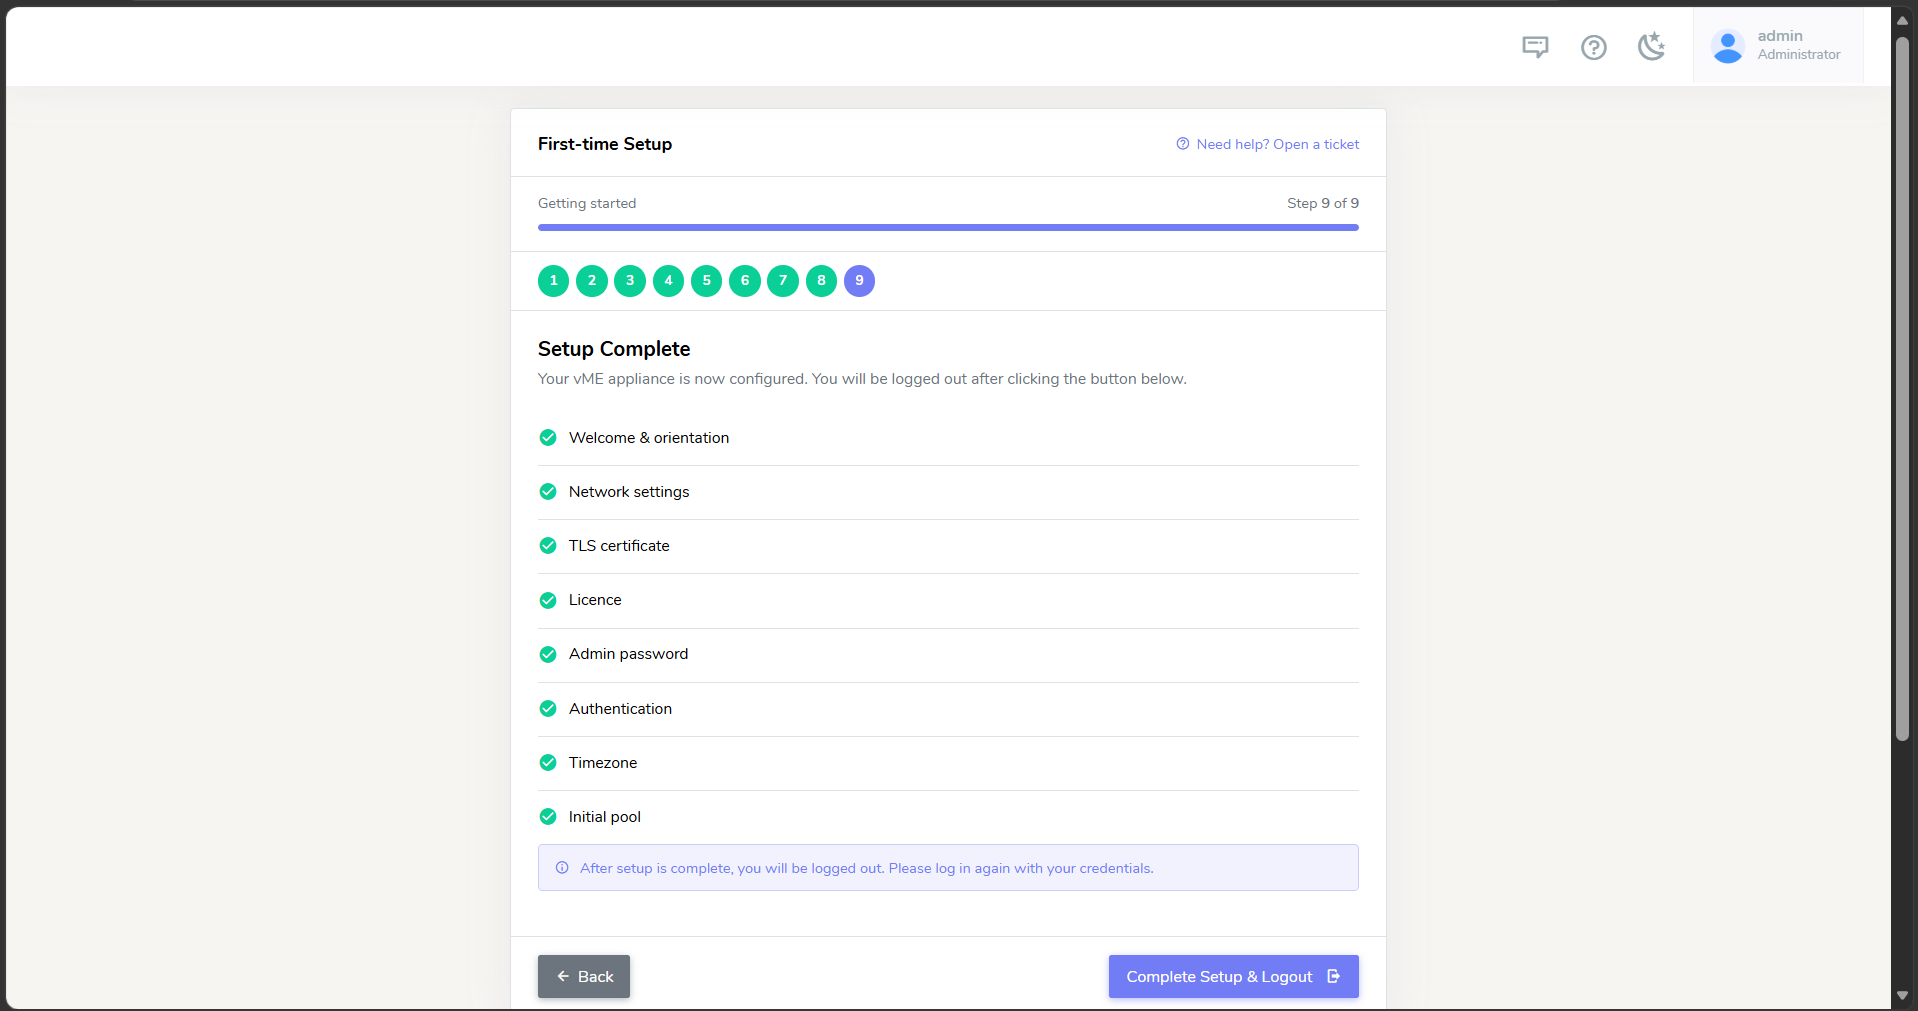
Finish
Review and finish. The wizard locks and redirects you to the login page.
5. After setup
- Log in with the new admin password.
- Configure sources, pools (if skipped), and the rest of vME from the normal UI.
The setup wizard is a one-time flow and locks once finished. If you need to reset the appliance or re-run the wizard, contact enov8 Support.
Related documentation
- VMware Install Guide: deploy the OVA on VMware ESXi
- Hyper-V Install Guide: deploy the VHDX package on Hyper-V