Hyper-V install guide
The DataFactory appliance for Hyper-V is a ready-made Ubuntu 22.04 virtual machine with DataFactory inside. It is a Generation 2 (UEFI) VM with an OS disk and a blank data disk, which you import into Hyper-V Manager. Start it, and DataFactory sets itself up on the first boot. It needs no internet access.
Steps to deploy DataFactory on Microsoft Hyper-V
1. Download and extract the appliance
Enov8 sends you a download link for the appliance, one .zip file: enov8-datafactory-1.3.0-vmconfig-9.0-release.zip. For other versions the name follows the pattern enov8-datafactory-<version>-vmconfig-9.0-release.zip.
Download it, then extract it (PowerShell):
Expand-Archive .\enov8-datafactory-1.3.0-vmconfig-9.0-release.zip -DestinationPath .\datafactory
The extracted enov8-datafactory-1.3.0-vmconfig-9.0 folder holds Virtual Machines, Virtual Hard Disks and Snapshots. Virtual Hard Disks contains two disks:
| Disk | Purpose |
|---|---|
enov8-datafactory-1.3.0-vmconfig-9.0.vhdx | The OS disk |
enov8-datafactory-1.3.0-vmconfig-9.0-data.vhdx | The data disk, blank |
Keep the folders together. This is the folder you import.
2. Check the host can run it
The host needs Hyper-V on Windows Server 2019 or later.
The virtual machine ships at this size:
| Resource | As shipped | Minimum |
|---|---|---|
| vCPU | 8 | 4 |
| Memory | 32 GB (32768 MB), static | 16 GB |
| OS disk | 128 GB, dynamically expanding | as shipped |
| Data disk | 200 GB, dynamically expanding, blank | 50 GB |
The data disk holds the database and generated files. Size it for your data. To make it larger, grow it before the first boot (step 5.2).
Hyper-V Manager only imports a VM the host can run as shipped. On a host with at least 8 logical processors and about 40 GB of memory or more, import with Hyper-V Manager (step 3). On a smaller host, import with PowerShell instead (step 4).
Users reach DataFactory on port 443. Port 80 redirects to it. The appliance needs outbound access only to the databases your users connect to, plus your identity provider and AI endpoint if you use them.
3. Import with Hyper-V Manager
- Open Hyper-V Manager, select the Hyper-V host to deploy DataFactory on, and in the Actions pane click Import Virtual Machine...
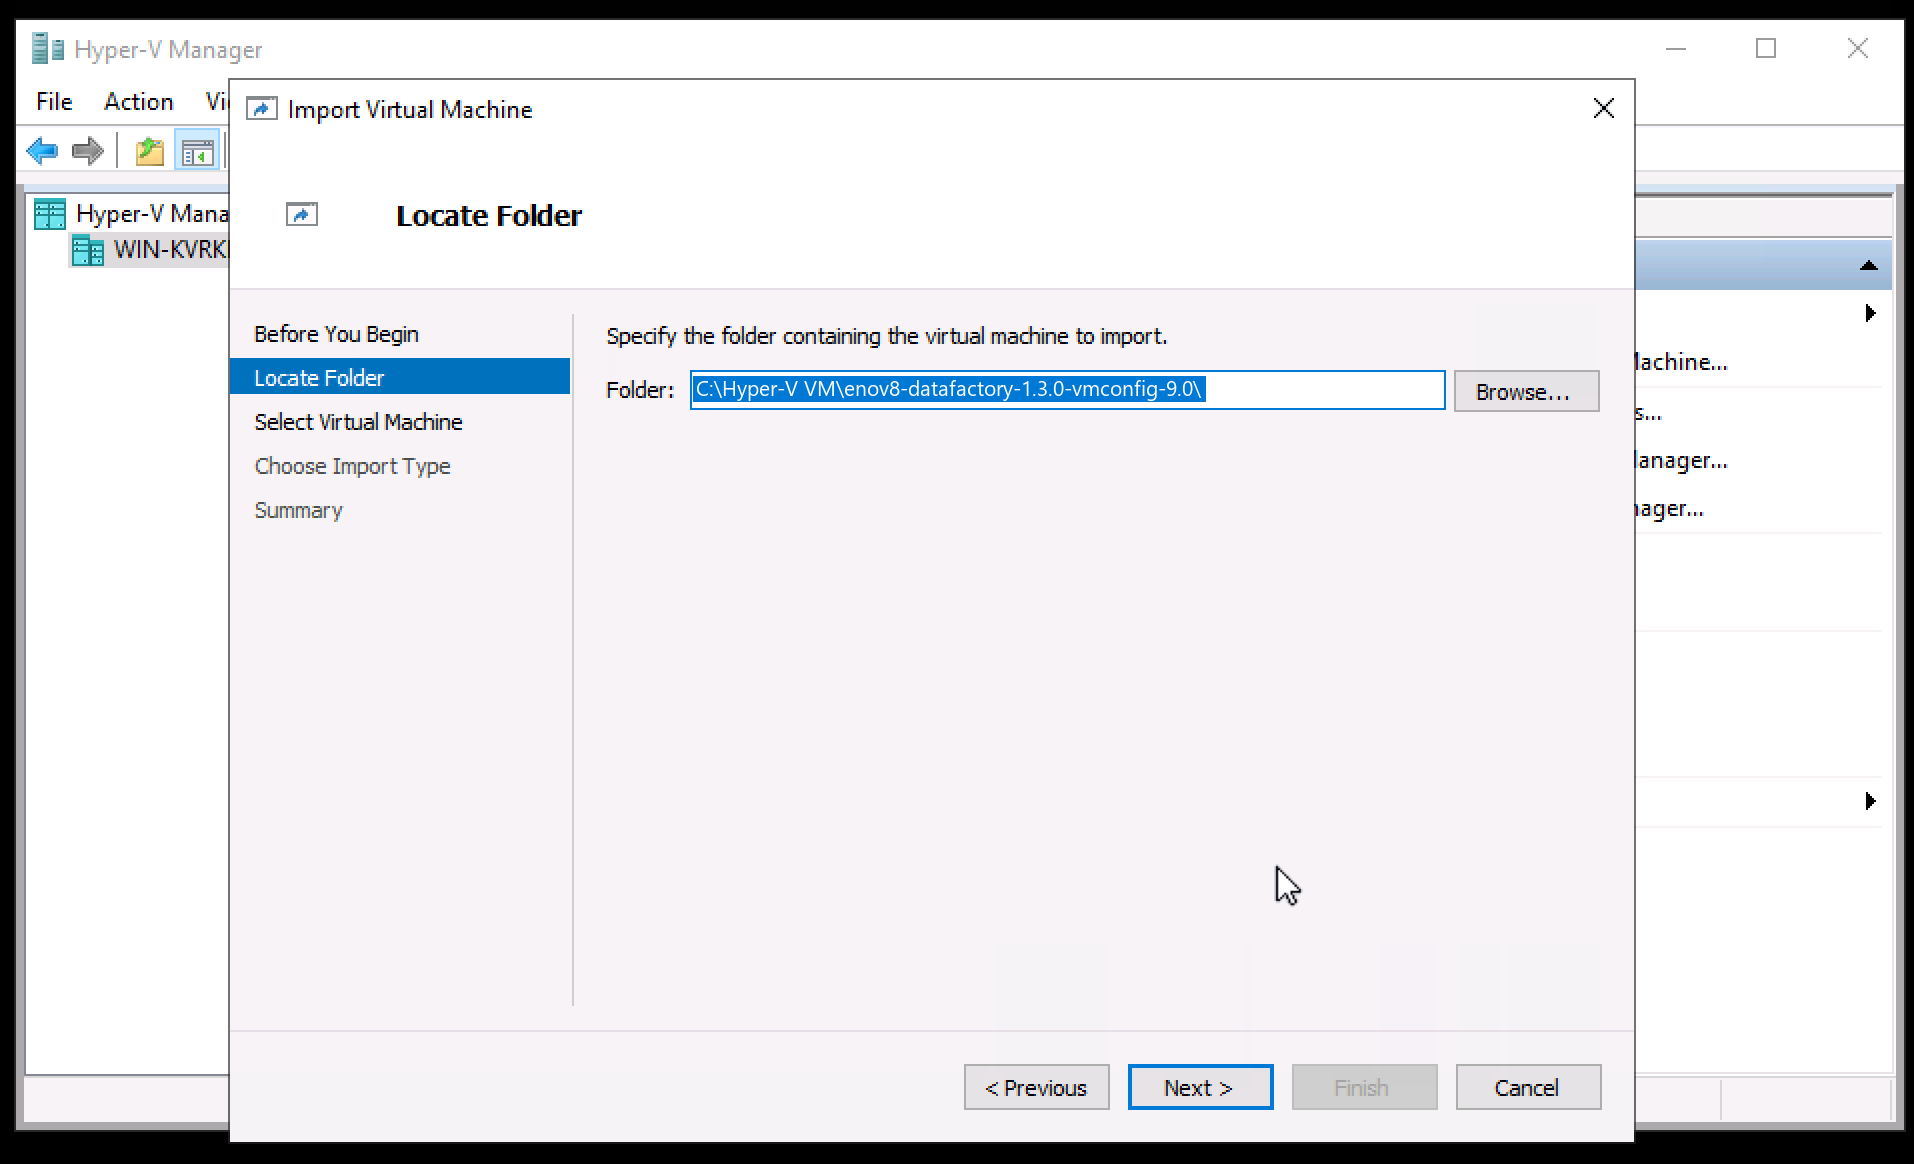
3.1 Locate Folder
- Click Browse, select the extracted
enov8-datafactory-1.3.0-vmconfig-9.0folder and click Next.
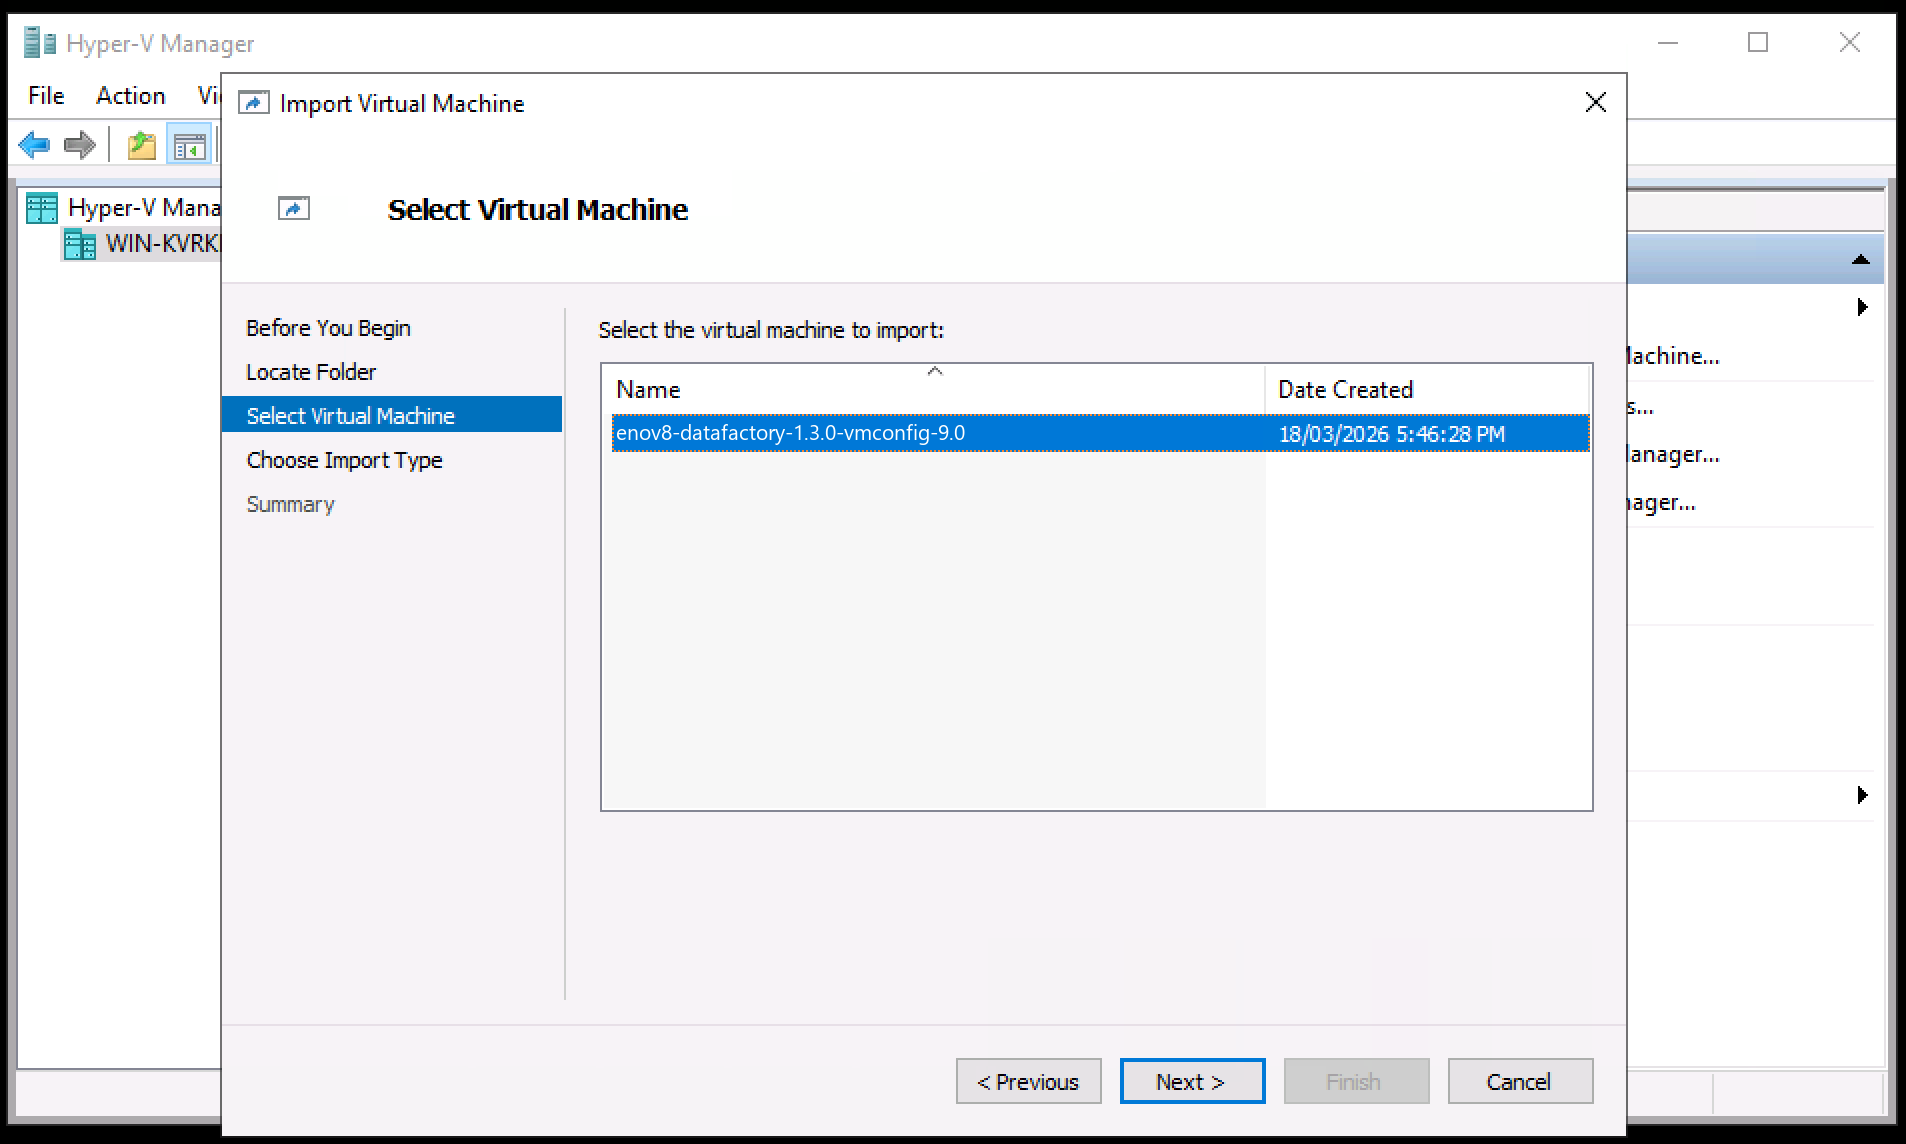
3.2 Select Virtual Machine
- The wizard finds the virtual machine
enov8-datafactory-1.3.0-vmconfig-9.0in the folder. Select it and click Next.
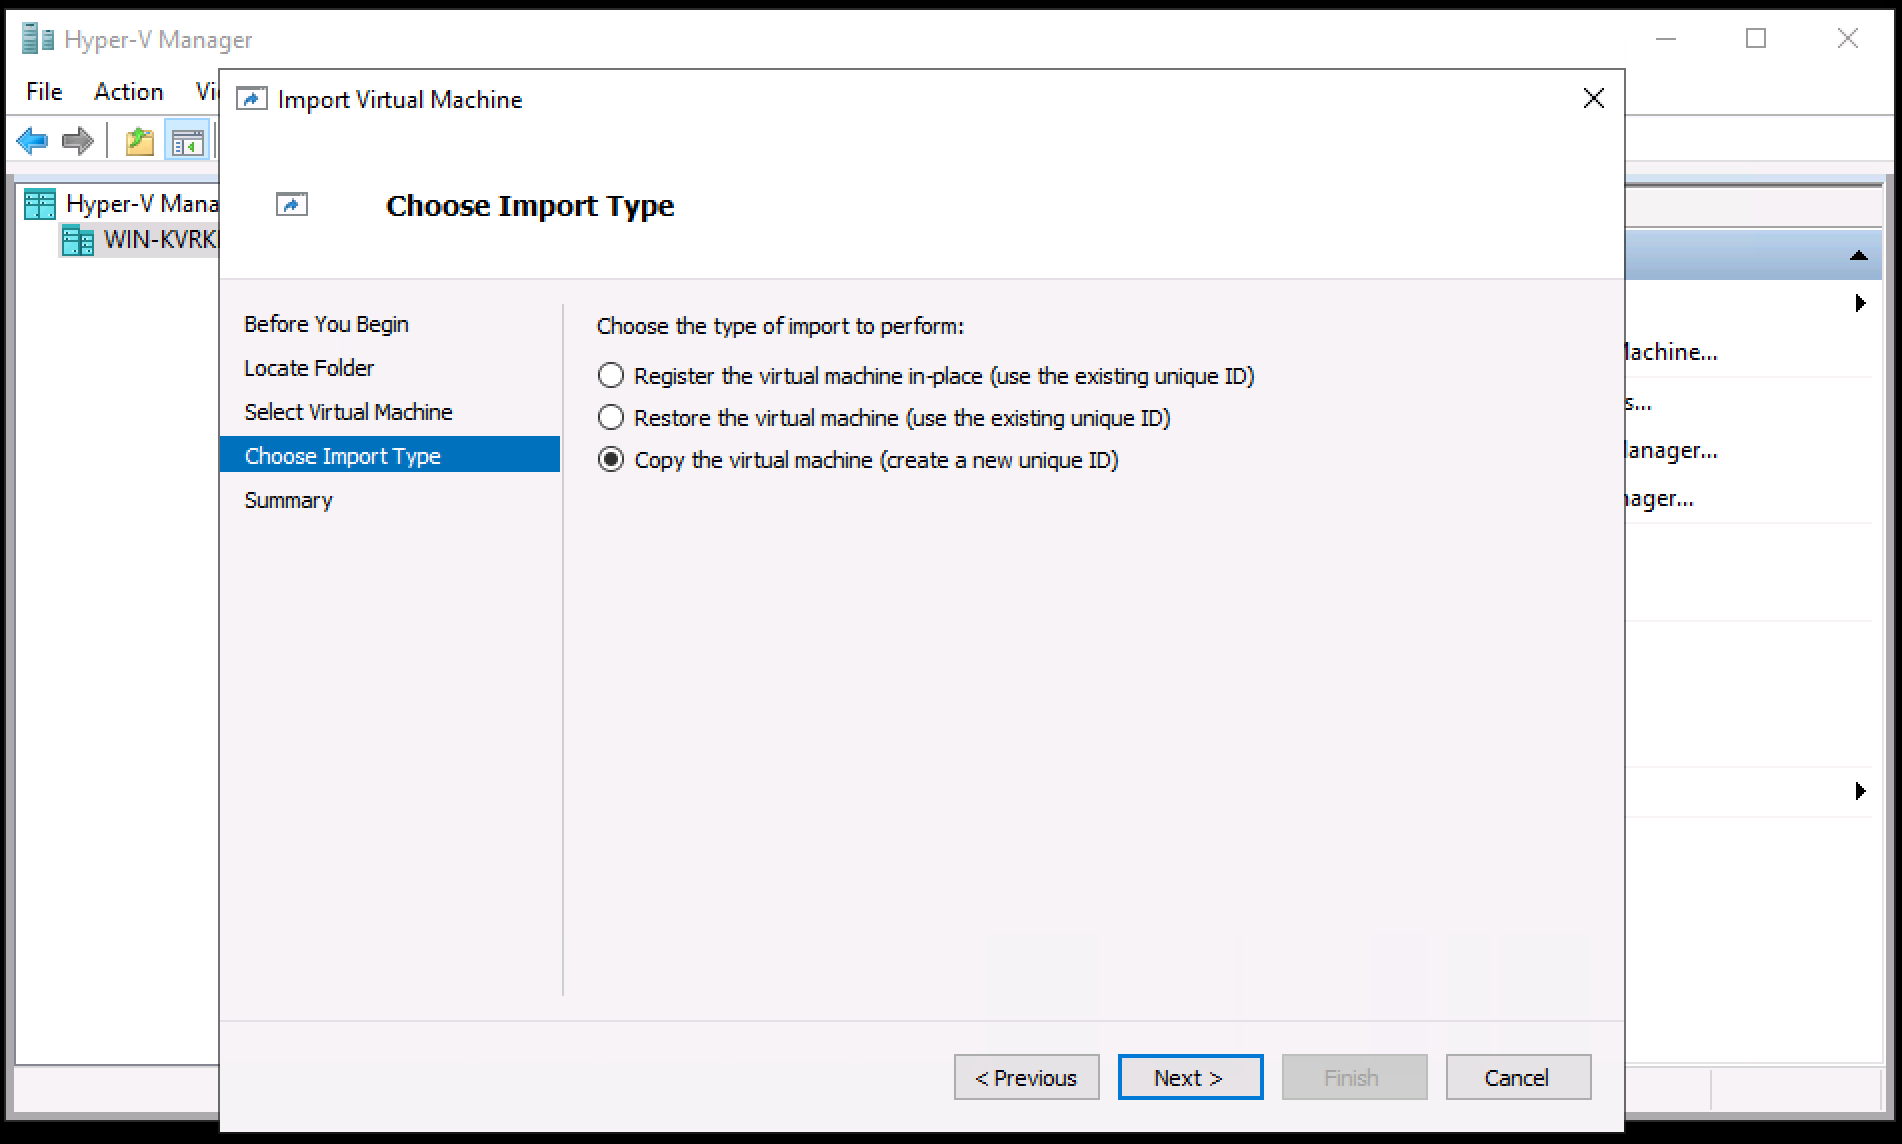
3.3 Choose Import Type
- Select Copy the virtual machine (create a new unique ID) and click Next.
Copying assigns a unique ID, so you can import the same appliance more than once on one host.
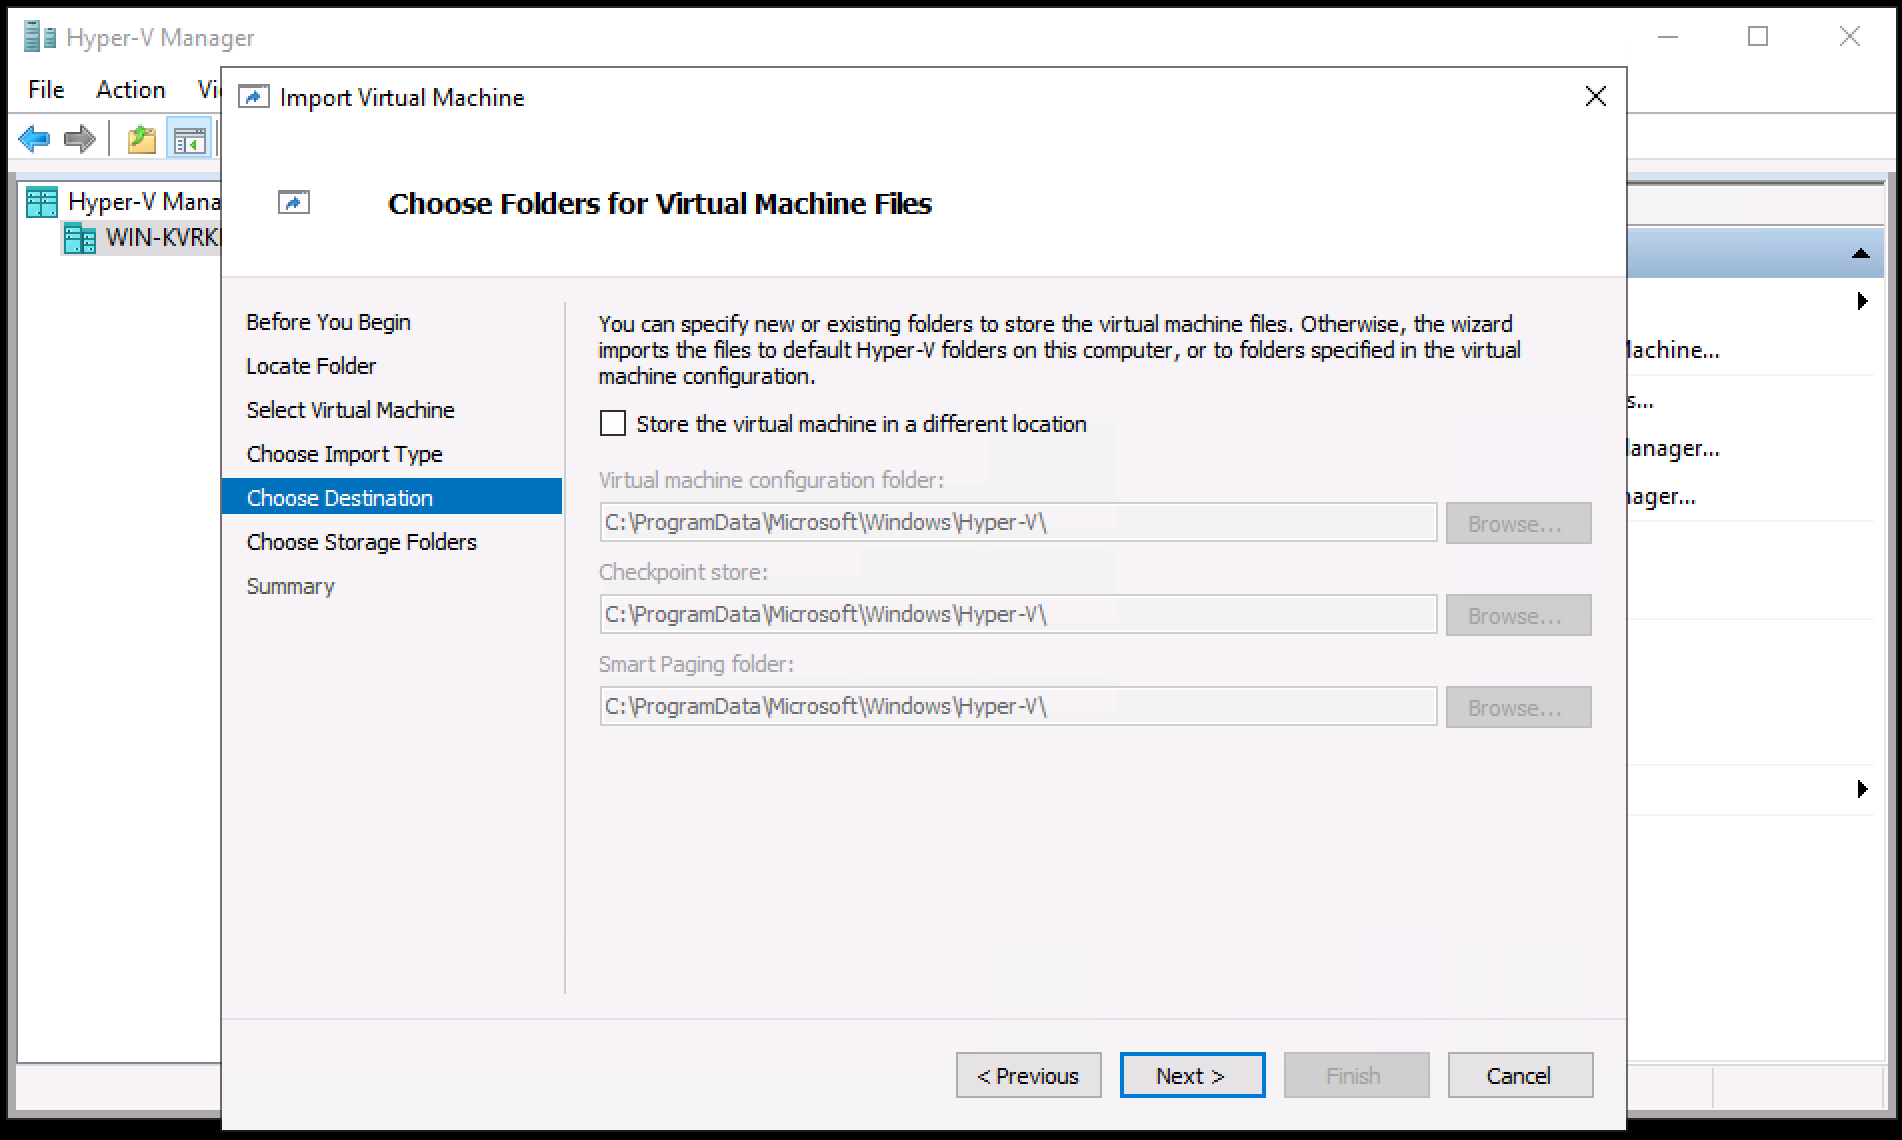
3.4 Choose Destination
- Accept the default folders for the virtual machine files, or browse to your preferred storage location, and click Next.
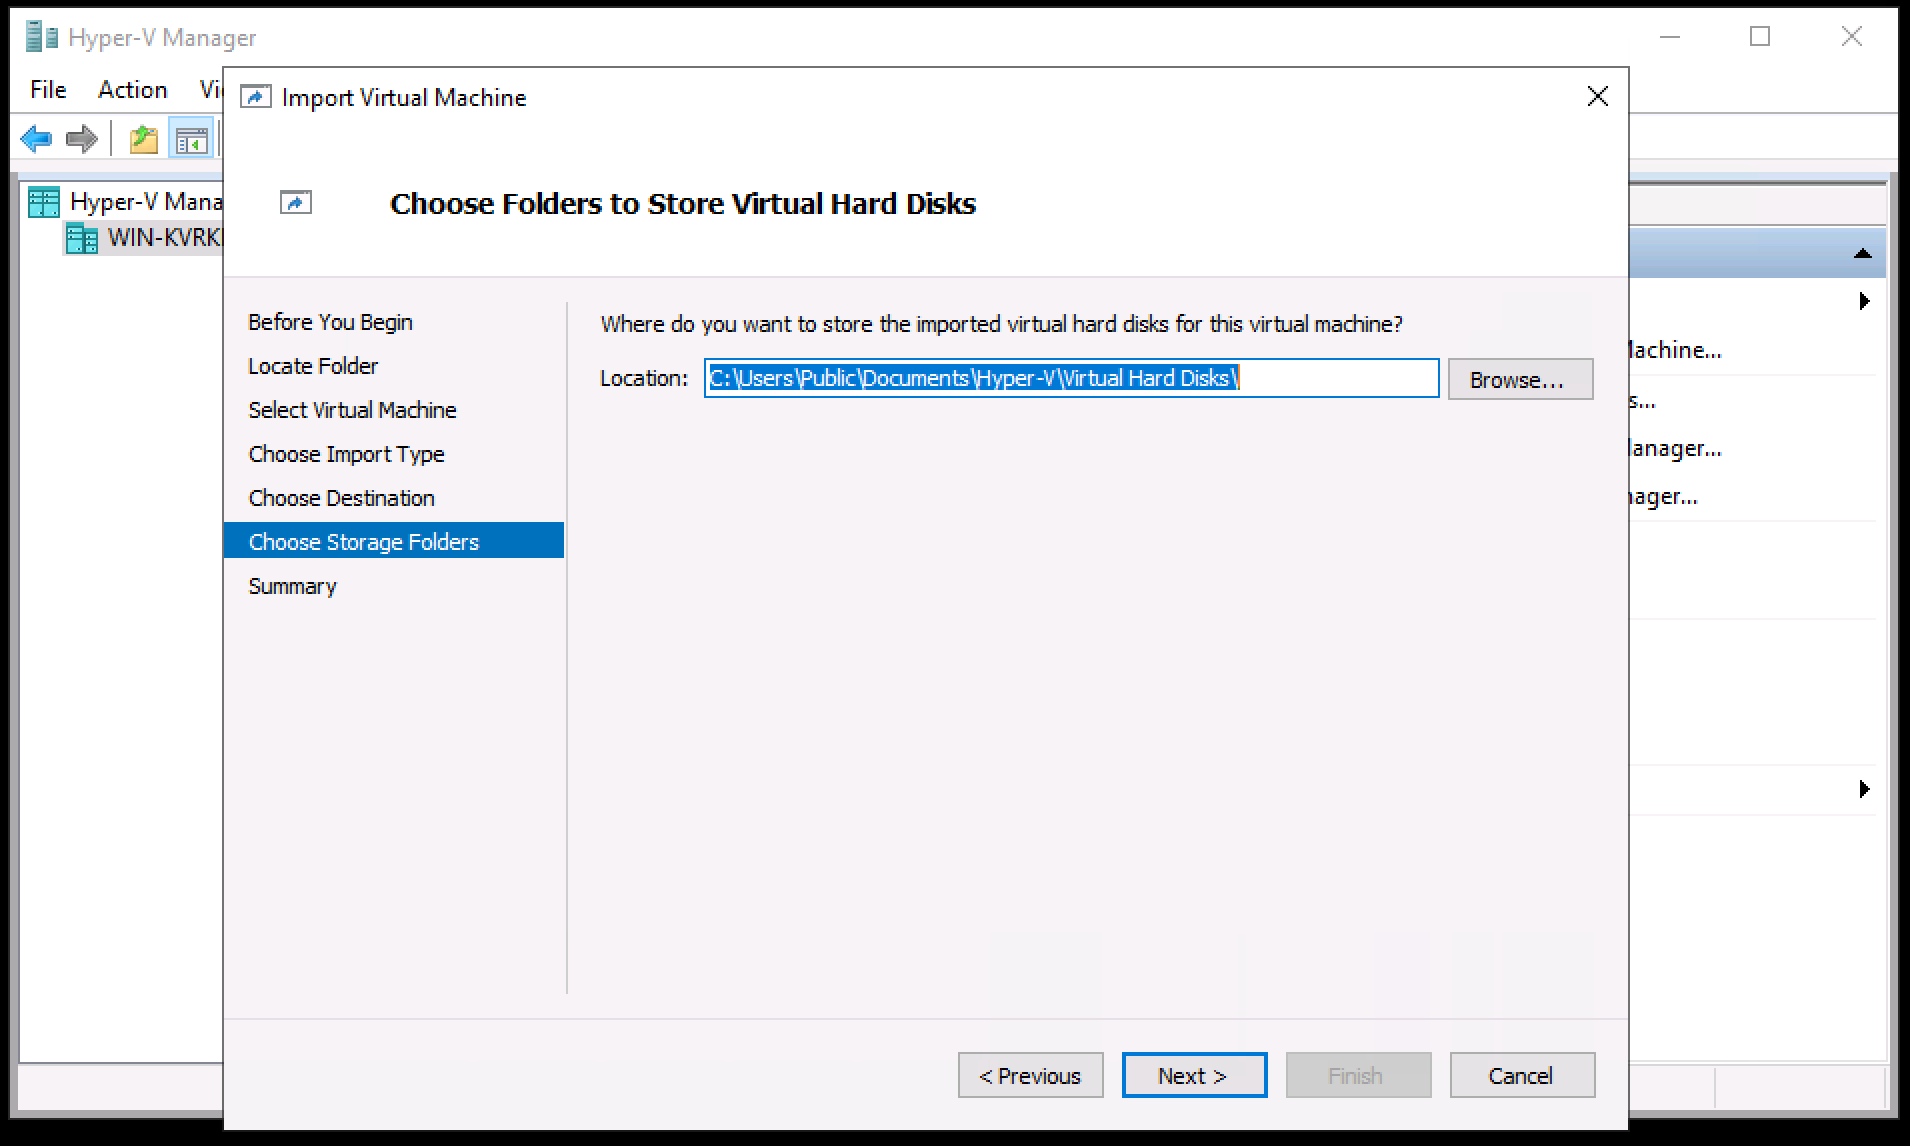
3.5 Choose Storage Folders
- Choose the folder for the two virtual hard disks and click Next.
3.6 Review and Finish
- Review the summary and click Finish. The import runs in the Status pane. When it finishes, the virtual machine appears in the Virtual Machines list.
Do not close Hyper-V Manager until the import is complete.
Continue with step 5.
4. Import with PowerShell (smaller hosts)
If the host has fewer than 8 processors or less than about 40 GB of memory, Hyper-V Manager refuses the import with "configuration errors". Import from an elevated PowerShell instead, and lower the size, no lower than the minimum above:
$vmcx = Get-ChildItem '.\datafactory\enov8-datafactory-1.3.0-vmconfig-9.0\Virtual Machines\*.vmcx'
$report = Compare-VM -Path $vmcx.FullName -Copy -GenerateNewId `
    -VirtualMachinePath 'D:\Hyper-V\DataFactory' -VhdDestinationPath 'D:\Hyper-V\DataFactory\Virtual Hard Disks'
Set-VMProcessor -VM $report.VM -Count 4
Set-VMMemory -VM $report.VM -StartupBytes 16GB
Import-VM -CompatibilityReport $report
The virtual machine appears in Hyper-V Manager when Import-VM returns.
5. Before first boot
Right-click the virtual machine and click Settings...
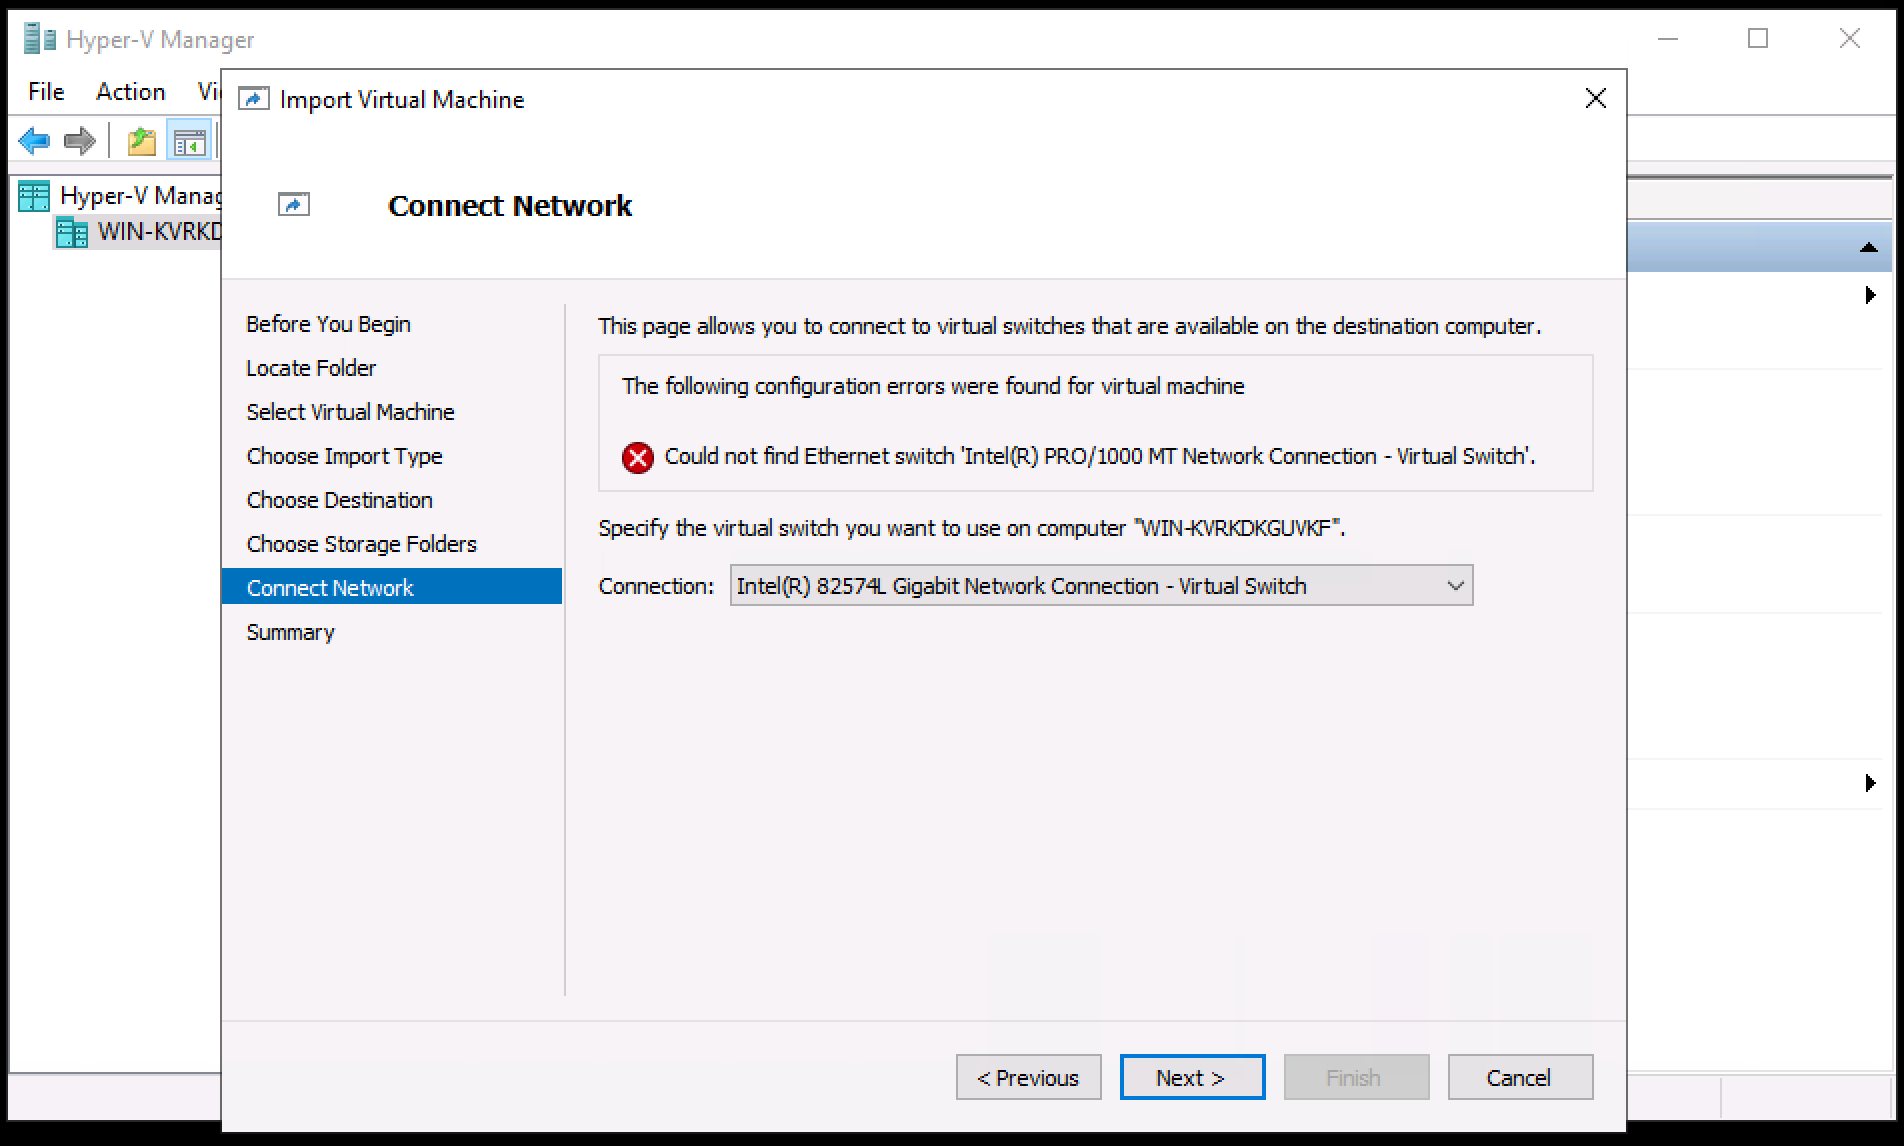
5.1 Connect the network
- Network Adapter: the adapter ships unconnected. Set the Virtual Switch to one on the network your users and databases are on.
- Network Adapter > Advanced Features > MAC address: select Static, so the VM keeps its address reservation if you use one.
Make sure the selected virtual switch can reach the databases DataFactory will connect to.
5.2 Check processors, memory and the data disk
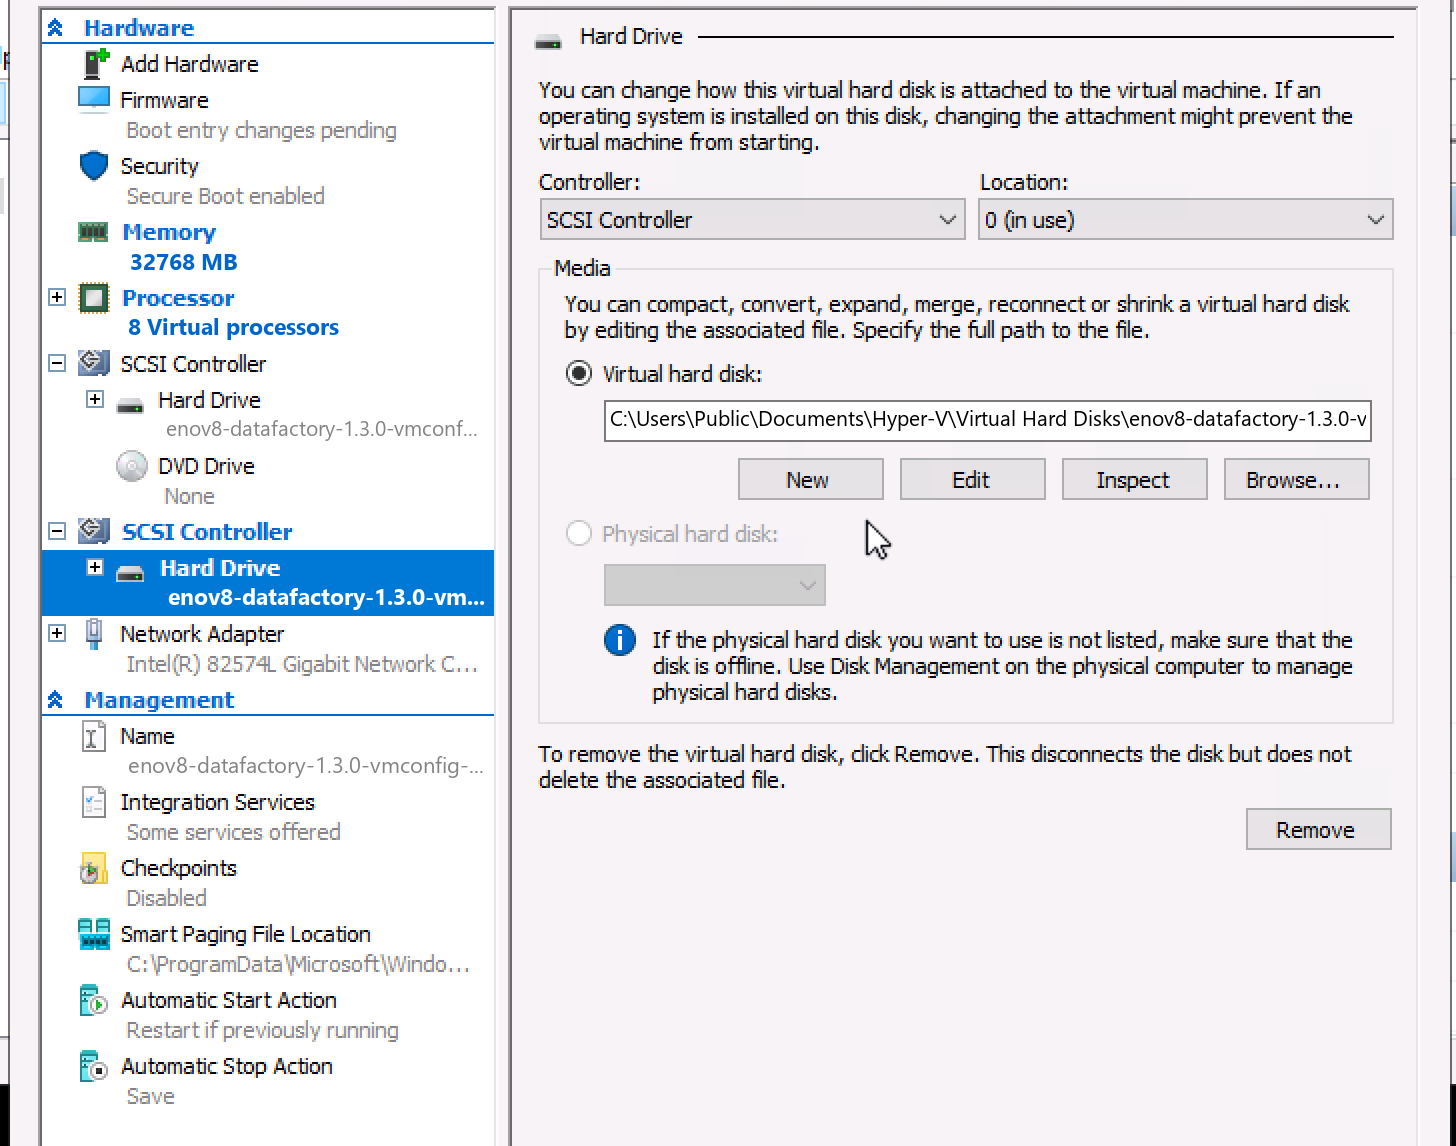
- Processor shows 8 virtual processors and Memory shows 32768 MB of static memory. Leave them as they are unless you imported a smaller size in step 4.
- SCSI Controller > Hard Drive (
enov8-datafactory-1.3.0-vmconfig-9.0-data.vhdx, on its own SCSI controller): this is the data disk. Keep it attached and leave it blank. The first boot formats it. - To make the data disk larger, use Edit Disk > Expand now.
- Click OK to save.
Grow the data disk only before the first boot. The first boot formats the disk at the size it has then.
Secure Boot (template Microsoft UEFI Certificate Authority) and static memory are already set. No firmware or memory changes are needed.
6. Start the VM and open the console
- Right-click the virtual machine and click Start, then Connect... to open its console.
- The first boot sets up DataFactory and takes a few minutes. While it runs, the console says Setting up for the first time. When it's done, the console shows the web address and the sign-in.
Next step: first boot and sign-in
Browse to the web address the console shows, sign in as admin / admin, choose a new password and install your licence.
→ Continue to First boot and sign-in for the full step-by-step walkthrough.
Troubleshooting
| Symptom | What to do |
|---|---|
| Import fails with "configuration errors" | The host has fewer processors or less memory than the VM asks for. Import with PowerShell (step 4). |
| Import can't find the disks | Import from the extracted folder, not from inside the .zip, and keep the Virtual Machines and Virtual Hard Disks folders together. |
| No address on the console | The network adapter isn't connected to a switch, or no DHCP server answered. Check step 5.1, or set a static address from the console menu. |
| The console says No data disk | The VM had no blank second disk at first boot. See First boot and sign-in. |
Related documentation
- VMware install guide: deploy the OVA on ESXi or vSphere
- First boot and sign-in: sign in, install the licence and use the console menu
- Install options: every way to host DataFactory