Masking
Overview of Masking
The next step of the process is to Mask your Data Source. Masking obscures data to protect personally identifiable information (PII) and ensures sensitive information is anonymised. After successfully running a profile scan on a data source, a draft mask configuration file is automatically created for review prior to execution.
Mask Configurations
The tables and columns selected for masking and how they should be masked is configured in a Mask Configuration.
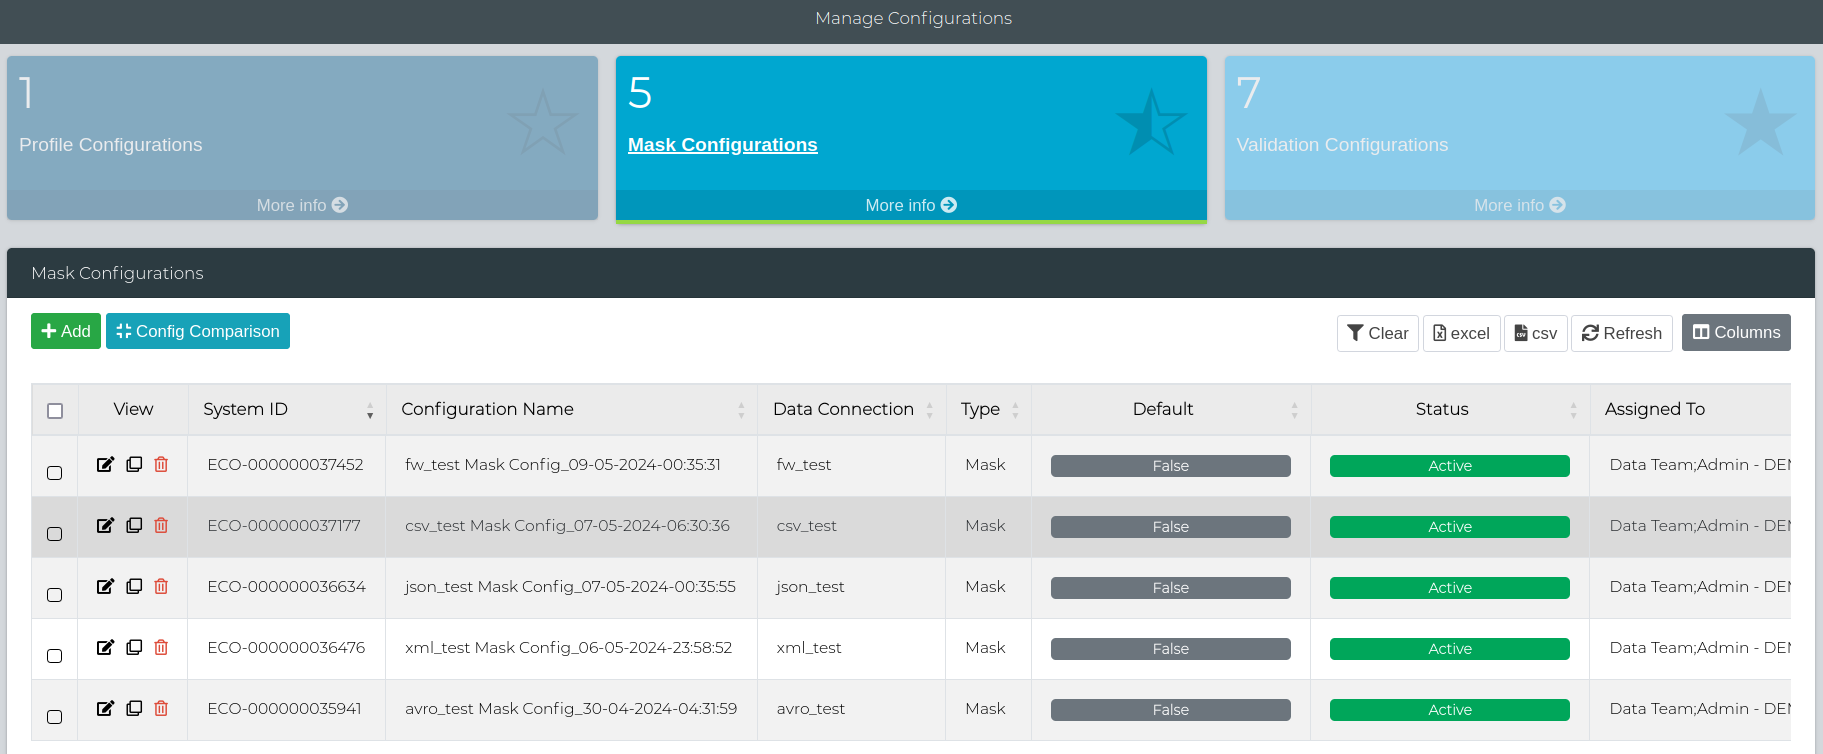
Navigate to Data Management Hub > Manage Configurations > Mask Configurations. Here you can Add, Edit, Clone or Delete a Masking Configuration.
Editing a Mask Configuration
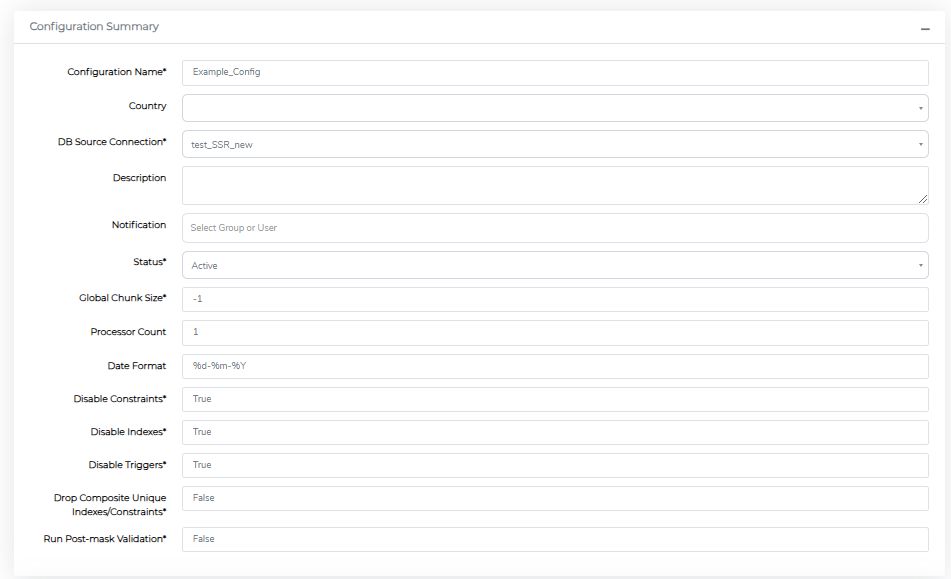
When a profiling job completes, it automatically creates a draft Mask Configuration. You can edit it by clicking the Edit Mask Configuration button. This opens the form shown below.
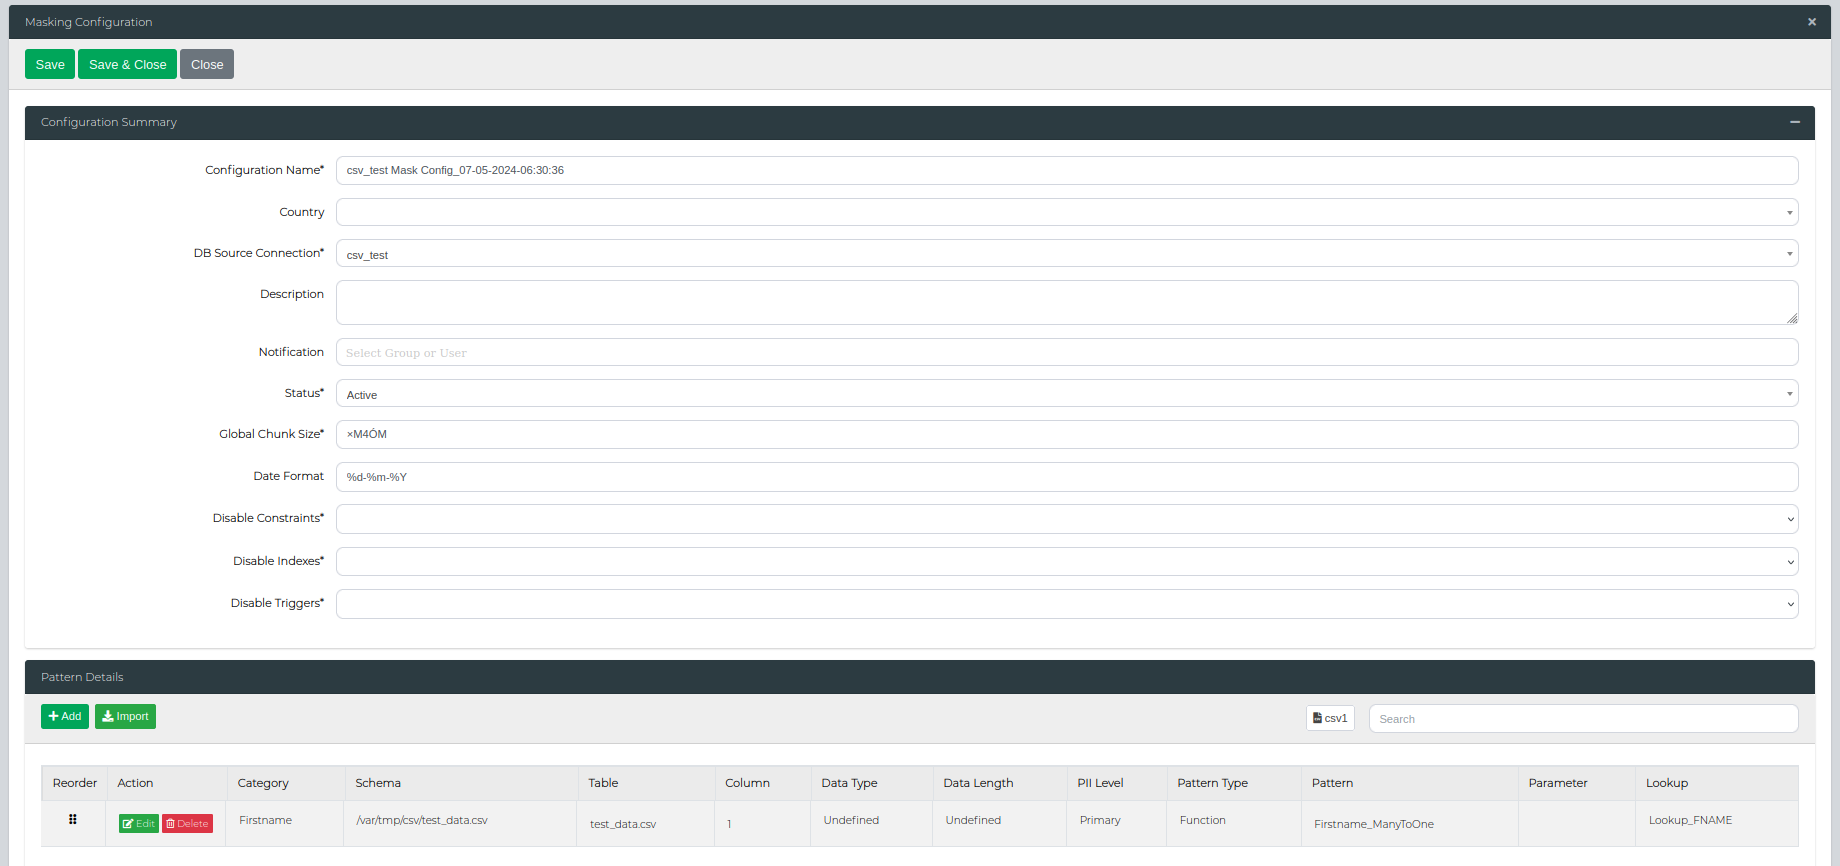
The main configuration options available on this form include:
| Setting | Description |
|---|---|
| Configuration Name | Give your masking configuration a clear, descriptive name to help identify it later. |
| DB Source Connection | Select the database connection this configuration will apply to. |
| Description | Add an optional description providing more context about this configuration's purpose. |
| Country | Optionally specify a country or language if this configuration uses region-specific data patterns. |
| Notification | Choose which users should receive notifications when this configuration runs. |
| Status | Set to Active to make this configuration available for execution, or Draft/Inactive to hide it from the execution screen. |
| Global Chunk Size | Control how many records are processed at once. Larger chunks speed up processing but use more memory. |
| Date Format | Set the date format for masked date fields using Python datetime formatting (e.g., %d/%m/%Y). This determines how dates will be stored in your database after masking. |
| Disable Constraints | Temporarily turn off foreign key and other database constraints during masking to prevent errors. |
| Disable Indexes | Temporarily turn off database indexes during masking for better performance. They're restored automatically afterward. |
| Disable Triggers | Prevent database triggers from running during masking to avoid unintended side effects. |
| Drop Composite Unique Indexes/Constraints | Remove multi-column unique indexes and constraints before masking. Available for MSSQL and Oracle only. |
| Processor Count | Set how many CPU cores to use for generating masked values. Higher values speed up masking but increase server load. Note: This accelerates individual value generation, not parallel column processing. |
Column-Specific Settings
Use this section to configure how individual columns are masked, including setting patterns, overrides, and conditional logic.
| Setting | Description |
|---|---|
| Category | Choose the masking category to filter available patterns in the dropdown list. |
| Table Name | The database table containing the column to be masked. |
| Column Name | The specific column within the table that will be masked. |
| PII Level | Classify the sensitivity level: Primary PII, Secondary PII, or Other. |
| Pattern | Select the masking function to apply from your Data Library Administration settings. |
| Active | Toggle whether this column should be masked. Set to True to include it, False to skip it. |
| Parameter | Provide custom parameters to modify how the selected masking pattern behaves. |
| Lookup | Choose a lookup file to customize the replacement values used by the masking pattern. |
| Column Disable Constraints | Override the global constraint setting for this specific column. |
| Column Disable Indexes | Override the global index setting for this specific column. |
| Column Disable Triggers | Override the global trigger setting for this specific column. |
| Column Chunk Size | Set a custom chunk size for this column, overriding the global setting. |
| Flag Column | Specify a column to evaluate for conditional masking logic. |
| Flag Condition | Choose the comparison operator: equals (=) or not equals (!=). |
| Flag String | Define the value to compare against in the flag column. Supports pattern matching with % wildcards. |
| Flag Table Name | Select an external table to join for cross-table conditional masking. |
| Join Column 1 | Specify the column in the source table for joining with the flag table. |
| Join Column 2 | Specify the column in the flag table for joining with the source table. |
| Date Format | Set a custom date format for this column, overriding the global date format setting. |
| Fixed Value | Enter a static value to replace all data in this column instead of using a masking pattern. |
When you're finished editing, click Save to apply your changes or Close to cancel without saving.
Make sure to set the Status to Active before trying to use this configuration in the Execute Masking screen.
Conditional Masking
Conditional masking allows you to apply advanced logic to control when and how data gets masked. You can set up conditions based on values in other columns, use fixed replacement values, optimize performance with chunking, and handle cross-table relationships.
Access these features by clicking Edit on any pattern in the Pattern Details section of your Masking Configuration.

Fixed Value Replacement
Replace all values in a column with a single, static value instead of using a masking pattern.
When to use: This is useful for columns where you want consistent test data, such as setting all phone numbers to "555-0123" or all departments to "Test Dept."
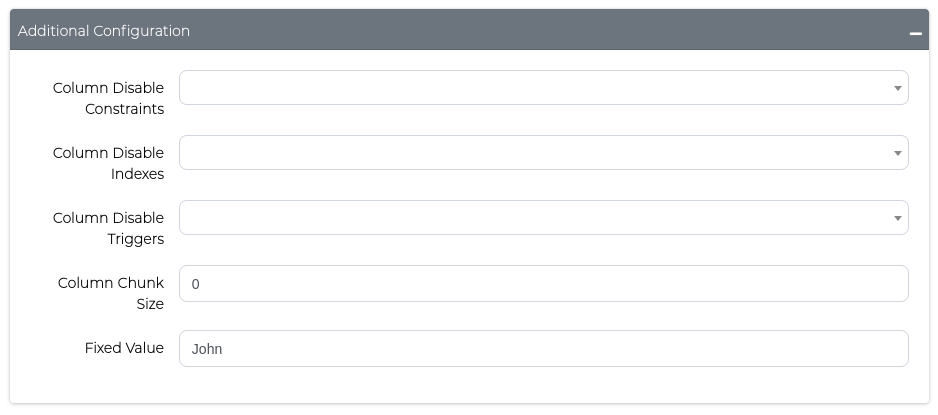
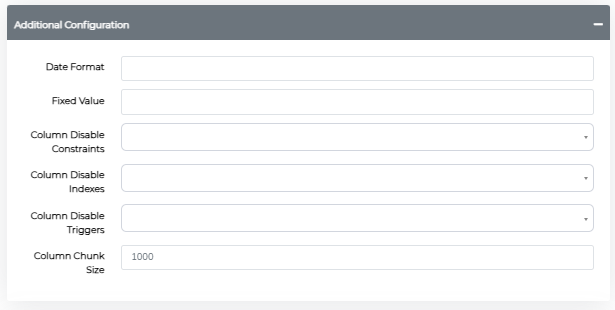
How to configure: Use the Fixed Value field in the Additional Configuration form and enter your replacement value (e.g., "John").
Flag Conditions
Set up conditional logic to mask data only when specific criteria are met. You can choose to mask data that either matches or doesn't match your specified conditions.
Basic setup: Define three components:
- Flag Column: The column to evaluate
- Flag Condition: Choose equals (
=) or not equals (!=) - Flag String: The value to compare against
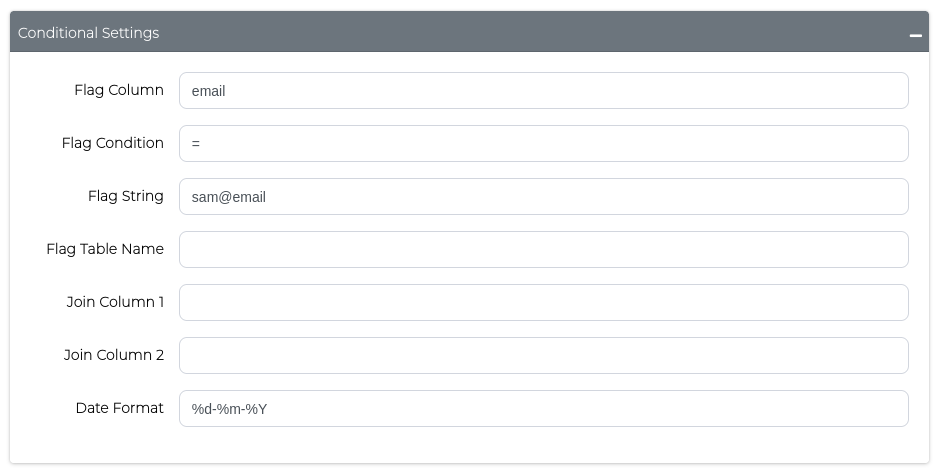
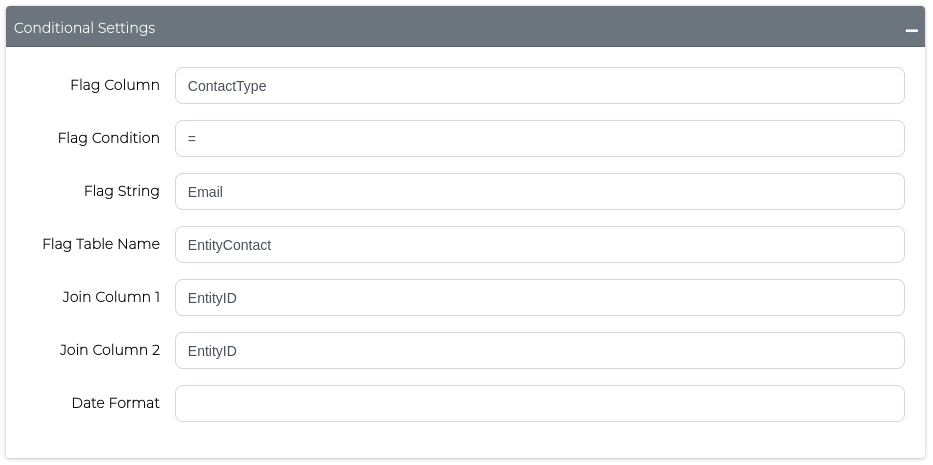
Configure these settings using the Conditional Settings form:
Pattern Matching with Wildcards
Use the % character in your flag string to create flexible pattern matching, similar to SQL LIKE expressions.
Example: email != %domain%
- Flag Column:
email - Flag Condition:
!=(not equals) - Flag String:
%domain%
This will mask email addresses only when they don't contain the word "domain" anywhere in the value.
Common patterns:
%text%- Matches any value containing "text" anywhere%son- Matches values ending with "son" (e.g., "Johnson", "Anderson")Sam%- Matches values starting with "Sam" (e.g., "Samantha", "Samuel")A%B%C- Matches values starting with "A", containing "B", and ending with "C"
Performance Optimization with Chunking
Control how much data is processed at once to optimize performance when masking large datasets.
Default behavior: Columns with over 1 million rows are automatically chunked.
Global chunking: Set the Global Chunk Size in the main configuration to apply to all columns:
Column-specific chunking: Override the global setting for individual columns using Column Chunk Size:
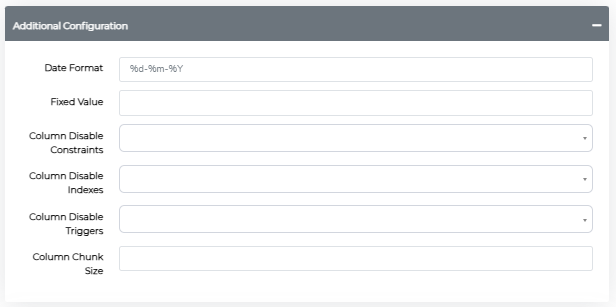
Date Format Control
Specify how dates should be formatted after masking using Python datetime formatting. This determines the final format stored in your database.
Default format: %d-%m-%Y (day-month-year)
Python datetime format codes:
| Code | Description | Example |
|---|---|---|
%d | Day of month (01-31) | 11 |
%m | Month as number (01-12) | 01 |
%Y | Full year | 2025 |
%y | Year without century | 25 |
%B | Full month name | January |
%b | Short month name | Jan |
%A | Full weekday name | Monday |
%a | Short weekday name | Mon |
%H | Hour (00-23) | 09 |
%I | Hour (01-12) | 9 |
%M | Minute (00-59) | 30 |
%S | Second (00-59) | 45 |
%p | AM/PM | AM |
Common formats:
%d/%m/%Y→ 11/01/2025%Y-%m-%d→ 2025-01-11%B %d, %Y→ January 11, 2025
Cross-Table Masking
Apply masking logic based on relationships between multiple tables. This ensures data consistency when masking related records across different tables.
Use case: You might want to mask customer names only when their account status in another table indicates they're inactive.
How to configure: Use the Conditional Settings form to specify:
- Flag Table Name: The external table to join
- Join Column 1: Column in your source table
- Join Column 2: Column in the flag table
- Flag conditions: Define your masking criteria
Adding a Mask Configuration
On the Mask Configurations screen, click the Add Mask Configuration button. This will present a new Profile Configuration form
Once complete, scroll to the bottom of the main window and click Save to Save the configuration or Close to Cancel out without saving. For TDM3.5, the save/close buttons are at the top of the config window.
Cloning a Mask Configuration
On the Mask Configurations screen, click the Clone button on the Mask Configuration you want to duplicate. This will present the Mask Configuration form with a duplication of all data for saving as a new Mask Configuration.
Once complete, scroll to the bottom of the main window and click Save to Save the configuration or Close to Cancel out without saving. For TDM3.5, the save/close buttons are at the top of the config window.
Deleting a Mask Configuration
On the Mask Configurations screen, click the Delete button on the Mask Configuration you want to remove. This will present a confirmation window confirming that you want to delete the Mask Configuration or not.
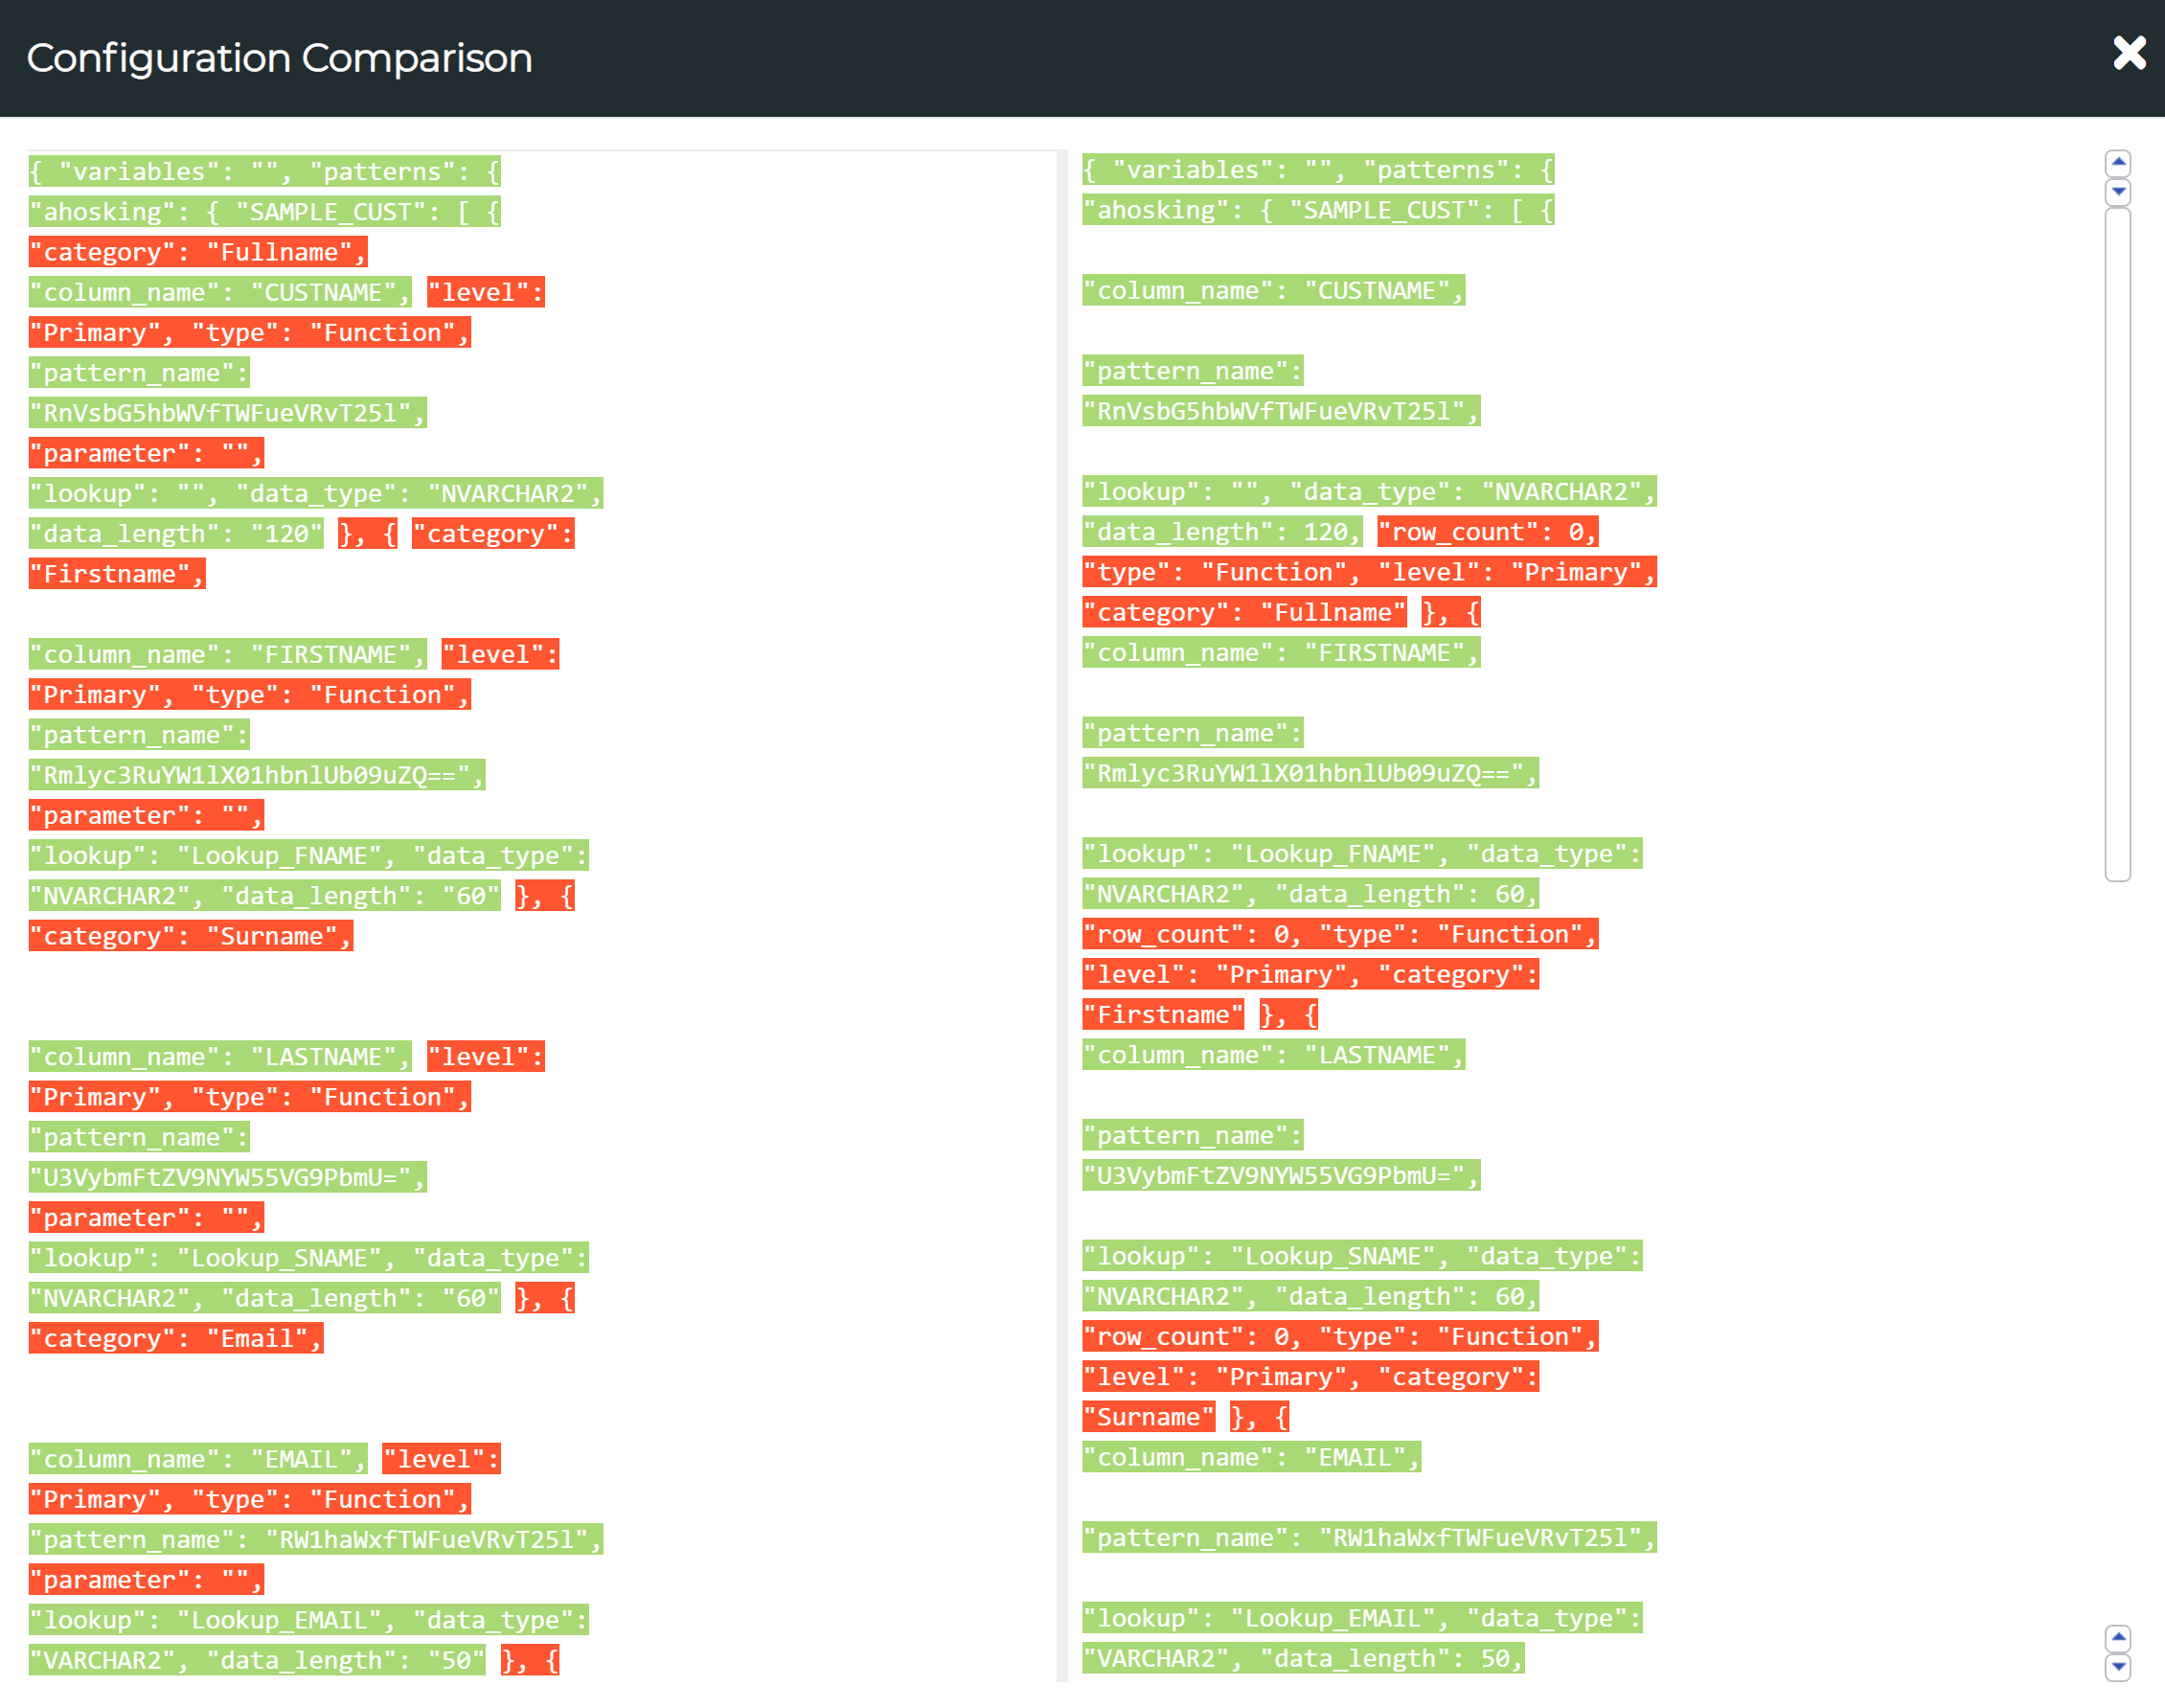
Comparing Mask Configurations
Tick on the check boxes in front of the two configurations which you want to compare and then press the Config Comparison button to view the comparison report. The text highlighted in red marks the differences in the two configurations.
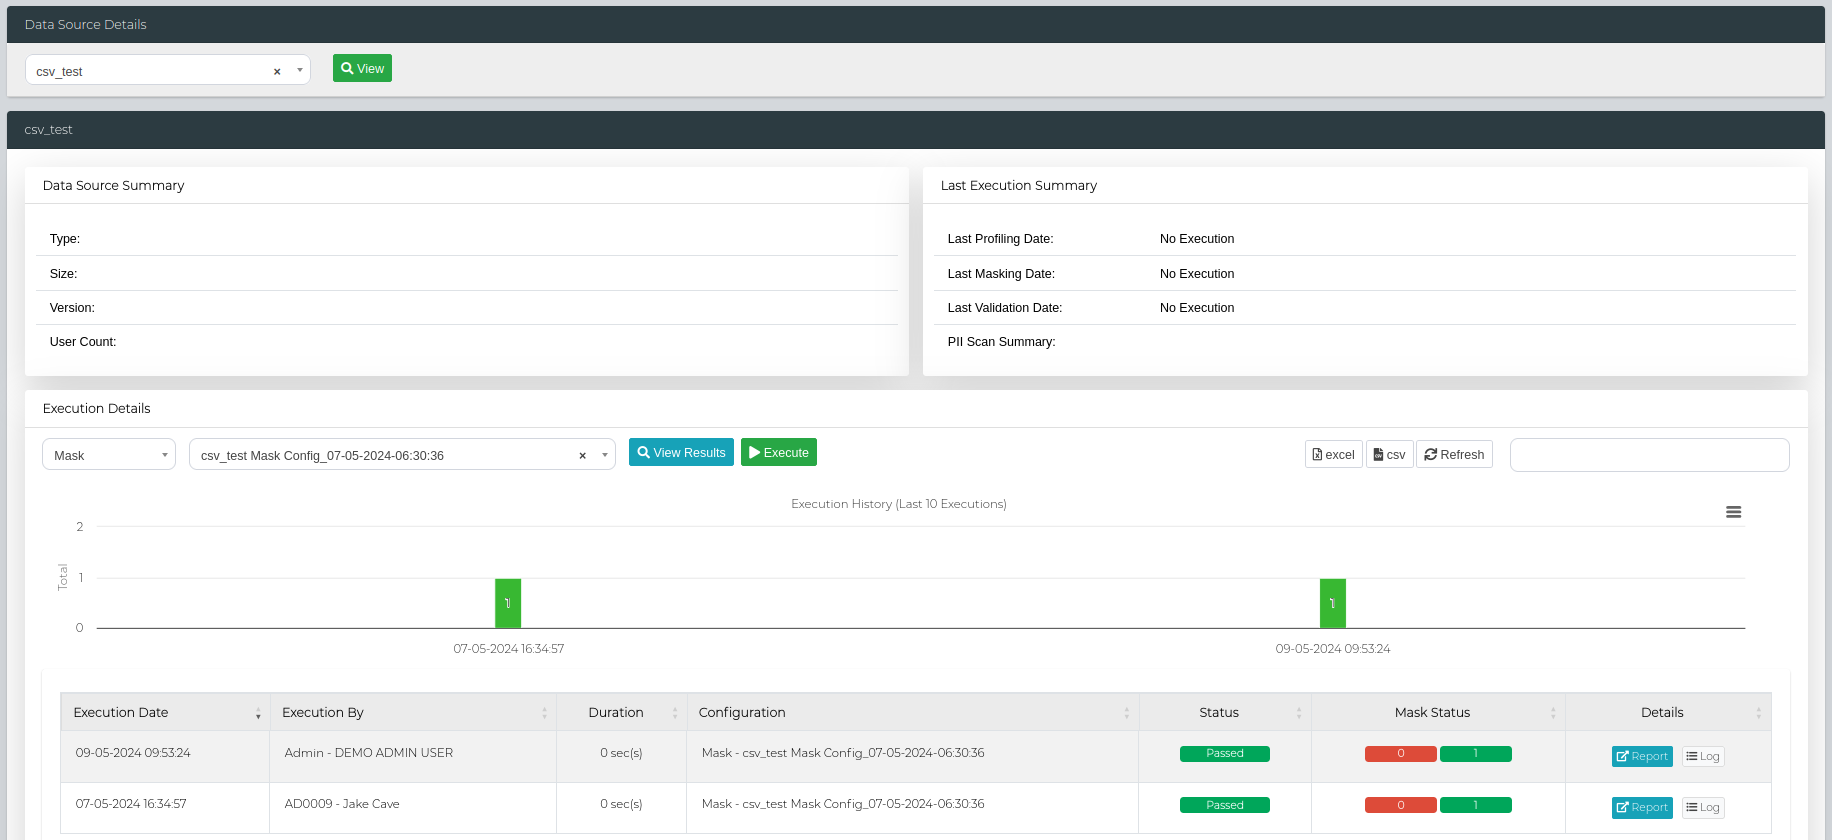
Execute Masking - Single Data Source
To execute a new masking request, navigate to Data Management Hub > Execution Console.
Here, you can select your data source then press View. Scroll down to the Execution Details section, select Mask in the first dropdown menu, and your chosen mask configuration in the second dropdown menu. The Execute button can be used to then run a mask job or View Results to simply view the results from the previously ran masking jobs.
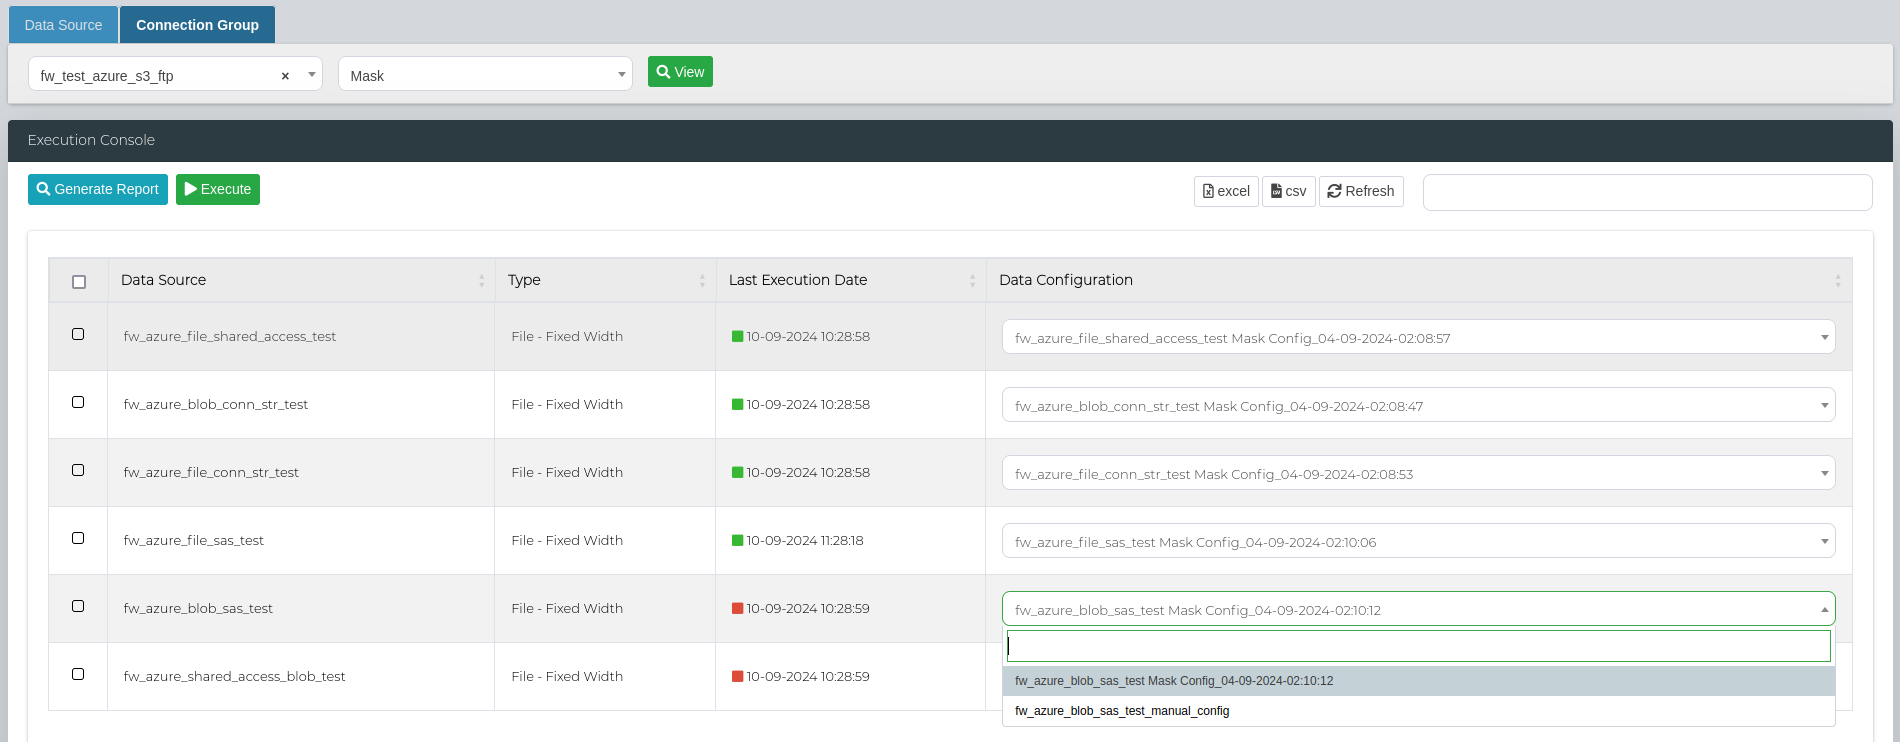
Execute Masking - Connection Groups
In order to run a mask scan on a connection group, firstly ensure TDM Queue Manager is turned on. Then, navigate to Data Management Hub > Execution Console > Connection Group.
Here, select your Connection Group from the first dropdown menu, then select Mask for your scan type. After selecting all the fields, click on View.

You can then select the mask configurations from the Data Configuration column for the specific Data Sources.
In order to run a bulk mask scan, select all the data sources that you want to execute the scan on and click on Execute.
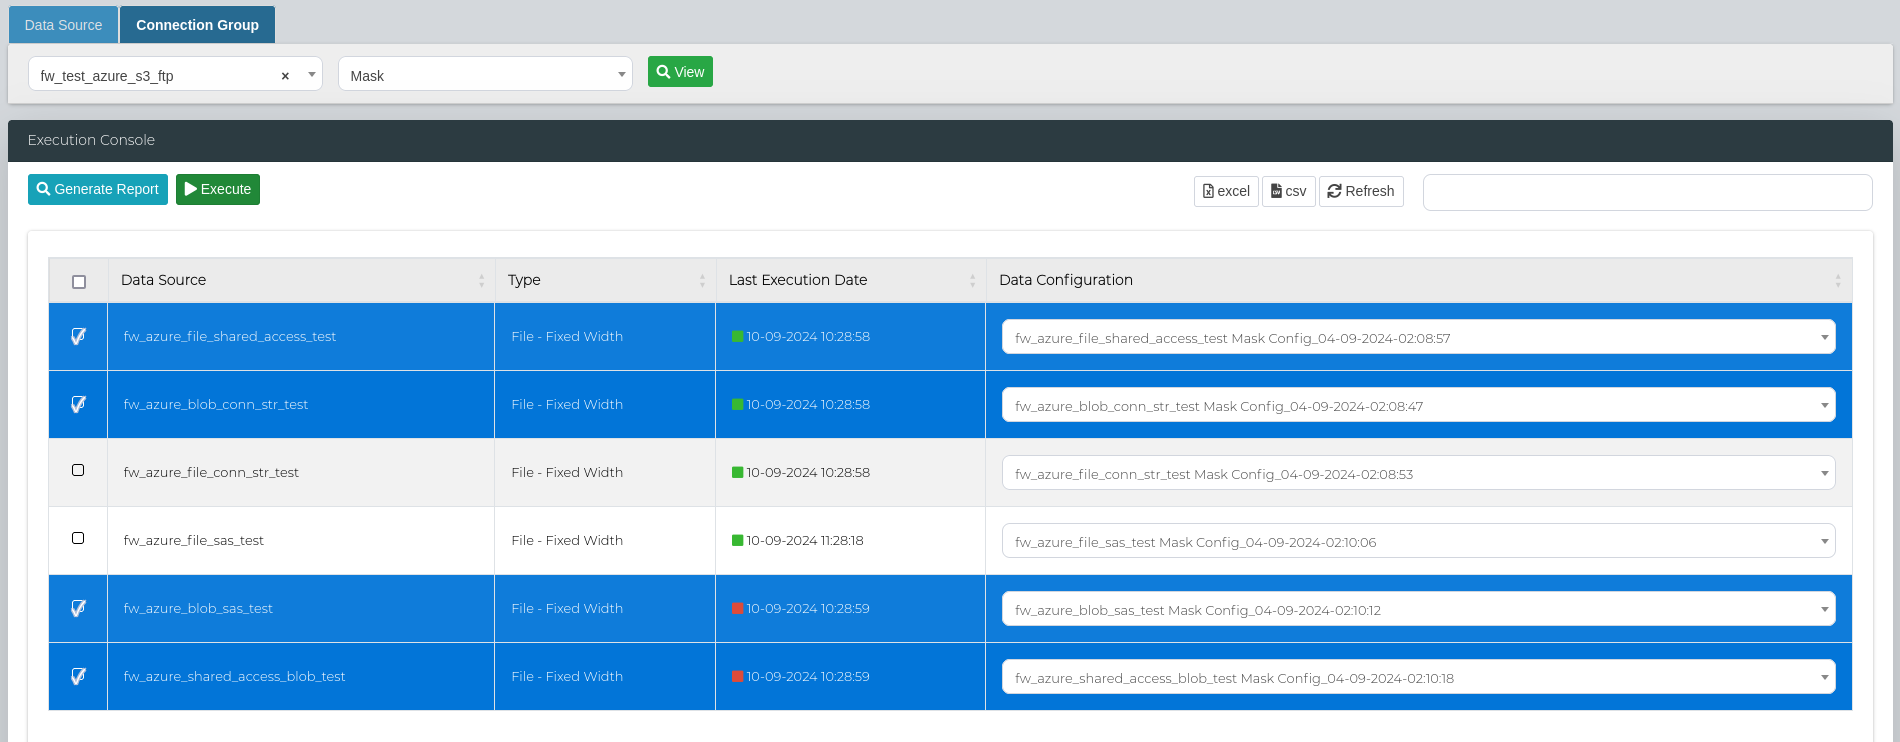
Then, scroll to the bottom of the page to the Execution Details section to look at the scan status, and access the logs and reports.
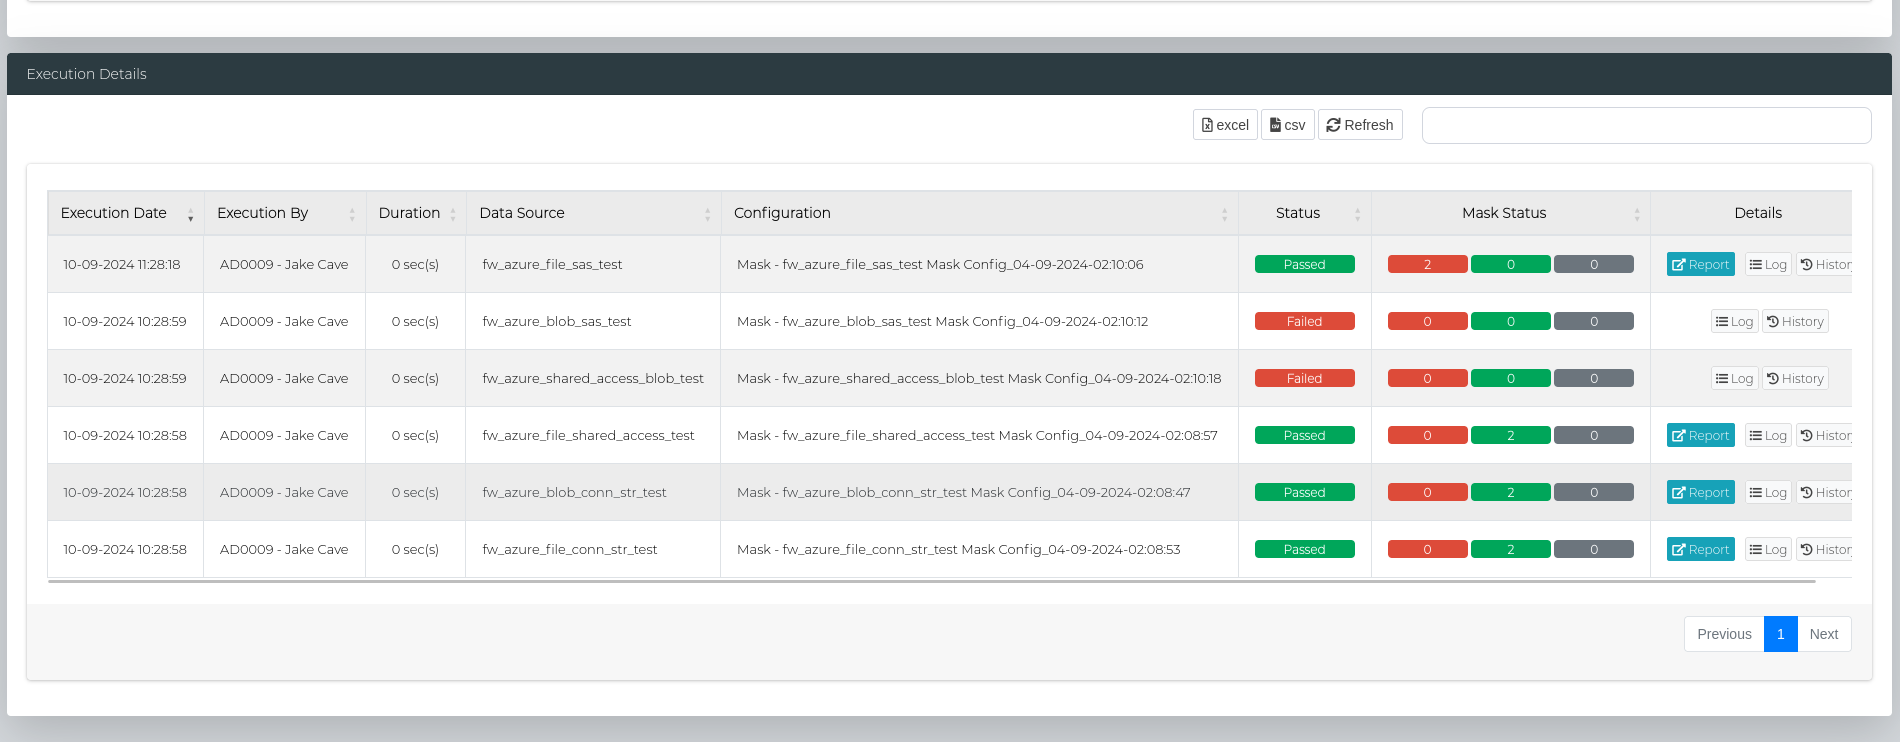
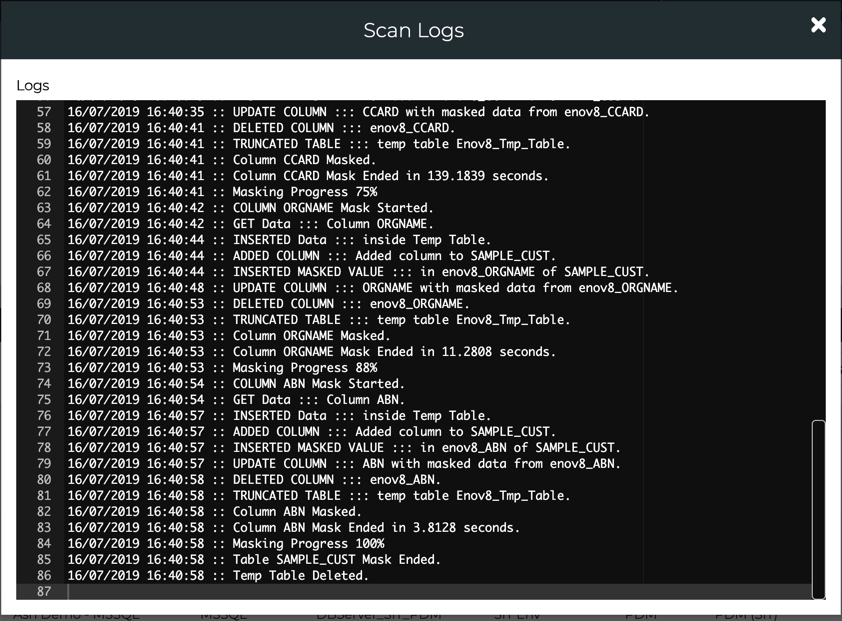
Masking Log
In the table below, Log Button can be used to view logs for the execution.
Note: The Log window refreshes every 15 seconds if the mask is currently executing.
A currently executing Mask can also be Cancelled by clicking the Cancel button.
Masking Report - Single Data Source
Successfully completed masks will generate a Mask Report which can be viewed by clicking the Report button.
This can also be searched on or exported out to Excel or CSV.

Masking Report Table
| Type | Description |
|---|---|
| Connection Name | The name of the data connection. |
| Schema | The schema under which the table resides. |
| Table Name | The name of the table containing the data. |
| Column | The specific column within the table. |
| Data Type | The type of data stored in the column (e.g., string, integer, date). |
| Data Length | The maximum length of the data in the column. |
| Masking Pattern Used | The pattern applied to mask the data in the column. |
| Masking Lookup Used | Lookup table or source used during the masking process. |
| Masking Parameters Used | Parameters applied during the masking process. TDM 3.4 or earlier |
| Flag Column | The column used to indicate a specific condition. |
| Flag Condition | Condition that determines when the flag is applied. |
| Flag String | The string value that represents the flag. |
| Masking Status | The current status of the masking operation (e.g., completed, in progress). |
| Scan Duration (Seconds) | The duration taken to complete the scan, measured in seconds. |
| Error Details | Details of any errors encountered for that specific column. |
Masking Report - Connection Groups
For grouped connections, each data source in the group will generate a Mask Report if successful, which can be viewed by clicking the Report button.
In order export the reports in bulk, navigate to the Execution Console section in the Connection Group tab, and select the data sources to include in the bulk report.
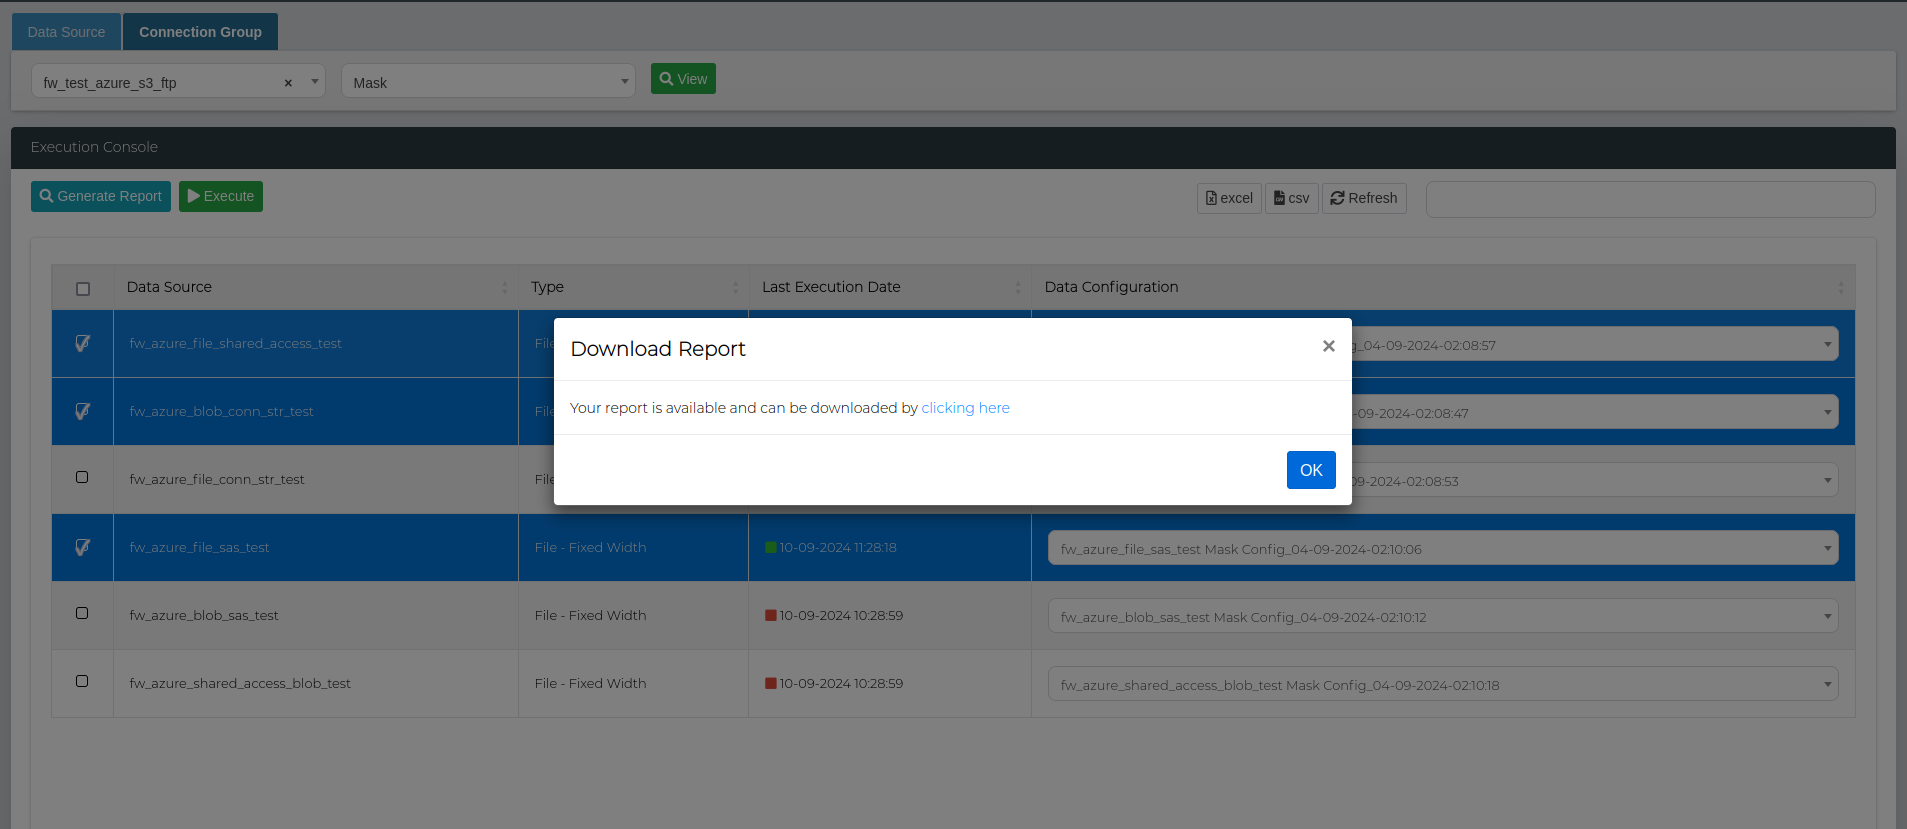
Click on the Generate Report button, then download the report by clicking on the popup window.
Important: Databases and files have different report structures, therefore their reports cannot be generated together in bulk. When selecting the data sources to include in the bulk report, make sure that files and database connections are not selected together.
Feature Support Table
The table below outlines the masking features supported by various data source connection types:
| Connection Type | Conditional Masking | Cross Table Masking | Chunking |
|---|---|---|---|
| Amazon Redshift | ✅ | ✅ | ✅ |
| CouchDB | ❌ | ❌ | ❌ |
| DB2 | ✅ | ❌ | ✅ |
| MariaDB | ✅ | ✅ | ✅ |
| MongoDB | ❌ | ❌ | ❌ |
| MSSQL | ✅ | ✅ | ✅ |
| MySQL | ✅ | ✅ | ✅ |
| Oracle | ✅ | ✅ | ✅ |
| PostgreSQL | ✅ | ✅ | ✅ |
| Sybase | ✅ | ❌ | ❌ |
| Teradata | ✅ | ❌ | ✅ |
| File - AVRO | ✅ | N/A | ❌ |
| File - Delimited | ✅ | N/A | ✅ |
| File - Fixed Width | ✅ | N/A | ❌ |
| File - JSON | ✅ | N/A | ❌ |
| File - ORC | ✅ | N/A | ❌ |
| File - Parquet | ✅ | N/A | ❌ |
| File - XML | ✅ | N/A | ❌ |
Note: Normal masking is supported across ALL data source connection types.